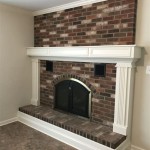
Tiling a Fireplace: A Comprehensive Guide
Transforming a fireplace from a simple functional element to a stunning focal point can be achieved through tiling. Tiling a fireplace offers a range of aesthetic possibilities, adding color, texture, and visual interest to your living space. This comprehensive guide will provide you with the necessary steps and information to successfully tile your fireplace.
1. Planning and Preparation
Before embarking on the tiling project, meticulous planning and preparation are crucial. This includes understanding the existing structure, selecting appropriate materials, and gathering the required tools.
Understanding the Existing Structure
Start by carefully assessing the current state of your fireplace. Identify the material of the existing surface, whether it's brick, stone, or plaster. Determine if the surface is stable and level or requires any repair or reinforcement before tiling. If the surface is uneven, consider using a leveling compound to create a smooth base for the tiles.
Selecting Appropriate Materials
The choice of tiles is paramount in determining the final aesthetic of your fireplace. Consider the style of your home, your personal preferences, and the practicality of the tiles. Heat-resistant tiles are essential for fireplace applications, as they are designed to withstand high temperatures without cracking or warping. Ceramic, porcelain, and stone tiles are popular choices for their durability and aesthetic versatility.
Gathering the Required Tools
Ensure you have the necessary tools for a smooth and successful tiling process. These include a tile cutter or wet saw for precise cuts, a trowel for spreading adhesive, a level for ensuring straight lines, a grout float for applying grout, and a sponge for cleaning. You may also need safety gear like gloves and eye protection.
2. Tiling the Fireplace
Once the planning and preparation are complete, you can begin tiling the fireplace. This involves applying adhesive, setting the tiles, and allowing them to cure properly.
Applying Adhesive
Apply a layer of tile adhesive to the fireplace surface using a notched trowel. The notches help create an even layer of adhesive that provides good bonding between the tiles and the substrate. Follow the manufacturer's instructions for the specific adhesive you are using.
Setting the Tiles
Carefully place the tiles onto the adhesive, ensuring they are level and aligned. Use spacers to maintain consistent grout lines. Start from the bottom and work your way up, ensuring each tile is properly adhered and flush with the surrounding tiles.
Allowing the Tiles to Cure
After setting the tiles, allow sufficient time for the adhesive to cure. This curing time varies based on the specific adhesive product. Refer to the manufacturer's recommendations for the precise curing time.
3. Grouting and Finishing
Once the tiles are cured, you can proceed with grouting and finishing touches to complete the fireplace tiling project.
Grouting
After the adhesive has cured, apply grout to the spaces between the tiles. Use a grout float to spread the grout evenly and fill all the gaps. Wipe away excess grout using a damp sponge to ensure clean lines and a polished finish.
Finishing Touches
Once the grout has cured, you can apply sealant to protect the tiles and grout from stains. This is especially important for fireplace applications, as the tiles may be exposed to soot and other contaminants. Consider adding decorative accents, such as a tile border or trim, to enhance the overall aesthetic appeal of the fireplace.
Tiling a fireplace requires patience and precision. By following these steps and paying attention to detail, you can transform your fireplace into a stunning focal point for your living space.
/102661017-6a23c040b71843379188b96b21ac1a08.jpg?strip=all)
How To Tile A Fireplace

How To Tile A Fireplace My Uncommon Slice Of Suburbia

Diy Projects Tiling A Fireplace Like Pro Rubi Blog Usa

Hot Fireplace Tile Trends Bedrosians Stone

How To Tile A Fireplace Even If It S Brick The Handyman Daughter

Diy Tiling A Fireplace Surround What We Learned Along The Way
Heat Resistant Tiles Can You Use Around A Wood Burner British Ceramic Tile

Diy Projects Tiling A Fireplace Like Pro Rubi Blog Usa

Corner Lot Modern Farmhouse Rustic Fireplace Tile Remodel

Remodeling A Fireplace With Tile
Related Posts

