Thin Brick For Fireplace Surround: A Comprehensive Guide
Thin brick, a lighter and more versatile alternative to full-sized brick, has become an increasingly popular choice for fireplace surrounds. Its aesthetic appeal, ease of installation, and cost-effectiveness make it a compelling option for homeowners seeking to enhance the look of their fireplaces. This article provides a comprehensive overview of using thin brick for fireplace surrounds, covering its advantages, installation process, design considerations, and maintenance.
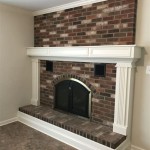
A fireplace is often the focal point of a living room or family room. The surround, which encompasses the area around the firebox, plays a significant role in defining the fireplace's overall style and ambiance. Traditionally, fireplace surrounds have been constructed from materials like stone, tile, or wood. However, thin brick offers a unique combination of classic brick aesthetics with modern installation benefits.
Thin brick is essentially a veneer made from real clay brick that has been sliced to a reduced thickness, typically ranging from 1/4 to 3/4 of an inch. This thinner profile significantly reduces the weight compared to full-sized bricks, making it suitable for applications where structural support is limited. It also simplifies installation, as it requires less specialized tools and expertise.
Advantages of Using Thin Brick for Fireplace Surrounds
The popularity of thin brick stems from several key advantages it offers over traditional materials. These benefits contribute to its widespread use in both new construction and renovation projects.
Aesthetic Appeal and Versatility: Thin brick provides the timeless look and feel of real brick. It is available in a wide range of colors, textures, and finishes, allowing homeowners to achieve various design styles, from rustic and traditional to modern and industrial. The variety ensures that thin brick can seamlessly integrate with any existing décor.
Cost-Effectiveness: Compared to installing full-sized brick, thin brick is generally more cost-effective. The reduced weight translates to lower transportation costs, and the simplified installation process can save on labor expenses. While the material cost of thin brick itself might be comparable to other veneer options, the overall project cost often favors thin brick, especially for DIY enthusiasts.
Ease of Installation: Thin brick is significantly easier to install than full-sized brick. Because of its light weight, it does not require a structural foundation. It can be adhered directly to a variety of surfaces, including concrete, drywall, and wood, using appropriate adhesives. This simplified installation opens up the possibility for homeowners to undertake the project themselves, further reducing costs.
Space Saving: In smaller rooms, the reduced thickness of thin brick can be a crucial advantage. It takes up less space than full-sized brick, allowing for a sleeker and less intrusive fireplace surround. This is particularly beneficial in urban apartments and homes where space is at a premium.
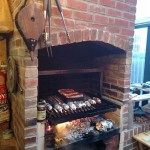
Durability and Fire Resistance: Thin brick is made from real clay, making it inherently durable and fire-resistant. It provides a protective layer around the fireplace, helping to contain heat and prevent damage to the surrounding wall. While not a substitute for proper fireproofing, thin brick adds an extra layer of security.
Installation Process: A Step-by-Step Guide
The installation of thin brick for a fireplace surround is a relatively straightforward process, but proper planning and execution are essential for achieving a professional and long-lasting result. The following steps outline the general installation procedure:
Preparation: The first step involves preparing the surface to which the thin brick will be adhered. This typically involves cleaning the surface thoroughly to remove any dust, dirt, or grease. If the surface is uneven, it may be necessary to apply a leveling compound to create a smooth and uniform base. For surfaces like drywall, it is recommended to apply a layer of cement board to provide a more stable and moisture-resistant substrate. Cement board is specifically designed to withstand the rigors of tile and brick installations.
Layout and Planning: Before applying any adhesive, it is crucial to plan the layout of the thin brick. This involves measuring the fireplace surround and determining the number of bricks needed to cover the area. Consider the desired pattern and any design elements, such as corners or borders. Dry-laying the bricks allows you to visualize the final result and make any necessary adjustments before permanently adhering them. This step also helps to minimize waste by allowing you to identify and cut any bricks that need to be trimmed.
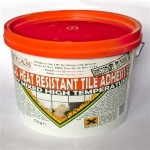
Adhesive Application: Select an appropriate adhesive specifically designed for thin brick or stone veneer. A modified thin-set mortar is generally recommended. Follow the manufacturer's instructions for mixing and applying the adhesive. Apply the adhesive to the back of each brick using a notched trowel, ensuring even coverage. The notched trowel helps to create ridges in the adhesive, providing better adhesion and preventing air pockets.
Brick Placement: Carefully place each brick onto the prepared surface, pressing firmly to ensure good contact with the adhesive. Use spacers to maintain consistent grout lines between the bricks. The size of the spacers will depend on the desired width of the grout lines. Regularly check the alignment of the bricks using a level to ensure that they are straight and plumb. If any bricks are misaligned, gently adjust them before the adhesive sets.
Cutting and Trimming: Inevitably, some bricks will need to be cut or trimmed to fit around corners, edges, or openings. Use a wet saw or a brick chisel and hammer to make these cuts. A wet saw provides clean and precise cuts, while a chisel and hammer are suitable for smaller adjustments. Always wear safety glasses when cutting or trimming bricks to protect your eyes from debris.
Grouting: Once the adhesive has fully cured, typically after 24-48 hours, it is time to grout the joints between the bricks. Select a grout color that complements the thin brick and the overall design. Follow the manufacturer's instructions for mixing and applying the grout. Use a grout float to force the grout into the joints, ensuring that they are completely filled. Remove any excess grout from the surface of the bricks using a damp sponge. Take care to avoid removing grout from the joints.
Cleaning and Sealing: After the grout has cured, typically after 24-72 hours, clean the surface of the thin brick to remove any remaining grout haze. Use a mild detergent and a soft brush to scrub the surface gently. Rinse thoroughly with water. Once the surface is completely dry, consider applying a sealant to protect the thin brick and grout from moisture and stains. Select a sealant specifically designed for brick or stone veneer.
Design Considerations for Thin Brick Fireplace Surrounds
Beyond the technical aspects of installation, careful consideration of design elements is crucial for creating a visually appealing and aesthetically pleasing fireplace surround. These design choices will greatly impact the overall look and feel of the room.
Color and Texture: The color and texture of the thin brick are fundamental design considerations. Choose a color that complements the existing décor of the room and creates the desired ambiance. Lighter colors can brighten up a room and create a more spacious feel, while darker colors can add warmth and sophistication. The texture of the brick can also significantly impact the overall look. Smooth bricks create a more modern and polished appearance, while textured bricks add a rustic and characterful touch.
Pattern and Layout: The pattern in which the thin brick is laid can dramatically alter the appearance of the fireplace surround. Common patterns include running bond, stacked bond, and herringbone. Running bond is a classic and versatile pattern that creates a staggered effect. Stacked bond is a more modern pattern that aligns the bricks directly on top of each other. Herringbone is a more intricate and decorative pattern that adds visual interest.
Grout Color and Width: The color and width of the grout lines can also impact the overall design. A contrasting grout color can accentuate the individual bricks and create a more defined look, while a matching grout color can create a more seamless and unified appearance. Wider grout lines add a rustic and traditional feel, while narrower grout lines create a more modern and streamlined look.
Mantel and Hearth: The mantel and hearth are important components of the fireplace surround that should be carefully considered. The mantel provides a shelf for displaying decorative items, while the hearth provides a protective surface in front of the fireplace. Choose a mantel and hearth that complement the thin brick and the overall design of the room. Materials like wood, stone, or concrete can be used for the mantel and hearth.
Overall Style: Consider the overall style of the room and choose a thin brick design that complements it. A rustic design might incorporate textured bricks and a wood mantel, while a modern design might feature smooth bricks and a minimalist mantel. Ensure that the fireplace surround integrates seamlessly with the existing décor and enhances the overall aesthetic of the room.
By carefully considering these design elements, homeowners can create a stunning and personalized fireplace surround using thin brick.

Thin Brick Wood Stove Surround Looks Great Feels Toasty
.png?strip=all "Blog Contact Cherokee Brick")
Blog Contact Cherokee Brick

Grey Is The New Red In Thin Brick Veneer Stone Farm

Thin Brick S From Pine Hall Are True Only Thinner

Crisp Brick Takes Fireplace From Dull To Dazzling Heat Glo

How To Diy A Fireplace Surround Using Thin Bricks The Sommer Home
.png?strip=all "Blog Contact Cherokee Brick")
Blog Contact Cherokee Brick

Walls Ceilings And Fireplaces Inglenook Brick Tiles Pavers Thin Tile Floor

Handmade Thin Brick Galleries

Think Thin Brick South Alabama Company