Spray Paint Fireplace: A Comprehensive Guide to Transformation
Fireplaces, often serving as central focal points in homes, can become visually outdated or aesthetically unappealing over time. Rather than undertaking costly and disruptive renovations, spray paint offers a viable and relatively inexpensive method to revitalize a fireplace's appearance. This article will provide a comprehensive guide to successfully spray painting a fireplace, covering essential preparation steps, product selection, application techniques, and safety considerations.
Before even considering color selection, a thorough assessment of the existing fireplace material is crucial. Common fireplace materials include brick, stone, concrete, and metal. Each material requires specific preparation techniques and may necessitate the use of specialized primers and paints. Identifying the material prevents improper product application and ensures optimal adhesion and longevity of the finish.
Safety is paramount. Proper ventilation is essential when working with spray paint, as the fumes can be harmful. Working outdoors or in a well-ventilated area with open windows and fans minimizes the risk of inhalation. Wearing a respirator mask specifically designed for paint fumes, along with protective eyewear and gloves, further reduces exposure to hazardous materials. It is also essential to protect surrounding surfaces, such as flooring and walls, with drop cloths and masking tape to prevent overspray.
Surface Preparation: The Foundation for a Flawless Finish
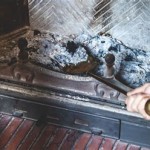
The success of any paint project relies heavily on proper surface preparation. For fireplaces, this involves a multi-step process designed to remove contaminants and create a suitable surface for paint adhesion. The first step is thorough cleaning. Use a stiff-bristled brush and a solution of trisodium phosphate (TSP) or a comparable degreaser to scrub away dirt, soot, grease, and other accumulated residue. Rinse the surface thoroughly with clean water and allow it to dry completely. Neglecting this step will result in poor paint adhesion and a compromised finish.
Once the fireplace is clean and dry, inspect it carefully for any loose or crumbling mortar, cracks, or other imperfections. Repair these flaws using appropriate patching compounds or mortar repair products. Allow the repairs to cure completely according to the manufacturer's instructions. Sand repaired areas smooth to create a uniform surface. This meticulous attention to detail will ensure a seamless and professional-looking paint job.
Sanding the entire surface of the fireplace is often necessary, particularly if the surface is glossy or has a previous coat of paint. Sanding creates a mechanical bond that allows the new paint to adhere properly. Use a medium-grit sandpaper (around 120-grit) for initial sanding, followed by a finer-grit sandpaper (around 220-grit) to smooth out any scratches. Wipe away sanding dust with a tack cloth before proceeding to the next step.
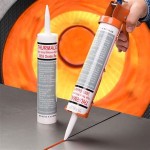
Applying a primer is crucial for achieving optimal paint adhesion, especially on porous surfaces like brick or stone. Select a primer specifically formulated for the type of material being painted. For example, use a masonry primer for brick and stone fireplaces and a metal primer for metal fireplace surrounds. Apply the primer in thin, even coats, following the manufacturer's instructions. Allow the primer to dry completely before applying the paint. Priming also helps to block stains and create a uniform base for the topcoat, ensuring consistent color and coverage.
Spray Paint Selection: Choosing the Right Product for the Job
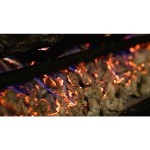
Choosing the appropriate spray paint is essential for achieving a durable and aesthetically pleasing finish. Numerous types of spray paint are available, each with its own unique properties and intended uses. For fireplaces, heat-resistant paint is often recommended, especially for areas near the firebox. This type of paint is formulated to withstand high temperatures without blistering, cracking, or discoloring. Always consult the paint manufacturer's specifications to ensure the product is suitable for the intended temperature range.
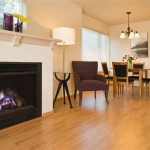
The type of material being painted also influences paint selection. Paints specifically designed for masonry or metal offer enhanced adhesion and durability on these surfaces. Consider using a paint that contains a built-in primer for added convenience. When selecting a paint color, consider the overall aesthetic of the room and choose a color that complements the existing décor. Sample different colors in a small, inconspicuous area before committing to an entire paint job. Both matte and gloss finishes are viable options, each impacting the aesthetic in different ways.
The type of spray nozzle can also affect the outcome of the paint job. Fan nozzles produce a wider spray pattern, which is suitable for covering large areas quickly. Cone nozzles produce a narrower spray pattern, which is better for detail work and tight spaces. Experiment with different nozzle types to determine which one provides the best results for the specific project.
Application Techniques: Achieving a Professional Finish
Mastering proper spray painting techniques is vital for achieving a smooth, even, and professional-looking finish. Shake the spray paint can vigorously for at least two minutes before starting. This ensures that the paint is properly mixed and prevents clogging of the spray nozzle. Hold the can approximately 8-10 inches from the surface being painted. Maintain a consistent distance throughout the application process to avoid drips and runs.
Apply the paint in thin, even coats, overlapping each pass slightly. Avoid applying too much paint in one coat, as this can lead to runs and sags. Allow each coat to dry completely before applying the next one, following the manufacturer's recommended dry time. Typically, two to three coats of paint are required for optimal coverage and durability.
When painting edges and corners, use a technique called "feathering" to blend the paint seamlessly into the surrounding areas. Feathering involves gradually reducing the amount of paint applied at the edges, creating a soft, diffused transition. This can be achieved by angling the spray can slightly and moving it quickly over the edges.
Clean the spray nozzle regularly with mineral spirits or a comparable solvent to prevent clogging. If the nozzle becomes clogged, remove it from the can and soak it in solvent. Replace the nozzle if it is damaged or cannot be unclogged. After finishing the paint job, invert the can and spray until only propellant comes out. This clears the nozzle and prevents it from clogging in the future.

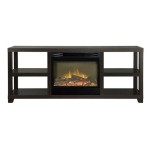
How To Spray Paint The Fireplace Surround My Homier Home

How To Spray Paint The Fireplace Surround My Homier Home

Spray Painted Fireplace Jj Painting Services

Fireplace Makeover Spray Paint Magic

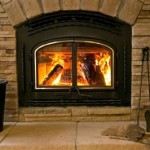
How To Spray Paint Fireplace Interior The Diy Playbook

Fireplace Door Update With Spray Paint Roots Wings Furniture Llc

Spray Painted Fireplace Jj Painting Services

Fireplace Makeover Spray Paint Magic

How To Spray Paint A Brass Fireplace Insert Erfly House

How To Spray Paint The Fireplace Surround My Homier Home
Related Posts