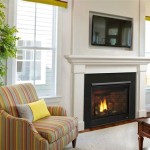
Resurfacing a Brick Fireplace with Tile: A Comprehensive Guide
A brick fireplace serves as a focal point in many homes, offering warmth and aesthetic appeal. However, over time, brick can become dated, stained, or simply no longer suit the evolving style of a living space. Resurfacing a brick fireplace with tile presents a practical and visually appealing solution to revitalize this architectural feature, offering a wide array of design options and enhancing the overall value of the property.
This article will explore the process of resurfacing a brick fireplace with tile, covering preparation, material selection, installation techniques, and essential considerations to ensure a successful and long-lasting transformation.
Key Point 1: Preparation is Paramount
The initial stage of resurfacing a brick fireplace with tile is thorough preparation. Proper preparation ensures the tile adheres correctly and the finished product has a professional appearance.
The first step is cleaning the brick surface. Years of soot, dust, and grime can accumulate, hindering the adhesion of mortar. Use a wire brush and a solution of trisodium phosphate (TSP) mixed with water to scrub the brick thoroughly. Rinse the brick completely with clean water and allow it to dry for at least 24 hours. This step is crucial for creating a clean and sound substrate.
Following cleaning, inspect the brick for any loose or damaged sections. Remove any crumbling or cracked bricks using a chisel and hammer. Fill these gaps with a masonry patching compound and allow it to cure completely according to the manufacturer's instructions. This ensures a consistent and level surface for tiling.
Consider applying a bonding agent to the brick surface. Bonding agents, typically latex-based, create a strong bond between the brick and the mortar. Apply the bonding agent evenly according to the product instructions and allow it to dry completely before proceeding with the tiling process. This step can significantly improve the longevity of the tiled surface.
Key Point 2: Selecting the Appropriate Tile and Mortar
Choosing the right tile and mortar is essential for both the aesthetic appeal and the structural integrity of the tiled fireplace. The selection process should consider factors such as heat resistance, design preferences, and the specific characteristics of the existing brick.
For a fireplace surround, tiles made of porcelain, natural stone (such as slate or granite), or ceramic are typically recommended. Porcelain tiles are particularly durable and resistant to heat, making them an excellent choice for areas directly exposed to the fireplace. Natural stone offers a unique and sophisticated look, while ceramic tiles provide a wide range of design options at a more affordable price point. Ensure the chosen tile is rated for fireplace or high-heat applications. Avoid using materials like vinyl or glass tiles near the firebox due to their limited heat resistance.
The mortar used to adhere the tiles to the brick should be specifically formulated for high-temperature environments. Look for a modified thin-set mortar designed for use with fireplaces or stoves. This type of mortar contains additives that enhance its heat resistance and prevent cracking or crumbling over time. Carefully read the mortar manufacturer's instructions regarding mixing ratios and application techniques to ensure optimal performance.
The grout used to fill the spaces between the tiles should also be heat-resistant. Epoxy grout is a popular choice for fireplace surrounds due to its durability, stain resistance, and impermeability. Cementitious grout is another option, but it may require sealing to protect against stains and moisture. Select a grout color that complements the chosen tile and the overall design aesthetic of the room.
Key Point 3: Installation Techniques for a Professional Finish
Proper installation techniques are critical to achieving a professional and durable tiled fireplace surround. Taking the time to carefully plan and execute each step of the installation process will yield the best results.
Before applying the mortar, dry-fit the tiles on the brick surface to determine the optimal layout and tile placement. This allows for adjustments and ensures a balanced and visually appealing design. Use tile spacers to maintain consistent grout lines between the tiles.
Mix the thin-set mortar according to the manufacturer's instructions, creating a smooth and consistent paste. Apply the mortar to the back of each tile using a notched trowel, ensuring even coverage. Press the tile firmly onto the brick surface, twisting slightly to ensure a strong bond. Check the level of each tile with a spirit level and make adjustments as needed.
After all the tiles have been installed, allow the mortar to cure completely according to the manufacturer's instructions, typically for at least 24-48 hours. Once the mortar has cured, remove the tile spacers and apply the grout. Work the grout into the grout lines using a grout float, ensuring complete coverage. Remove excess grout with a damp sponge, rinsing frequently. Allow the grout to dry slightly before polishing the tile surface with a clean, dry cloth.
Finally, seal the grout lines with a grout sealer to protect against stains and moisture. Apply the sealer according to the manufacturer's instructions, typically in multiple thin coats. The completed tiled fireplace surround will then provide a revitalized focal point, enhancing the visual appeal and value of the home.

A Step By Guide To Fireplace Refacing Diy Family Handyman

Result For Fireplace Resurfacing Reface Brick Makeover

Fireplace Refacing So You Want To Bob Vila

Pin By Tarra Wills Efkarpidis On For The Home Brick Fireplace Remodel Stone

Reface Fireplace Brick Makeover Home Remodel

A Step By Guide To Fireplace Refacing Diy Family Handyman

Renovating With A Tile Over Brick Fireplace Design

Resurface A Face Brick Fireplace Surround

Fireplace Refacing So You Want To Bob Vila

30 Gorgeous Painted Brick Fireplace Ideas
Related Posts

