Resurfacing Fireplace Ideas: Breathing New Life into an Old Hearth
Fireplaces, often the focal point of a living room or family area, can become dated or damaged over time. Instead of undertaking a complete fireplace replacement, resurfacing offers a cost-effective and visually impactful solution to revitalize this important architectural element. Resurfacing involves applying a new layer of material over the existing fireplace structure, concealing imperfections and creating a fresh aesthetic. This process allows homeowners to update the fireplace's style, improve its durability, and enhance its visual appeal without the extensive demolition and reconstruction associated with a full replacement. This article explores various resurfacing options, detailing their characteristics, application processes, and suitability for different fireplace types.Before embarking on a resurfacing project, it's crucial to thoroughly assess the existing fireplace structure. Look for signs of structural damage, such as cracks in the firebox, crumbling mortar, or loose stones. Addressing these underlying issues is paramount before applying any new surface material. A professional inspection is highly recommended, especially if there are concerns about the fireplace's structural integrity or functionality.
The condition of the existing surface will also influence the choice of resurfacing material and preparation methods. A smooth, even surface is ideal for many applications, while a rough or uneven surface may require leveling or patching prior to resurfacing. Careful preparation is essential for ensuring proper adhesion and a long-lasting, aesthetically pleasing result. This preparation frequently involves cleaning the existing surface to remove soot, dust, and debris, followed by repairing any minor imperfections. Applying a bonding agent can further enhance adhesion between the existing surface and the new material.
Choosing the Right Resurfacing Material
The selection of resurfacing material is a key decision that depends on the desired aesthetic, budget, and the existing fireplace structure. Several popular options offer a range of styles and benefits.
1. Stone Veneer:
Stone veneer provides the look and feel of natural stone without the weight and expense. It consists of thin slices of stone adhered to a lightweight backing, making it suitable for application over existing brick, concrete, or even wood framing (with proper preparation). Stone veneer is available in a wide variety of styles, colors, and textures, ranging from rustic fieldstone to contemporary stacked stone. The installation process typically involves applying a mortar bed to the existing surface and then carefully setting the individual veneer stones. Grouting between the stones completes the look and provides added stability.
The benefits of stone veneer include its relatively lightweight nature, ease of installation compared to full-thickness stone, and versatility in terms of design options. It can be used to create a modern, rustic, or traditional look, depending on the chosen style and color. One consideration is that stone veneer can be more expensive than some other resurfacing options, and professional installation is often recommended for optimal results.
2. Brick Veneer:
Similar to stone veneer, brick veneer offers the classic appeal of brick without the structural requirements of full-thickness brick. Thin brick slices are adhered to a backing and installed using mortar, mirroring the process for stone veneer. Brick veneer is an excellent choice for creating a traditional or farmhouse-style fireplace. Various brick colors, textures, and patterns are available, allowing for customization to match existing décor or create a unique focal point.
Brick veneer is often more affordable than stone veneer and provides a durable, low-maintenance surface. It's also relatively fire-resistant, further enhancing the safety of the fireplace. The installation process is generally straightforward, but precise alignment and proper mortar application are crucial for a professional-looking finish.
3. Tile:
Tile is a versatile resurfacing option that offers a wide range of design possibilities. Ceramic, porcelain, and natural stone tiles are all suitable for fireplace resurfacing. Tile can be used to create intricate patterns, geometric designs, or simple, clean lines. The color and finish of the tile can be selected to complement the surrounding décor and create the desired aesthetic.
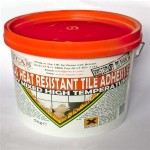
Tile is relatively easy to clean and maintain, making it a practical choice for a fireplace surround. It's also fire-resistant and can withstand high temperatures. The installation process involves applying thin-set mortar to the existing surface and then setting the individual tiles. Grouting between the tiles seals the surface and provides a finished look. Tile can be especially effective in contemporary or modern settings, allowing for the incorporation of bold colors and geometric shapes.
4. Concrete Overlay:
Concrete overlay involves applying a thin layer of concrete over the existing fireplace surface. This technique can be used to create a smooth, modern look or to add texture and dimension. Concrete overlays can be stained, polished, or stamped to achieve a variety of finishes. This option is particularly well-suited for minimalist or industrial-inspired designs.
Concrete overlays offer excellent durability and fire resistance. They can be customized to match almost any color scheme or design preference. The application process requires careful surface preparation and skilled application to ensure a smooth, even finish. It's often recommended to hire a professional contractor experienced in concrete overlay techniques.
5. Plaster or Stucco:
Plaster or stucco can be used to create a textured, rustic, or Mediterranean-style fireplace surround. These materials are applied in layers and can be finished with a variety of techniques to achieve different textures and effects. Plaster and stucco can be tinted to match existing décor or to create a contrasting accent.
Plaster and stucco offer a cost-effective resurfacing option and can be applied to a variety of surfaces, including brick, concrete, and drywall (with proper preparation). The application process requires some skill and experience to achieve a smooth, even finish. It's important to choose a fire-resistant plaster or stucco product specifically designed for fireplace applications.
Surface Preparation: The Foundation for Success
Regardless of the chosen resurfacing material, proper surface preparation is essential for a successful and long-lasting result. The existing surface must be clean, sound, and properly prepared to ensure adequate adhesion of the new material. This often involves several steps.
1. Cleaning:
Thoroughly clean the existing surface to remove all traces of soot, dust, grease, and loose debris. A wire brush, scraper, and vacuum cleaner can be used to remove loose particles. A degreasing cleaner may be necessary to remove stubborn grease or soot stains. Rinse the surface thoroughly with water and allow it to dry completely before proceeding.
2. Repairing:
Repair any cracks, chips, or other imperfections in the existing surface. Use a patching compound or mortar to fill in cracks and smooth out uneven areas. Allow the patching compound to dry completely according to the manufacturer's instructions before proceeding.
3. Leveling:
If the existing surface is significantly uneven, leveling may be necessary to create a smooth, even base for the new material. A self-leveling compound can be used to fill in low spots and create a level surface. Alternatively, a thin layer of mortar can be applied to create a more even base.
4. Applying a Bonding Agent:
To enhance adhesion between the existing surface and the new material, apply a bonding agent according to the manufacturer's instructions. A bonding agent is a liquid compound that creates a stronger bond between two surfaces. This is particularly important when applying veneer or tile to a smooth or non-porous surface.
Installation Techniques and Best Practices
The installation process will vary depending on the chosen resurfacing material. However, some general best practices apply to all fireplace resurfacing projects.
1. Accurate Measurements and Planning:
Before beginning the installation, carefully measure the fireplace surround and create a detailed plan. This will help ensure that the materials are cut to the correct size and that the installation is properly aligned. Dry-fitting the materials before applying adhesive or mortar is also recommended to identify any potential problems and make adjustments as needed.
2. Proper Adhesive or Mortar Application:
Use the appropriate adhesive or mortar for the chosen resurfacing material. Follow the manufacturer's instructions carefully for mixing and application. Apply the adhesive or mortar evenly to the back of the material and to the existing surface. Press the material firmly into place and ensure that it is properly aligned.
3. Grouting (for Tile or Veneer):
If installing tile or veneer, apply grout between the individual pieces after the adhesive or mortar has cured. Choose a grout color that complements the resurfacing material and the surrounding décor. Apply the grout evenly and remove any excess grout from the surface before it dries. Seal the grout to protect it from staining and moisture.
4. Safety Precautions:
Wear appropriate safety gear during the resurfacing process, including gloves, eye protection, and a dust mask. Ensure adequate ventilation when working with adhesives, mortars, and other chemicals. Follow all safety precautions outlined by the manufacturer of the chosen materials.
Resurfacing a fireplace can dramatically transform the look and feel of a room. By carefully considering the various resurfacing options, preparing the existing surface properly, and following best installation practices, homeowners can achieve a beautiful and durable fireplace that will enhance their living space for years to come. While some individuals may be comfortable undertaking a DIY resurfacing project, engaging a qualified professional is often recommended, particularly for complex installations or when dealing with structural issues.

A Step By Guide To Fireplace Refacing Diy Family Handyman

10 Fireplace Makeover Ideas Before And After Regency

Diy Fireplace Makeover Wood Slat

15 Fabulous Fireplace Refacing Ideas Average But Inspired

10 Fireplace Makeover Ideas Before And After Regency

15 Best Fireplace Ideas Brick Makeover Remodel Design

30 Fireplace Remodel Ideas For Any Budget

Reface A Fireplace With The Look Of Stone Or Brick Barron Designs

Stone Fireplace Design And Remodel

47 Amazing Fireplace Remodel Ideas To Diy Artsy Pretty Plants
Related Posts

