Replace Your Tile Fireplace Surround: A Comprehensive Guide
Revitalizing your fireplace surround with a new tile design can dramatically enhance the aesthetics of your living space. While the process may seem daunting, it's surprisingly achievable with the right preparation and techniques. This guide will provide a comprehensive overview of the essential aspects to consider when replacing your tile fireplace surround, empowering you to create a stunning and functional centerpiece for your home.
Planning and Preparation
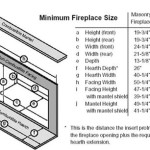
Thoroughly plan before embarking on the replacement project. Measure the fireplace opening and surrounding area to determine the quantity and size of tiles required. Select a tile material that complements your interior design style and fireplace usage. Consider factors such as durability, heat resistance, and ease of maintenance. Gather all necessary tools, including a tile cutter, adhesive, grout, spacers, and safety gear.
Removing the Existing Surround
Safety is paramount when removing the existing tile surround. Wear protective eyewear and gloves. Using a crowbar or hammer and chisel, carefully pry the old tiles loose from the substrate. Clean the surface thoroughly, ensuring no debris or adhesive remains. If necessary, use a tile adhesive remover to dissolve stubborn adhesive residue.
Preparing the Substrate
A level and stable substrate is crucial for a flawless tile installation. Inspect the fireplace surround for any cracks or imperfections. Repair or smooth out any irregularities using a patching compound or mortar. Apply a thin layer of cement backer board or a similar underlayment to create an even surface. Secure the underlayment firmly using screws or adhesive.
Laying the Tiles
Spread a layer of tile adhesive onto the prepared substrate using a notched trowel. Lay the first row of tiles along the bottom edge, ensuring they're level and aligned. Use spacers to maintain consistent gaps between tiles. Continue laying rows in a straight pattern, alternating tiles as needed to create a visually appealing and structurally sound surface.
Grouting and Finishing
Once the tiles are firmly set, fill the spaces between them with grout. Apply the grout using a rubber float, pressing it into the gaps and removing any excess. Allow the grout to cure according to the manufacturer's instructions. Seal the grout to protect it from moisture and staining. Once the sealant has fully cured, you can enjoy your newly revitalized fireplace surround. Regularly clean the tiles and grout to maintain their pristine condition.

Diy Tiling A Fireplace Surround What We Learned Along The Way

How To Remove Fireplace Tiles Chaotically Creative

4 Great Ways To Give Your Fireplace A Makeover Using Tiles

Diy Tiling A Fireplace Surround What We Learned Along The Way

How To Tile A Fireplace My Uncommon Slice Of Suburbia

How To Paint Fireplace Tile Easy Home Update Allisa Jacobs

Er Friendly Fireplace Makeover With L Stick Tiles The Homes I Have Made

How To Paint Tile Easy Fireplace Makeover Setting For Four Interiors

Diy Tile Fireplace Makeover The Home Depot

How To Paint Fireplace Tile Easy Home Update Allisa Jacobs
Related Posts

