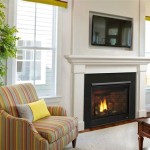
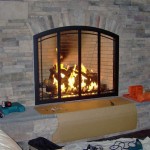
Refinishing Fireplace Tile: A Comprehensive Guide
Fireplace tile, a common architectural feature, adds aesthetic appeal and functional heat resistance to a fireplace surround. Over time, however, fireplace tile can become worn, chipped, stained, or simply outdated. Refinishing fireplace tile presents a cost-effective alternative to complete replacement, allowing homeowners to update the look of their fireplace without the expense and disruption of a major renovation. This article will explore various methods for refinishing fireplace tile, outlining the necessary steps, materials, and considerations for a successful project.
Before embarking on any refinishing project, it is crucial to accurately assess the type and condition of the existing tile. Different types of tile, such as ceramic, porcelain, or natural stone, require different treatment methods and products. Identifying pre-existing damage, such as cracks, chips, or loose tiles, is also vital to ensure appropriate repairs are made before refinishing. Ignoring these initial assessments can lead to unsatisfactory results or even further damage to the fireplace surround.
Cleaning and Preparation: The Foundation for Success
Proper cleaning and preparation are paramount to achieving a durable and visually appealing refinished surface. This stage removes dirt, grime, soot, and any existing coatings that may impede the adhesion of new paint or sealant. The specific cleaning agents and methods will vary depending on the type of tile and the nature of the soiling.
For general cleaning, a mixture of warm water and mild detergent is often sufficient. However, for stubborn stains or soot buildup, a stronger cleaning solution, such as trisodium phosphate (TSP), may be necessary. It is imperative to follow the manufacturer's instructions carefully when using TSP or any other chemical cleaner, and to wear appropriate personal protective equipment (PPE), including gloves and eye protection. A stiff-bristled brush or sponge can be used to scrub the tile thoroughly, paying particular attention to grout lines.
After cleaning, the tile must be rinsed thoroughly with clean water to remove any residual cleaning agents. Allow the tile to dry completely before proceeding to the next step. This drying process may take several hours or even overnight, depending on the humidity and ventilation in the area. A moisture meter can be used to verify that the tile is completely dry.
Once the tile is clean and dry, any loose or damaged tiles should be repaired. Loose tiles can be reattached using thin-set mortar or tile adhesive. Cracked or chipped tiles can be repaired using epoxy filler or patching compound formulated for tile. Follow the manufacturer's instructions for mixing and applying these materials. Allow the repair materials to cure completely before proceeding to the next step.
Finally, the tile surface should be lightly sanded to create a slightly rough profile that will promote better adhesion of the new coating. Use fine-grit sandpaper (e.g., 220-grit) and sand the tile surface gently. Avoid applying excessive pressure, as this could damage the tile. After sanding, remove any dust with a tack cloth or vacuum cleaner.
Refinishing Options: Paint, Epoxy, and Tile Re-glazing
Several options exist for refinishing fireplace tile, each with its own set of advantages and disadvantages. The choice of method will depend on the desired aesthetic outcome, the budget, and the level of expertise of the person undertaking the project.
Painting: Painting is a relatively inexpensive and straightforward method for refinishing fireplace tile. Specialized tile paints are available in a wide range of colors and finishes, allowing for a high degree of customization. However, paint coatings are generally less durable than other refinishing options and may be prone to chipping, scratching, or fading over time. Proper surface preparation and the use of a high-quality primer are essential for achieving a durable and long-lasting paint finish.
When painting fireplace tile, it is crucial to use a heat-resistant paint specifically designed for this purpose. Standard wall paint is not suitable for fireplace surrounds, as it may not withstand the high temperatures generated by the fireplace. Apply several thin coats of paint, allowing each coat to dry completely before applying the next. A clear sealant can be applied over the paint to provide additional protection and enhance the durability of the finish.
Epoxy Coating: Epoxy coatings provide a more durable and chemical-resistant finish than paint. Epoxy resins are two-part systems that, when mixed together, create a hard, glossy surface. Epoxy coatings are particularly well-suited for areas that are subject to water exposure or heavy use, such as fireplace surrounds. However, epoxy coatings can be more difficult to apply than paint, requiring careful mixing and application techniques to avoid bubbles or unevenness. Epoxy coatings also tend to be more expensive than paint.
When applying epoxy coating to fireplace tile, it is important to follow the manufacturer's instructions carefully. The two parts of the epoxy resin must be mixed in the correct proportions, and the mixture must be applied within the specified pot life. A self-leveling epoxy should be used to ensure a smooth, even finish. Multiple coats may be necessary to achieve the desired thickness and coverage. Properly ventilate the area during application and curing, as epoxy resins can release strong fumes.
Tile Re-glazing: Tile re-glazing is a more specialized refinishing technique that involves applying a new layer of glaze to the existing tile surface. This method is typically performed by professionals using specialized equipment and materials. Tile re-glazing can restore the original appearance of the tile and provide a durable, long-lasting finish. However, it is generally the most expensive refinishing option.
The tile re-glazing process typically involves cleaning the tile surface, applying a bonding agent, and then spraying on a new layer of glaze. The glaze is then baked at high temperatures to create a durable, waterproof finish. Because of the specialized equipment and expertise required, tile re-glazing is best left to professionals.
Grout Repair and Sealing: Completing the Refinishing Project
Grout, the material that fills the spaces between tiles, is an important component of the fireplace surround. Over time, grout can become stained, cracked, or crumbling. Repairing and sealing the grout is an essential part of the tile refinishing process.
Cracked or crumbling grout should be removed using a grout saw or a rotary tool with a grout removal attachment. Be careful not to damage the adjacent tiles during this process. Once the old grout has been removed, the area should be cleaned thoroughly to remove any debris. New grout can then be applied using a grout float. Press the grout firmly into the joints, ensuring that they are completely filled. Remove any excess grout with a damp sponge. Allow the grout to cure completely before sealing.
Sealing the grout helps to protect it from stains and moisture damage. A penetrating grout sealer can be applied using a brush or sponge. Allow the sealer to penetrate the grout for the recommended amount of time, then wipe off any excess. Reapply the sealer every few years to maintain its effectiveness. Choosing a matching grout color to the existing tile is vital for a seamless and professional look. Mismatched grout can detract from the overall aesthetic appeal of the refinished fireplace.
After the grout has been repaired and sealed, the entire fireplace surround should be cleaned thoroughly to remove any dust or debris. Inspect the refinished surface carefully to ensure that there are no imperfections. Touch up any areas as needed. Allow the refinished surface to cure completely before using the fireplace. This curing process may take several days or even weeks, depending on the type of coating used.
Consider the overall décor of the room when choosing a refinishing method and color for the fireplace tile. The fireplace should complement the existing style and color scheme of the room. Before starting the project, it is advisable to acquire all necessary materials and tools. This will prevent delays and ensure that the project can be completed efficiently. Always wear appropriate safety gear, including gloves, eye protection, and a respirator, when working with chemicals or power tools. By carefully following these steps and precautions, it is possible to successfully refinish fireplace tile and create a beautiful and functional focal point for the home.

Painting Fireplace Tile The Ultimate Guide Jessica Welling Interiors

Painting Fireplace Tile Ridiculously Easy Diy Makeover Tiny Hands Tidy Home

How To Paint Tile Easy Fireplace Makeover Setting For Four Interiors

Before And After The Best Room Makeovers Paint Fireplace Tile

How To Paint Fireplace Tile Diy Makeover A Blossoming Life

How To Paint A Tile Fireplace Amber Simmons

110 Diy Fireplace Makeover How To Paint Tile Jessica Welling Interiors

How To Paint A Tile Fireplace Des And Sses

Freckles Stoked Fireplace Mini Facelift Home Tile Surround Fireplaces

How To Paint Fireplace Tile Diy Makeover A Blossoming Life