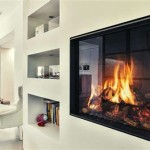
Refacing a Brick Fireplace with Faux Stone: A Comprehensive Guide
A brick fireplace, while often a classic and charming feature in a home, may sometimes appear dated or clash with a desired aesthetic. Rather than undertaking a costly and disruptive demolition and rebuild, homeowners can consider refacing the brick with faux stone. This process offers a relatively straightforward and cost-effective approach to dramatically transforming the fireplace's appearance, adding texture, and enhancing the room's overall ambiance. This article provides a detailed guide to refacing a brick fireplace with faux stone, covering preparation, material selection, installation, and finishing touches.
Preparing the Brick Fireplace for Faux Stone Installation
Proper preparation of the existing brick surface is paramount for ensuring a strong and lasting bond with the faux stone. This stage involves thorough cleaning, surface preparation, and addressing any existing structural issues. Failure to adequately prepare the brick can lead to adhesion problems, ultimately compromising the integrity and longevity of the refaced fireplace.
The first step is to thoroughly clean the brick. This involves removing any dirt, dust, soot, grease, or loose debris. A wire brush is an effective tool for scrubbing the brick surface, addressing crevices and mortar joints. For stubborn stains or grime, a mild detergent solution can be used, followed by rinsing with clean water. If mildew or mold is present, a bleach solution (diluted with water) can be applied, ensuring proper ventilation and personal protective equipment is worn. Allow the brick to dry completely before proceeding to the next step.
Once the brick is clean and dry, it is crucial to assess the condition of the mortar joints. Any loose, crumbling, or damaged mortar should be removed and replaced. This process is called "repointing." Using a chisel and hammer, carefully chip away the deteriorated mortar, being mindful not to damage the surrounding bricks. After removing the loose mortar, thoroughly clean the joints with a brush and vacuum. Mix a new batch of mortar according to the manufacturer's instructions and apply it to the joints using a pointing trowel. Ensure the mortar is packed tightly into the joints and flush with the existing brick surface. Allow the new mortar to cure completely before proceeding.
Applying a bonding agent or primer is essential for promoting adhesion between the brick and the faux stone. This step is particularly critical if the brick surface is smooth or non-porous. A bonding agent is a liquid adhesive that creates a textured surface for the mortar to grip. Apply the bonding agent evenly to the entire brick surface, following the manufacturer's instructions regarding application method and drying time. Some faux stone manufacturers may recommend a specific type of bonding agent, which should be adhered to for optimal results.
In some cases, it may be necessary to install a metal lath over the brick surface. This is especially recommended if the brick is very smooth, uneven, or has significant structural issues. The metal lath provides a mechanical key for the mortar, ensuring a strong and secure bond. Attach the metal lath to the brick using masonry screws or nails, ensuring it is firmly secured and evenly spaced. Overlap the edges of the lath sections to create a continuous surface.
Selecting and Installing Faux Stone Veneer
Choosing the right faux stone veneer is crucial for achieving the desired aesthetic and ensuring the material's suitability for fireplace applications. Faux stone comes in various styles, colors, textures, and materials, each offering unique characteristics and visual appeal. Proper installation is equally important, requiring careful planning, precise cutting, and meticulous application of the mortar. This section details the selection process and provides step-by-step instructions for installing faux stone veneer.
When selecting faux stone, consider the overall style of the room and the desired aesthetic. Options range from rugged and rustic to sleek and contemporary. Pay attention to the color palette and choose a stone that complements the existing décor. Consider the texture of the stone, as this can significantly impact the overall look and feel of the fireplace. Request samples of different faux stone options and view them in the room's lighting to make an informed decision.
Ensure the faux stone is specifically designed for fireplace applications. Look for materials that are fire-resistant and can withstand the heat generated by the fireplace. Some faux stone products may be susceptible to cracking or discoloration when exposed to high temperatures. Consult with a fireplace expert or the faux stone manufacturer to confirm the suitability of the material for your specific fireplace and usage patterns.
Before beginning the installation, carefully plan the layout of the faux stone. Dry-fit the stones on the floor to arrange them in a visually appealing pattern. Consider the size and shape of the stones, and how they will fit around the fireplace opening and any existing features. This pre-planning stage allows for adjustments and ensures a smooth installation process. Mark the desired positions of the stones on the brick surface as a guide.
Mix the mortar according to the manufacturer's instructions. Use a mortar mixer or a mixing tub and a drill with a mixing paddle to ensure a consistent and homogenous mixture. Add water gradually until the mortar reaches a thick, creamy consistency. Allow the mortar to slake for the recommended time before using it.
Apply a layer of mortar to the back of each faux stone using a trowel. The mortar should be thick enough to create a strong bond but not so thick that it oozes out when the stone is pressed against the brick surface. Apply mortar to the brick surface as well, creating a bed for the stone to adhere to. Press the stone firmly against the brick, wiggling it slightly to ensure good contact. Remove any excess mortar that squeezes out from the edges. Use spacers between the stones to maintain consistent grout lines, if desired.
Continue installing the stones, working from the bottom up. Use a level to ensure each stone is properly aligned. For stones that need to be cut to fit, use a wet saw with a diamond blade. Wear safety glasses and ear protection when cutting the stone. Smooth the cut edges with a rubbing stone to remove any sharp points. As you progress, periodically check the overall appearance and make any necessary adjustments.
Finishing and Maintaining the Faux Stone Fireplace
After the faux stone is installed and the mortar has cured, the final steps involve finishing the grout lines, sealing the stone, and implementing a maintenance plan to preserve its appearance. These steps are essential for enhancing the aesthetic appeal of the fireplace and ensuring its long-term durability. This section outlines the procedures for finishing, sealing, and maintaining a faux stone fireplace.
Once the mortar has cured, the grout lines can be filled. Use a grout bag or a grout float to apply the grout to the joints between the stones. Ensure the grout is packed tightly into the joints and flush with the stone surface. Allow the grout to set for the recommended time, then use a damp sponge to wipe away any excess grout from the stone surface. Be careful not to remove too much grout from the joints. Use a grout shaping tool to create a smooth and consistent finish on the grout lines. Allow the grout to cure completely before proceeding.
Sealing the faux stone can provide added protection against moisture, stains, and fading. Choose a sealant that is specifically designed for faux stone and is suitable for fireplace applications. Apply the sealant according to the manufacturer's instructions. Typically, this involves applying a thin, even coat of sealant to the entire stone surface using a brush, roller, or sprayer. Allow the sealant to dry completely before using the fireplace. Reapply the sealant periodically as needed, following the manufacturer's recommendations.
Regular cleaning is essential for maintaining the appearance of the faux stone fireplace. Dust the stone surface regularly with a soft brush or cloth. For more stubborn dirt or stains, use a mild detergent solution and a soft sponge. Avoid using harsh chemicals or abrasive cleaners, as these can damage the stone or sealant. Rinse the stone surface with clean water and allow it to dry completely.
Inspect the fireplace regularly for any signs of damage, such as cracks, chips, or loose stones. Repair any damage promptly to prevent further deterioration. If any stones become loose, reattach them using mortar. If cracks or chips appear, fill them with a color-matched patching compound. Over time, the faux stone may accumulate soot or other deposits from the fireplace. These deposits can be removed using a fireplace cleaner or a specialized stone cleaner. Follow the manufacturer's instructions carefully when using these products. With proper care and maintenance, a faux stone fireplace can provide years of beauty and enjoyment.

Reface A Fireplace With The Look Of Stone Or Brick Barron Designs

Pin By Tarra Wills Efkarpidis On For The Home Brick Fireplace Remodel Stone

Faux Stone Panels For Fireplaces

Faux Stone Panels For Fireplaces

Reface A Fireplace With The Look Of Stone Or Brick Barron Designs

Stone Selex Show Special 970 Fireplace Refacing Selexstone

Stone Veneer Over A Brick Fireplace Updates The Look

Brick Fireplace Makeover Pine And Prospect Home

Fireplace Recovering With Stone

Refacing A Fireplace With Stone Veneer Horizon
Related Posts