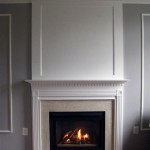
Redoing Fireplace Tile: A Comprehensive Guide
The fireplace serves as a focal point in many homes, offering warmth and visual appeal. Over time, the tile surrounding a fireplace can become outdated, damaged, or simply no longer fit with the evolving aesthetic of the living space. Redoing fireplace tile presents an opportunity to revitalize this central feature, enhancing the room's overall design and potentially increasing the home's value. This article provides a detailed overview of the process, covering essential considerations, material selection, preparation steps, installation techniques, and maintenance tips.
Assessing the Existing Fireplace and Planning the Redo
Before embarking on a fireplace tile redo, a thorough assessment of the existing structure is crucial. This involves inspecting the current tile and its underlying substrate for any signs of damage, such as cracks, loose tiles, or water damage. Identifying the type of tile currently installed is also important, as this can influence the removal method and the selection of appropriate replacement materials. Furthermore, the dimensions of the fireplace surround should be accurately measured to determine the required quantity of new tile.
The architectural style of the home and the desired aesthetic of the living space should guide the selection of new tile. Consider the color palette, textures, and patterns that will complement the existing décor. Modern, traditional, rustic, and contemporary styles each lend themselves to specific tile choices. For example, sleek, minimalist designs often pair well with large-format porcelain tiles, while more traditional settings may benefit from natural stone or ceramic tiles with intricate patterns.
Budgetary constraints are a significant factor in the planning process. Tile prices vary considerably based on material, size, and design. It is essential to establish a realistic budget that encompasses the cost of the tile itself, as well as necessary tools, adhesives, grout, and any professional labor that may be required. Obtaining quotes from multiple suppliers and contractors can help ensure that the budget is well-informed and comprehensive.
Local building codes and safety regulations must be adhered to when redoing fireplace tile. These codes may specify minimum clearances between the fireplace opening and combustible materials, as well as requirements for non-combustible hearth extensions. Consulting with a building inspector or experienced contractor can help ensure compliance with all applicable regulations and prevent potential hazards.
Removing Existing Tile and Preparing the Surface
The removal of existing tile should be approached with care to avoid damaging the underlying substrate. Safety precautions, such as wearing safety glasses and gloves, are essential. A chisel and hammer can be used to carefully break away individual tiles, starting with those that are already loose or damaged. A specialized tile removal tool can also be employed to speed up the process and minimize the risk of damage.
Once the tile has been removed, the underlying substrate must be thoroughly cleaned and prepared. Any residual mortar, adhesive, or grout should be scraped away using a scraper or putty knife. The surface should then be cleaned with a wire brush and a damp sponge to remove any remaining debris. If the substrate is uneven or damaged, it may need to be repaired or replaced before installing the new tile.
Repairing the substrate may involve patching cracks or holes with a cement-based patching compound. For more extensive damage, it may be necessary to install a new layer of cement board or backer board. Cement board provides a stable, moisture-resistant surface for tile installation and is specifically designed for use in wet or high-heat environments. It is crucial to ensure that the cement board is properly secured to the framing with screws and that the seams are taped and mudded to create a smooth, continuous surface.
Priming the prepared surface is an important step in ensuring proper adhesion of the new tile. A latex-based primer can be applied to the cement board or other substrate to improve bonding and prevent moisture absorption. The primer should be allowed to dry completely before proceeding with the tile installation.
Installing the New Fireplace Tile
Before applying any adhesive, it is recommended to dry-fit the tile to ensure proper spacing and alignment. This involves laying out the tile on the floor or a work surface to visualize the final arrangement and make any necessary adjustments. Spacers should be used between the tiles to maintain consistent grout lines.
Thin-set mortar, a cement-based adhesive specifically formulated for tile installation, is typically used to adhere the new tile to the prepared surface. The type of thin-set mortar should be selected based on the type of tile being installed and the substrate. Follow the manufacturer's instructions for mixing the thin-set mortar to achieve the correct consistency.
Apply the thin-set mortar to the substrate using a notched trowel. The size of the notched trowel should be chosen based on the size of the tile. Hold the trowel at a 45-degree angle and create consistent ridges in the mortar. This will ensure proper coverage and bonding of the tile.
Carefully place each tile onto the mortar bed, pressing it firmly into place and twisting slightly to ensure good contact. Use spacers to maintain consistent grout lines between the tiles. Periodically check the level and alignment of the tiles using a level and straightedge. Adjust as needed to ensure a uniform and professional-looking installation.
Once all of the tiles have been installed, allow the thin-set mortar to cure completely according to the manufacturer's instructions. This typically takes 24 to 72 hours. Avoid walking on or disturbing the tile during the curing process.
Grouting and Sealing the Tile
After the thin-set mortar has cured, remove the spacers and prepare to grout the tile. Choose a grout color that complements the tile and the overall aesthetic of the fireplace. Cement-based grout is a common choice for fireplace tile, but epoxy grout may be preferred for its durability and stain resistance.
Mix the grout according to the manufacturer's instructions. Apply the grout to the tile surface using a grout float, working it into the grout lines at a 45-degree angle. Ensure that all of the grout lines are completely filled.
After the grout has been applied, use a damp sponge to remove excess grout from the tile surface. Rinse the sponge frequently in clean water. Be careful not to remove too much grout from the grout lines.
Allow the grout to dry slightly, then use a clean, dry cloth to buff the tile surface and remove any remaining grout haze. This may require multiple passes to achieve a clean and polished finish.
Once the grout has fully cured, apply a grout sealer to protect it from stains and moisture. Follow the manufacturer's instructions for applying the sealer. This will help to prolong the life of the grout and maintain its appearance.
Maintaining the Fireplace Tile
Regular cleaning is essential for maintaining the appearance of fireplace tile. A mild soap and water solution can be used to clean the tile surface. Avoid using harsh chemicals or abrasive cleaners, as these can damage the tile or grout.
Periodically inspect the tile and grout for any signs of damage, such as cracks, loose tiles, or crumbling grout. Address any issues promptly to prevent further damage. Replace damaged tiles as needed, and repair or replace crumbling grout.
Consider applying a fresh coat of grout sealer every one to two years to maintain its protective properties. This will help to prevent stains and moisture damage and prolong the life of the grout.
For natural stone tiles, consider using a stone-specific cleaner and sealer. These products are designed to protect the stone from stains and moisture without damaging its natural beauty.

110 Diy Fireplace Makeover How To Paint Tile Jessica Welling Interiors

Diy Fireplace Makeover At Home With The Barkers

How To Paint Tile Easy Fireplace Makeover Setting For Four Interiors

Er Friendly Fireplace Makeover With L Stick Tiles The Homes I Have Made

How To Paint Fireplace Tile Diy Makeover A Blossoming Life

Diy Tile Fireplace Makeover Home
5 Amazing Inexpensive Easy Fireplace Remodel Transformations Designed

Diy Fireplace Makeover With Vinyl Tiles Sew Much Ado

Our 200 Marble Fireplace Makeover Young House Love

Diy Tile Fireplace Makeover The Home Depot

