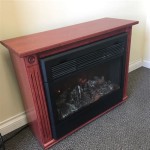
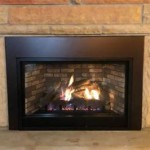
Pleasant Hearth Glass Fireplace Door Installation: A Comprehensive Guide
Installing a Pleasant Hearth glass fireplace door is a worthwhile project for homeowners seeking to enhance the safety, efficiency, and aesthetic appeal of their fireplaces. A properly installed glass door improves heating efficiency by preventing drafts when the fireplace is not in use and controlling airflow during operation. Furthermore, it provides a barrier against sparks and embers, increasing safety for occupants and the surrounding area. This article provides a detailed, step-by-step guide to installing a Pleasant Hearth glass fireplace door.
Before commencing the installation, it's crucial to ensure the correct type of door is selected for the fireplace. Pleasant Hearth offers a variety of door styles and sizes, designed to fit different fireplace openings. Verify the fireplace opening's dimensions carefully, paying close attention to the width, height, and depth. Accurate measurements are necessary to ensure the door fits properly and functions as intended. Consult the Pleasant Hearth product specifications and installation instructions for detailed measurement guidelines.
In addition to selecting the correct size, consider the style of the door and how it complements the existing décor of the room. Pleasant Hearth offers various finishes, including black, brass, and nickel, allowing homeowners to choose a door that matches their aesthetic preferences. Consider the operational style of the door as well. Bifold doors and single-panel doors are common options, each offering distinct advantages in terms of access and visual appeal.
Gather all necessary tools and materials prior to beginning the installation. This typically includes a tape measure, level, drill with appropriate drill bits, screwdriver (both Phillips and flathead), safety glasses, gloves, and a pencil. The installation kit provided with the Pleasant Hearth glass fireplace door should contain the necessary mounting hardware, including screws, brackets, and potentially drywall anchors. If drywall anchors are needed and not supplied, purchase appropriate anchors based on the wall material surrounding the fireplace.
Preparing the Fireplace Opening
The first step in the installation process is to thoroughly clean the fireplace opening. Remove any loose debris, soot, or ash from the firebox and the surrounding area. A clean surface ensures proper adhesion of the mounting hardware and prevents interference with the door's operation.
Inspect the fireplace opening for any cracks, damage, or uneven surfaces. Address these issues before proceeding. Small cracks can be filled with high-temperature caulk designed for fireplace applications. Uneven surfaces may require leveling with shims or other suitable materials to ensure the door sits flush against the fireplace opening.
Dry-fit the door frame within the fireplace opening to verify the fit. This provides an opportunity to identify any potential issues and make necessary adjustments before permanently attaching the door. If the door frame is too large, further cleaning might be necessary. If the door frame is too small, the gap will need to be considered when securing the frame.
It’s important to have a proper seal to prevent heat loss and drafts. If the fireplace has uneven brick or stone, consider using high-temperature silicone sealant around the edges of the door frame where it meets the fireplace opening. This sealant will fill any gaps and create a tighter seal.
Installing the Door Frame
Once the fireplace opening is prepared, proceed with attaching the door frame. The installation method varies slightly depending on the type of Pleasant Hearth door and the fireplace surround material. Generally, the door frame is secured to the fireplace using screws that penetrate into the brick, stone, or drywall surrounding the opening.
Position the door frame within the fireplace opening and ensure it is level and centered. Use a level to check both the horizontal and vertical alignment of the frame. Adjust the frame as necessary until it is perfectly level. It’s recommended to have a second person assist with holding the frame in place while marking the screw locations.
Using a pencil, mark the locations for the mounting screws on the fireplace surround. Refer to the Pleasant Hearth installation instructions for the recommended screw placement. Drill pilot holes at the marked locations using a drill bit appropriate for the material of the fireplace surround. If drilling into brick or stone, use a masonry drill bit. If drilling into drywall, install drywall anchors to provide a secure hold for the screws.
Attach the door frame to the fireplace surround using the screws provided in the installation kit. Tighten the screws securely, but avoid over-tightening, which can damage the frame or the surrounding material. Periodically check the level of the frame as you tighten the screws to ensure it remains properly aligned. If the frame seems unstable, consider adding shims behind the frame to provide additional support.
After the frame has been installed, inspect all seams and connections to ensure they are tight and secure. Re-check the level of the frame to ensure the frame did not shift during installation. Any gaps can be filled with high-temperature caulk to ensure a proper seal.
Attaching the Door Panels and Hardware
With the door frame securely installed, the next step is to attach the door panels and any remaining hardware. This typically involves installing hinges, handles, and any decorative elements included with the Pleasant Hearth door.
Carefully attach the door panels to the hinges on the door frame. Ensure the panels are properly aligned and swing freely. Tighten the hinge screws securely, but avoid over-tightening. Test the operation of the doors, ensuring they open and close smoothly without binding or rubbing.
Install the door handles according to the Pleasant Hearth installation instructions. The handles are typically attached to the door panels using screws. Ensure the handles are securely fastened and comfortable to grip. Test the operation of the latches or catches to ensure they engage properly and hold the doors closed securely.
Attach any remaining hardware, such as decorative trim or mesh screens, to the door frame or panels. Follow the Pleasant Hearth installation instructions for the specific hardware components included with the door. Ensure all hardware is securely fastened and does not interfere with the operation of the doors.
After attaching the door panels and the hardware, conduct a final inspection of the entire assembly. Check for any loose screws, misaligned panels, or other issues that may affect the door's performance or appearance. Make any necessary adjustments or repairs to ensure the door is functioning correctly and looks aesthetically pleasing.
Regularly check for wear and tear. The hinges may need to be lubricated periodically to maintain smooth operation. The glass panels may need to be cleaned with a specialized glass cleaner designed for high-temperature applications.
By following these detailed instructions, homeowners can successfully install a Pleasant Hearth glass fireplace door, enhancing the safety, efficiency, and aesthetic appeal of their fireplaces. Proper installation ensures the door functions as intended, providing years of reliable performance and enjoyment.

How To Install Fireplace Doors Pleasant Hearth

Pleasant Hearth Fenwick Fireplace Door Doors

Pleasant Hearth Ascot Glass Firescreen Black

Pleasant Hearth Carlisle Fireplace Glass Door Doors

Pleasant Hearth Alsip Fireplace Glass Door Doors

Diy Fireplace Door Installation Pleasant Hearth

Pleasant Hearth Fillmore Fireplace Door Doors

Pleasant Hearth Alpine Glass Firescreen Black

Pleasant Hearth Fieldcrest Black Finish Glass Firescreen Doors Fireplace

Pleasant Hearth Axel Large Glass Fireplace Doors Ax 1302 The Home Depot
Related Posts