Painting a Rock Fireplace: A Comprehensive Guide
A rock fireplace can be a stunning focal point in a home, adding rustic charm and natural texture. However, over time, the rocks may become dull, outdated, or simply no longer fit the desired aesthetic of the living space. Painting a rock fireplace is a viable option for updating its appearance and breathing new life into the room. This process, while relatively straightforward, requires careful planning, preparation, and execution to achieve a durable and visually appealing result. This article provides a detailed guide to painting a rock fireplace, covering key considerations, necessary materials, step-by-step instructions, and essential maintenance tips.
Key Considerations Before Painting
Before embarking on the painting project, several crucial factors must be carefully considered. These considerations directly impact the success of the project, the longevity of the paint job, and the overall aesthetic outcome.
First, assess the type of rock comprising the fireplace. Rocks vary in porosity and texture. Highly porous rocks, such as sandstone or limestone, absorb more paint and may require additional coats. Smoother rocks, like river rock, may require a primer designed for adhesion to non-porous surfaces. Understanding the specific properties of the rock is crucial for selecting appropriate paints and primers.
Second, evaluate the existing condition of the rock. Are there loose stones, crumbling mortar, or significant dirt and grime buildup? Addressing these issues before painting is essential. Loose stones must be re-mortared. Crumbling mortar should be repaired or replaced. Thorough cleaning is imperative to remove any contaminants that could interfere with paint adhesion.
Third, determine the desired aesthetic outcome. Do you envision a solid, uniform color, or a more nuanced, textured finish that preserves the natural variations in the rock? The desired aesthetic will influence the choice of paint color, application techniques, and the potential use of faux finishing techniques.
Fourth, consider the style of the home and the overall design scheme. The painted fireplace should complement the existing décor and enhance the overall ambiance of the space. Choose a paint color and finish that harmonizes with the surrounding elements, such as furniture, flooring, and wall colors.
Finally, research local building codes and regulations. In some jurisdictions, painting certain types of fireplaces may be restricted due to safety concerns or historical preservation requirements. Ensuring compliance with all applicable regulations is vital.
Necessary Materials and Tools
Having the right materials and tools is critical for a successful rock fireplace painting project. Gathering these items beforehand ensures a smooth and efficient workflow.
Safety Gear: Safety glasses are essential to protect the eyes from dust and debris during cleaning and preparation. A dust mask or respirator is necessary to avoid inhaling harmful particles. Gloves protect the hands from harsh cleaning agents and paint.
Cleaning Supplies: A stiff-bristled brush (wire brush for stubborn dirt) is required for scrubbing the rocks. A mild detergent or specialized stone cleaner removes dirt, grime, and grease. A bucket for water and cleaning solution is necessary. Sponges or rags are needed for wiping down the rocks after cleaning.
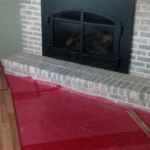
Preparation Materials: Painter's tape protects surrounding surfaces, such as the wall and fireplace mantel. Plastic sheeting or drop cloths protect the flooring from paint splatters. A putty knife or scraper removes loose paint or debris. Mortar repair compound addresses cracks or gaps in the mortar.
Priming and Painting Supplies: A bonding primer, specifically formulated for masonry or stone, ensures proper paint adhesion. High-quality acrylic latex paint in the desired color and finish (matte, satin, or semi-gloss) is essential. Paintbrushes in various sizes (including angled brushes for corners) are required for detailed application. Paint rollers with appropriate nap length (depending on the rock texture) cover larger areas efficiently. Paint trays hold the paint during application. Optional: Faux finishing glazes and tools for creating textured effects.
Miscellaneous Items: Stir sticks mix the paint thoroughly. A ladder provides access to higher areas of the fireplace. Caulk fills any gaps between the fireplace and the wall. A vacuum cleaner removes dust and debris after preparation.
Step-by-Step Painting Instructions
Following a systematic approach is essential for painting a rock fireplace effectively. This section outlines a detailed, step-by-step guide to ensure a professional-looking result.
Step 1: Preparation. Begin by thoroughly cleaning the rock fireplace. Use a stiff-bristled brush and a mild detergent solution to scrub away dirt, grime, and grease. Rinse the rocks with clean water and allow them to dry completely for at least 24 hours. Repair any loose stones or crumbling mortar using a mortar repair compound. Allow the repair compound to cure according to the manufacturer's instructions. Scrape away any loose paint or debris with a putty knife or scraper. Vacuum the fireplace and surrounding area to remove dust and debris. Tape off surrounding surfaces, such as the wall and fireplace mantel, using painter's tape. Cover the flooring with plastic sheeting or drop cloths to protect it from paint splatters.
Step 2: Priming. Apply a bonding primer specifically formulated for masonry or stone. Use a paintbrush or roller to apply a thin, even coat of primer to all the rock surfaces. Pay close attention to crevices and uneven areas. Allow the primer to dry completely according to the manufacturer's instructions. This may take several hours or overnight.
Step 3: Painting. Once the primer is dry, begin painting the rock fireplace with high-quality acrylic latex paint. Apply the paint in thin, even coats, using a paintbrush or roller. Start with the crevices and uneven areas, using a paintbrush to get into tight spaces. Then, use a roller to cover the larger, flat surfaces. Avoid applying too much paint in one coat, as this can lead to drips and runs. Allow the first coat of paint to dry completely according to the manufacturer's instructions. This may take several hours.
Step 4: Second Coat (Optional). Apply a second coat of paint if necessary to achieve the desired coverage and color saturation. Follow the same application techniques as with the first coat. Allow the second coat to dry completely according to the manufacturer's instructions.
Step 5: Faux Finishing (Optional). If desired, apply faux finishing techniques to create a textured or aged look. This can be achieved using various glazes, sponges, or rags. Experiment with different techniques to achieve the desired effect. Allow the faux finish to dry completely according to the manufacturer's instructions.
Step 6: Caulking (Optional). If there are any gaps between the fireplace and the wall, apply caulk to seal them. This will prevent air leaks and improve the overall appearance of the fireplace.
Step 7: Clean Up. Remove the painter's tape and plastic sheeting. Clean up any paint spills. Allow the paint to cure completely for several days before using the fireplace.
Essential Maintenance Tips
Proper maintenance is crucial for preserving the appearance and longevity of a painted rock fireplace. Regular cleaning and preventative measures can help prevent damage and maintain the fireplace's aesthetic appeal.
Clean the painted rock fireplace regularly with a soft cloth and mild detergent solution. Avoid using abrasive cleaners or scrub brushes, as these can damage the paint. Wipe up any spills or splatters immediately to prevent staining. Inspect the fireplace regularly for any signs of damage, such as cracks, chips, or peeling paint. Address any damage promptly to prevent it from worsening. Touch up any chips or scratches in the paint with a small amount of paint. Follow the same application techniques as with the original painting. Re-caulk any gaps between the fireplace and the wall as needed to prevent air leaks and water damage. Avoid placing flammable materials, such as paper or wood, too close to the fireplace. This can create a fire hazard and damage the paint. Consider applying a heat-resistant sealant to the painted surface to protect it from extreme temperatures, especially in areas close to the firebox opening. This is particularly important if the fireplace is used frequently.
The steps outlined above provide a comprehensive guide to painting a rock fireplace. By carefully considering the preparation, materials, and application techniques, a homeowner can transform an outdated fireplace into a stunning focal point that enhances the overall aesthetic of the living space.

Ehow How To S Articles More Discover The Expert In You Fireplace Remodel Painted Rock Fireplaces Stone

Painted Stone Wall In Black 42 Fireplace Styles That Will Add Warmth To Any Space Decoist Remodel Home Makeover

How To Painting The Stone Fireplace White Greige Design

See How I Made Over An Ugly Clunky Stone Veneer Fireplace With Paint

How To Paint A Stone Or Brick Fireplace Easy Diy Building Bluebird

Stone Fireplace Makeover Part 2 Faux Whitewash Organized Ish

Black Painted Fireplace How To Paint Stone

Painting A Lava Rock Wall Mantle Hometalk

How To Paint River Rock For An Updated Look

Farmhouse Family Room With Painted White Fireplace River Rock Tall Fir Fireplaces Home Farm House Living

