Here is an article about painting fireplace mantels, adhering to the given specifications:
Painting Fireplace Mantels: A Comprehensive Guide
Painting a fireplace mantel can dramatically alter the aesthetic of a living space, transforming it from outdated or drab to modern and stylish. This process, when executed carefully, offers a cost-effective way to refresh a room and create a focal point. However, successful fireplace mantel painting requires meticulous planning, proper preparation, and the use of appropriate materials. This article provides a detailed guide to painting fireplace mantels, covering essential aspects from surface preparation to paint selection and application techniques.
Assessing the Existing Mantel and Planning the Project
Before commencing any painting project, a thorough assessment of the existing fireplace mantel is crucial. This involves identifying the material of the mantel (wood, stone, brick, or composite), evaluating its condition, and determining the desired final appearance. Different materials require different preparation and painting techniques. For instance, a wooden mantel might need sanding and priming, while a brick mantel might necessitate a specialized masonry primer.
Consider the existing paint or finish on the mantel. If the existing paint is peeling, cracking, or chipping, it will need to be removed before applying a fresh coat. The removal process can vary depending on the type of paint and the underlying material. Methods include scraping, sanding, or using chemical paint strippers. Proper safety precautions, such as wearing gloves and eye protection, are essential when working with paint strippers.
Planning the project also involves deciding on the color and finish of the paint. The color should complement the existing décor of the room and the overall style of the fireplace. The finish, whether matte, satin, semi-gloss, or gloss, will affect the durability and sheen of the painted surface. Higher gloss finishes are typically more durable and easier to clean but also more reflective, potentially highlighting imperfections.
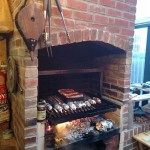
Finally, consider the heat source. While the mantel itself is typically far enough from the firebox to avoid direct heat, some heat exposure should be anticipated. Select paints specifically designed for high temperatures if the mantel is in close proximity to the heat source. Regular interior paints may blister or crack under prolonged heat exposure.
Surface Preparation: The Foundation of a Flawless Finish
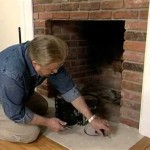
Proper surface preparation is arguably the most important step in painting a fireplace mantel. A poorly prepared surface will result in a paint job that is prone to peeling, chipping, and other imperfections. The preparation process typically involves cleaning, sanding, repairing, and priming the surface.
Begin by thoroughly cleaning the mantel to remove any dust, dirt, grease, or soot. Use a mild detergent and water solution, scrubbing the surface with a sponge or cloth. For stubborn stains, a degreaser may be necessary. Allow the mantel to dry completely before proceeding to the next step.
Sanding is essential for creating a smooth surface and improving paint adhesion. Use sandpaper with varying grits, starting with a coarser grit to remove any imperfections or old paint and progressing to a finer grit to smooth the surface. For wooden mantels, sanding along the grain is crucial to avoid scratching the wood. For brick or stone mantels, use a wire brush or specialized sanding tools designed for masonry.
Repair any cracks, holes, or imperfections in the mantel. Use wood filler for wooden mantels and patching compound for brick or stone mantels. Apply the filler or compound according to the manufacturer's instructions, allowing it to dry completely before sanding it smooth. This will ensure a seamless finish.
Priming is a critical step, especially for wooden or porous surfaces. Primer creates a uniform surface for the paint to adhere to, improves paint coverage, and prevents stains from bleeding through. Choose a primer that is compatible with the type of paint being used and the material of the mantel. Apply the primer evenly, following the manufacturer's instructions, and allow it to dry completely before painting.
Selecting the Right Paint and Applying it Effectively
Choosing the right paint is essential for achieving a durable and aesthetically pleasing finish. Consider factors such as the material of the mantel, the desired color and finish, and the level of heat exposure. Acrylic latex paints are a popular choice for interior painting due to their durability, ease of application, and low odor. Oil-based paints offer excellent durability and a smooth, even finish but require more rigorous cleanup and have a stronger odor.
For brick mantels, masonry paints are specifically designed to adhere to porous surfaces and withstand moisture. These paints are typically breathable, allowing moisture to escape from the brick without causing the paint to peel or blister. Ensure the chosen paint is suitable for interior use and can withstand the temperature fluctuations near a fireplace, even if indirect.
Before applying the paint, thoroughly stir it to ensure a consistent color and viscosity. Use a high-quality brush or roller designed for the type of paint being used. Apply the paint in thin, even coats, avoiding drips or runs. Allow each coat to dry completely before applying the next. Two or three coats are typically necessary to achieve full coverage and a durable finish.
When painting intricate details or hard-to-reach areas, use a smaller brush. For larger, flat surfaces, a roller can provide a smoother and more even finish. Maintain a wet edge to prevent lap marks and ensure a seamless appearance.
After the final coat of paint has dried completely, inspect the mantel for any imperfections. Touch up any areas as needed and allow the paint to cure fully before placing any decorations or objects on the mantel. Curing times can vary depending on the type of paint used, but typically range from a few days to a few weeks.
Special Considerations for Different Mantel Materials
While the basic principles of painting remain consistent, there are specific considerations for each mantel material. Understanding these nuances is crucial for achieving optimal results.
Wooden Mantels: Wood mantels are generally the easiest to paint. However, the type of wood and its existing finish can affect the preparation process. If the wood is unfinished, it may require more priming to prevent the paint from soaking in unevenly. If the existing finish is glossy, it may need to be sanded more thoroughly to create a suitable surface for the paint to adhere to.
Brick Mantels: Brick mantels are porous and require specialized preparation. Clean the brick thoroughly with a wire brush and a masonry cleaner to remove any efflorescence or mineral deposits. Apply a masonry primer specifically designed for brick to seal the surface and prevent moisture from damaging the paint. Use a masonry paint that is breathable and resistant to cracking.
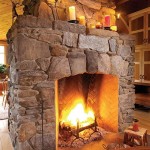
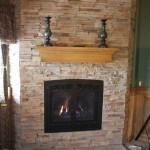
Stone Mantels: Similar to brick, stone mantels require thorough cleaning and a specialized primer. Choose a primer and paint that are compatible with the type of stone, whether it is natural or manufactured. Some stones may be more porous than others, requiring multiple coats of primer and paint. Consider the texture of the stone when selecting a brush or roller. A textured roller may be necessary to reach into the crevices of a rough stone surface.
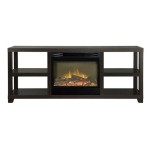
Composite Mantels: Composite mantels, made from materials like MDF or resin, offer a smooth and uniform surface that is generally easy to paint. However, it is essential to use a primer specifically designed for composite materials to ensure proper adhesion. Avoid using harsh chemicals or solvents that could damage the composite material.
Safety Precautions and Clean-Up
Painting projects require careful attention to safety. When working with paints, primers, and cleaning solutions, always wear appropriate personal protective equipment (PPE), including gloves, eye protection, and a respirator. Work in a well-ventilated area to minimize exposure to fumes. Dispose of paint cans, brushes, and rags properly according to local regulations.
Before starting the project, protect the surrounding areas with drop cloths or plastic sheeting. Tape off any areas that you do not want to paint, such as the firebox opening or the surrounding wall. This will help to prevent accidental spills and splatters.
After completing the painting project, clean the brushes and rollers thoroughly with soap and water (for latex paints) or mineral spirits (for oil-based paints). Store the paint cans properly to prevent them from drying out or leaking. Allow the painted mantel to dry and cure completely before placing any decorations or using the fireplace. Proper clean-up ensures a safe and tidy workspace and prolongs the life of your painting tools.

Mantel Makeover With Paint

Pearl Mantels 56 In X 42 Unfinished Paint And Stain Grade Interior Opening Full Surround Fireplace Mantel Rps56110d The Home Depot

How To Paint Your Mantel And Get Clean Lines Postcards From The Ridge

Paint Color Picks For Magnificent Mantels Tinted Sherwin Williams

Diy Fireplace Makeover Part Two Kilz Priming And Painting Remodelaholic
:max_bytes(150000):strip_icc()/208368922_866049550648380_5600741727305574454_n-533ffc956ce04a8eaa7c81d2f7eb1fdd.jpg?strip=all "30 Gorgeous Painted Fireplace Ideas")
30 Gorgeous Painted Fireplace Ideas

Tiny Bits Of Happiness
:max_bytes(150000):strip_icc()/195949384_533489974504579_3035995865627682669_n-3c30dc0791c74ced9847f823ec3a55d1.jpg?strip=all "30 Gorgeous Painted Fireplace Ideas")
30 Gorgeous Painted Fireplace Ideas

Fireplace Mantel Before After Surrounds Oak Old Home Remodel

Smouldering Fireplace Mantels To Heat Up Your Night Laurel Home
Related Posts