Installing Gas Logs in an Existing Fireplace
Converting an existing wood-burning fireplace to utilize gas logs offers a blend of convenience and aesthetic appeal. Gas logs eliminate the need to source, store, and manage firewood while providing a visually similar ambiance. This article provides a comprehensive guide on the essential steps involved in installing gas logs in an existing fireplace, ensuring safety and optimal performance. It is crucial to emphasize that any gas appliance installation, including gas logs, may require permits and inspections according to local building codes. It is highly recommended to consult with a qualified professional gas fitter or contractor before commencing any work.
Before beginning the installation process, several preliminary steps are necessary to ensure compatibility and safety. These steps include assessing the fireplace for suitability, selecting the appropriate gas log set, and gathering the necessary tools and materials.
Assessing the Existing Fireplace
The initial step involves a thorough inspection of the existing fireplace. This inspection aims to determine if the fireplace is structurally sound and meets the requirements for gas log installation. Key considerations include:
Flue Condition: The flue, or chimney, must be in good working order and free from obstructions. A professional chimney sweep should inspect the flue to ensure it is clean and properly functioning. Creosote buildup from previous wood-burning can pose a fire hazard if not addressed. Furthermore, the draft should be tested to confirm adequate ventilation. A properly functioning flue is critical for safely venting combustion byproducts, such as carbon monoxide.
Firebox Dimensions: The firebox, the interior space where the fire burns, must be large enough to accommodate the selected gas log set. Dimensions should be carefully measured and compared to the manufacturer's specifications for the chosen log set. Overcrowding the firebox can restrict airflow and affect combustion efficiency. Clearance requirements for the gas logs, including the distance from the logs to the sides and top of the firebox, must be strictly adhered to.
Gas Line Availability: A gas line must be accessible near the fireplace. If a gas line is not already present, one will need to be installed by a qualified gas fitter. Existing gas lines must be inspected for leaks and proper sizing to ensure adequate gas flow to the log set. The gas line should have a shut-off valve in close proximity to the fireplace for safety and maintenance purposes.
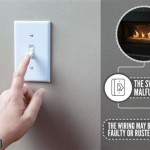
Fireplace Damper: The role of the fireplace damper is dependent on the type of gas logs being installed. For vented gas logs, the damper must be permanently propped open to ensure proper ventilation. This prevents the buildup of carbon monoxide inside the home. A damper clamp or other locking mechanism should be used to secure the damper in the open position. For ventless gas logs, the damper should be closed to avoid heat loss up the chimney. The manufacturer's instructions will specify the correct damper position.
Selecting the Appropriate Gas Log Set
Choosing the correct gas log set is paramount for both functionality and aesthetics. Gas log sets are available in two main types: vented and ventless (or vent-free). The choice depends on individual preferences, fireplace characteristics, and local regulations.
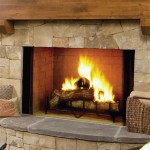
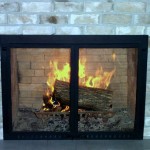
Vented Gas Logs: Vented gas logs are designed to resemble a real wood-burning fire and produce realistic flames. They require the fireplace damper to be permanently open to allow for proper ventilation of combustion gases. Vented logs produce more heat than ventless logs, but a significant portion of the heat is lost up the chimney. They are primarily for aesthetic purposes and are not intended to be a primary heating source.
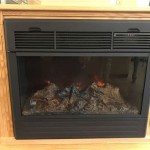
Ventless Gas Logs: Ventless gas logs, as the name suggests, do not require a permanently open damper. They are designed to burn cleanly and efficiently, releasing heat into the room. Ventless logs are typically equipped with an Oxygen Depletion Sensor (ODS) that shuts off the gas supply if oxygen levels in the room become too low. While ventless logs offer greater heating efficiency, they may produce a slight odor and can increase humidity levels. Some jurisdictions may have restrictions or outright prohibitions on the use of ventless gas logs.
When selecting a gas log set, it is essential to consider the following factors:
Firebox Size: The gas logs must fit comfortably within the firebox without overcrowding. Refer to the manufacturer's specifications for recommended firebox dimensions.
Gas Type: Gas log sets are designed to operate on either natural gas or propane. Ensure that the selected log set is compatible with the available gas supply.
BTU Rating: The British Thermal Unit (BTU) rating indicates the amount of heat the log set produces per hour. Choose a BTU rating that is appropriate for the size of the room and desired heating effect.
Ignition System: Gas log sets are available with various ignition systems, including manual, spark, and electronic ignition. Electronic ignition systems offer the convenience of remote control operation.
Aesthetics: Gas logs are available in a variety of styles and finishes to complement different decor styles. Consider the desired look and choose a log set that matches the overall aesthetic of the room.
Gathering Tools and Materials
Having the necessary tools and materials readily available will streamline the installation process. Essential tools and materials include:
Pipe Wrench: Used for tightening and loosening gas pipes and fittings.
Adjustable Wrench: Provides versatility for various nut and bolt sizes.
Screwdrivers (Phillips and Flathead): For securing screws and fasteners.
Level: Ensures that the gas log burner is properly aligned.
Leak Detector Solution: Used to detect gas leaks in connections.
Pipe Joint Compound or Teflon Tape: Applied to pipe threads to create a gas-tight seal.
Flexible Gas Connector: Connects the gas supply line to the gas log burner.
Shut-Off Valve: Installed on the gas supply line for safety and maintenance.
Gas Log Set: The selected gas log set, including the burner, logs, and ember material.
Damper Clamp (for Vented Logs): Secures the fireplace damper in the open position.
Safety Glasses and Gloves: Provides personal protection during installation.
Once the fireplace has been assessed, the appropriate gas log set has been selected, and the tools and materials have been gathered, the installation process can begin.
The installation process involves several key steps, including preparing the fireplace, installing the gas line connection, positioning the burner, arranging the logs, and testing for leaks. It is important to follow the manufacturer's instructions carefully during each step.
Preparing the Fireplace
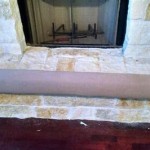
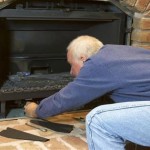
Before installing the gas logs, the fireplace firebox must be thoroughly cleaned. Remove any ash, debris, or leftover firewood from previous wood-burning fires. This prepares a clean and safe workspace for the installation process. A wire brush can be used to scrub the firebox walls and remove any loose soot or creosote. Ensure that the firebox floor is level and stable. It is also prudent to visually inspect the firebox for any cracks or damage, and address them accordingly before proceeding.
For vented log sets, the damper must be permanently propped open. Use a damper clamp or other locking mechanism to secure the damper in the fully open position. This ensures adequate ventilation and prevents the buildup of carbon monoxide. For ventless log sets, ensure the damper is closed tightly to prevent heat loss up the chimney.
Installing the Gas Line Connection
This step involves connecting the gas supply line to the gas log burner. If a gas line is not already present, a qualified gas fitter must install one. The gas line should be sized appropriately to deliver the required gas flow for the gas log set. Install a shut-off valve on the gas supply line in close proximity to the fireplace. This allows for easy shut-off of the gas supply in case of emergency or maintenance. Ensure that the gas supply is turned off at the main gas meter before commencing any work on the gas line.
Connect the flexible gas connector to the gas supply line using pipe joint compound or Teflon tape on the threads to create a gas-tight seal. Similarly, connect the other end of the flexible gas connector to the gas log burner. Tighten all connections securely using a pipe wrench and adjustable wrench.
Positioning the Burner and Arranging the Logs
The gas log burner should be positioned according to the manufacturer's instructions. Ensure that the burner is level using a level. Adjust the burner position as needed to achieve a level surface. Secure the burner in place using screws or fasteners, if provided. Incorrect positioning of the burner can affect the flame pattern and combustion efficiency.
Arrange the gas logs on top of the burner according to the manufacturer's instructions. The logs are typically numbered or marked to indicate their correct placement. Proper log placement is crucial for achieving a realistic flame appearance and ensuring proper combustion. Do not obstruct the burner ports with the logs. Distribute the provided ember material around the base of the logs to enhance the visual effect.
Testing for Leaks
After all connections have been made, it is essential to test for gas leaks. Turn on the gas supply at the shut-off valve. Apply leak detector solution to all gas connections, including the shut-off valve, flexible gas connector, and burner connections. Look for bubbles forming, which indicates a gas leak. If a leak is detected, turn off the gas supply immediately and tighten the connection. Reapply leak detector solution and check again. If the leak persists, consult a qualified gas fitter. Do not attempt to operate the gas logs until all leaks have been resolved.
Once the leak test is complete and no leaks are detected, the gas logs can be ignited according to the manufacturer's instructions. Observe the flame pattern and adjust the gas flow as needed to achieve the desired flame appearance. Ensure that the flames are burning cleanly and efficiently.
The installation of gas logs in an existing fireplace can provide a convenient and aesthetically pleasing alternative to wood-burning fires. Adhering to the steps outlined in this guide, consulting with qualified professionals, and prioritizing safety can ensure a successful and enjoyable gas log experience. Always consult local building codes and regulations before starting any gas appliance installation.

How To Select And Install A Gas Fireplace Log Set Fireplaces Direct Learning Center

How To Select And Install A Gas Fireplace Log Set Fireplaces Direct Learning Center

Can I Install Gas Logs In My Existing Fireplace Thomas Bros Propane

How To Put In A Gas Log Set For Fireplace

Adding A Gas Fireplace To An Existing Home Just Log Fires

We Install Gas Logs Amarillo Tx West Chimney

Gas Log Set S Installation Vented Logs For Your Fireplace

Convert A Wood Fireplace To Gas Full Service Chimney

Installing Vent Free Gas Log Set

Convert To Gas Installing Fireplace Inserts Doctor Flue
Related Posts