Installing a Fireplace Mantel: A Step-by-Step Guide
A fireplace mantel serves both aesthetic and functional purposes, providing a decorative touch to your living space while also creating a focal point around the fireplace. Installing a mantel may seem like a daunting task, but it's a manageable project that can be completed with the right tools, materials, and guidance.
Materials Required:
Before you begin, gather the following materials:
- Fireplace mantel of your choice
- Spirit level
- Measuring tape
- Screws or nails appropriate for the mantel and wall material
- Drill or screwdriver
- Masonry adhesive (if mounting on brick or stone)
Step 1: Determine the Mantel's Placement
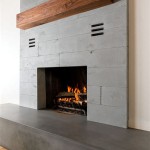
First, determine where you want to place the mantel. It should be centered over the fireplace opening and at a height that allows it to be admired without obstructing the view of the fire or blocking the heat. Mark the desired location on the wall using a pencil or tape.
Step 2: Prepare the Wall
If you are mounting the mantel on drywall, ensure it is securely anchored to the wall studs. For brick or stone fireplaces, use masonry adhesive to create a solid bond between the mantel and the surface.
Step 3: Install Support Brackets (Optional)
Depending on the weight of the mantel and the strength of the wall, consider using support brackets for added stability. Position the brackets according to the manufacturer's instructions and secure them to the wall with appropriate hardware.
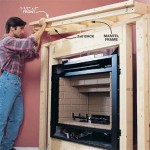
Step 4: Mount the Mantel
Align the mantel with the marked location on the wall. Use a spirit level to ensure it is level. Depending on the type of mantel and wall material, secure it using screws or nails. Drive them through the mantel's back into the wall studs or support brackets.
Step 5: Apply Masonry Adhesive (for Brick/Stone)
If you are mounting the mantel on a brick or stone fireplace, apply a generous layer of masonry adhesive to the back of the mantel. Carefully position it on the wall and press firmly to ensure a secure bond.
Additional Tips:
For a professional finish, use wood filler or caulk to fill any gaps between the mantel and the wall or ceiling.
Consider painting or staining the mantel to match your decor and add a personal touch.
If you are unsure about any step of the installation process, consult a professional for assistance.
By following these steps and paying attention to detail, you can successfully install a fireplace mantel that will enhance the beauty and functionality of your living space.

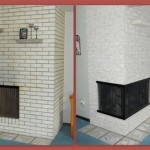
Fireplace Mantel Installation Before And After

Fireplace Mantel Installation Tips How To Antique Woodworks

How To Install A Floating Mantle The Easy Way In Just One Afternoon

Installing A Heavy Wood Mantel 2024 Beginners Guide

How To Install A Floating Mantle The Easy Way In Just One Afternoon

Fireplace Mantels Installation Care Redwood Burl Inc

Installing A Barn Beam Mantel Before The Stone Is Best Option Here One Of Our Custom Fireplace Mantels Insta Home Remodel

Fireplace Mantel Installation Kit Brick Custom Made Mantelsiguana Art Design

How To Install A Floating Mantle The Easy Way In Just One Afternoon

Fireplace Mantels Installation Care Redwood Burl Inc
Related Posts


