Installing Tile Over a Marble Fireplace: A Comprehensive Guide
Updating a fireplace is a common home improvement project aimed at enhancing aesthetics and potentially increasing property value. While marble fireplaces offer a classic and elegant look, homeowners may choose to install tile over them for various reasons, including design preferences, cost considerations, or addressing pre-existing damage. Successfully tiling over marble requires careful preparation, appropriate materials, and precise execution. This article provides a comprehensive guide to installing tile over a marble fireplace, outlining the necessary steps and considerations for a durable and visually appealing result.
Assessing the Suitability of the Marble Surface
Before commencing any installation, a thorough assessment of the existing marble surface is crucial. This evaluation dictates whether the project is feasible and informs the selection of appropriate materials and techniques. Several factors need careful consideration:
Stability and Condition of the Marble: The marble must be structurally sound and free of significant cracks, loose pieces, or crumbling areas. Any pre-existing damage must be addressed before tile installation. This may involve repairing cracks with epoxy or replacing severely damaged sections. Failure to address underlying structural issues will compromise the integrity of the tile installation, leading to cracking, loosening, and eventual failure.
Surface Cleanliness and Preparation: Marble surfaces are often treated with sealants or polishes that can hinder the adhesion of thin-set mortar. Thorough cleaning is essential to remove any waxes, sealants, oils, or debris present on the surface. Degreasing agents designed for stone surfaces are recommended. After cleaning, a light sanding with a coarse-grit sandpaper (around 60-80 grit) can further improve adhesion by providing a more porous surface for the mortar to grip. However, extreme caution should be exercised to avoid scratching or damaging the marble. The surface must be meticulously cleaned again after sanding to remove any residual dust.
Marble Porosity and Moisture Content: Marble is a porous material, and its moisture content can affect the curing process of the thin-set mortar. It is important to ensure the marble is relatively dry before installation. This may involve allowing the marble to air dry for several days or using a dehumidifier to reduce moisture levels, particularly in humid environments. Testing the marble's porosity using a small water droplet can provide insights into its absorbency. If the water absorbs quickly, indicating high porosity, a primer may be necessary to prevent the marble from drawing moisture from the mortar too rapidly, which can weaken the bond.
Understanding Expansion and Contraction: Marble and tile expand and contract at different rates in response to temperature fluctuations. This differential movement can lead to stress and cracking in the tile installation if not properly accounted for. Utilizing a flexible thin-set mortar and incorporating expansion joints are crucial for accommodating these movements. Expansion joints are gaps left between tiles, typically filled with a flexible sealant, that allow for movement without causing stress on the surrounding tiles or the marble substrate.
Selecting Appropriate Materials for Tile Installation
The selection of appropriate materials is paramount to the success and longevity of the tile installation. Using incompatible materials can lead to adhesion problems, cracking, and premature failure of the project. Key materials include:
Thin-Set Mortar: A modified thin-set mortar designed for use on non-porous surfaces is essential. Look for mortars specifically formulated for adhering tile to marble or other dense materials. These mortars typically contain polymers that enhance adhesion and flexibility. Carefully follow the manufacturer's instructions for mixing and application. Avoid using unmodified thin-set mortar, as it may not provide sufficient bond strength on the smooth surface of the marble.
Grout: The choice of grout depends on the type of tile being installed and the desired aesthetic. Epoxy grout is generally recommended for its durability, stain resistance, and waterproof properties. However, it can be more challenging to work with than cement-based grout. Cement-based grout is a more economical option, but it requires sealing to prevent staining and water absorption. Consider the color of the grout to complement the tile and the overall design of the fireplace. A grout sealer should always be applied to cement-based grout to protect it from stains and moisture damage.
Tile Type: The type of tile chosen should be compatible with fireplace applications. Porcelain tile is a popular choice due to its durability, heat resistance, and wide range of styles and colors. Natural stone tiles, such as slate or granite, can also be used, but they may require more maintenance and sealing. Glass tiles can add a unique decorative element, but they may be more prone to cracking in high-heat areas. Consider the weight of the tile, as heavier tiles may require additional support or reinforcement of the marble substrate.
Primer (Optional): Depending on the porosity of the marble, a primer may be necessary to improve adhesion. Use a primer specifically designed for use with thin-set mortar and marble. The primer helps to create a more uniform surface for the mortar to bond to and prevents the marble from drawing moisture from the mortar too quickly. Follow the manufacturer's instructions for application and drying time.
Sealer: A high-quality stone sealer is essential for protecting the marble from stains and moisture damage, even after the tile is installed. Apply the sealer to any exposed marble surfaces, such as the sides or edges of the fireplace surround. Choose a sealer that is specifically designed for marble and follow the manufacturer's instructions for application. Reapply the sealer periodically to maintain its protective properties.
Step-by-Step Installation Process
The installation process requires careful attention to detail and adherence to best practices to ensure a professional and long-lasting result. The following steps outline the recommended procedure:
Preparation and Layout: Thoroughly clean the marble surface as described earlier. Dry-fit the tiles to determine the layout and ensure proper spacing. Use tile spacers to maintain consistent grout lines. Mark the layout with a pencil, including the placement of any cuts. Pay attention to symmetry and balance in the layout. Avoid small slivers of tile at the edges, as they can be difficult to install and may not look aesthetically pleasing. Adjust the layout as needed to achieve the desired appearance.
Applying Thin-Set Mortar: Mix the thin-set mortar according to the manufacturer's instructions. Use a notched trowel to apply the mortar to the marble surface, covering a manageable area at a time. The size of the trowel notch will depend on the size and type of tile being used. Ensure that the mortar is applied evenly and consistently. Avoid applying too much mortar, as this can cause the tiles to shift or become uneven. Do not let the mortar skin over before setting the tiles.
Setting the Tiles: Press each tile firmly into the mortar, using a slight twisting motion to ensure good contact. Use tile spacers to maintain consistent grout lines. Check the level of each tile with a level and adjust as needed. Remove any excess mortar that squeezes out between the tiles. Work in small sections, allowing the mortar to set slightly before moving on to the next section. Avoid walking on the tiles until the mortar has fully cured. Use a rubber mallet to gently tap the tiles into place if needed.
Cutting Tiles: Use a wet saw to cut tiles to fit around the fireplace opening or any other obstructions. Measure carefully and make precise cuts to ensure a clean and professional finish. Wear safety glasses and gloves when using a wet saw. Smooth the cut edges of the tiles with a tile file or sandpaper to prevent chipping. Consider hiring a professional tile installer if you are not comfortable using a wet saw.
Grouting: After the mortar has fully cured (typically 24-48 hours), remove the tile spacers and clean the grout lines. Mix the grout according to the manufacturer's instructions. Apply the grout to the tile surface, working it into the grout lines with a grout float. Use a damp sponge to remove excess grout from the tile surface. Rinse the sponge frequently in clean water. Allow the grout to dry slightly, then buff the tile surface with a clean, dry cloth to remove any remaining grout haze. Follow the manufacturer's instructions for curing time. Apply a grout sealer to cement-based grout to protect it from stains and moisture damage.
Sealing (If Applicable): After the grout has cured, apply a sealer to the tile and any exposed marble surfaces. This will help to protect the materials from stains and moisture damage. Choose a sealer that is specifically designed for the type of tile and marble being used. Follow the manufacturer's instructions for application. Reapply the sealer periodically to maintain its protective properties.
Expansion Joints: If applicable, install expansion joints at appropriate intervals. These joints allow for movement of the materials due to temperature fluctuations and can prevent cracking. Fill the expansion joints with a flexible sealant that is compatible with the tile and marble. Follow the manufacturer's instructions for application.
Successfully installing tile over a marble fireplace requires careful planning, meticulous execution, and the use of appropriate materials. By thoroughly assessing the existing marble surface, selecting compatible materials, and following the recommended installation process, homeowners can achieve a durable and aesthetically pleasing result that enhances the beauty and value of their home.

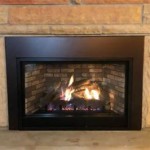
How To Tile Over A Marble Fireplace Surround Porch Daydreamer

How To Tile Over A Marble Fireplace Surround Porch Daydreamer

How To Tile Over A Marble Fireplace Surround Porch Daydreamer

How To Tile Over An Existing Fireplace Surround My Woodlands Life

How To Tile Over A Marble Fireplace Surround Porch Daydreamer

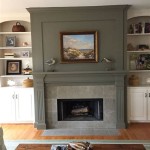
Tiling A Marble Herringbone Pattern Young House Love

How To Add Herringbone Marble Tile A Fireplace Southern Hospitality

Fireplace Makeover How To Tile Over A Surround Love Remodeled

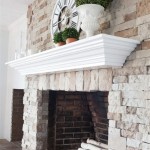
How To Seal Marble Shine Your Light

Our 200 Marble Fireplace Makeover Young House Love
Related Posts