Installing a Fireplace Mantel: A Comprehensive Guide
A fireplace mantel serves as a focal point in a room, adding both aesthetic appeal and functional shelf space. Installing a fireplace mantel, while potentially achievable as a DIY project, requires careful planning and precise execution to ensure safety and stability. This article provides a comprehensive guide to the installation process, covering necessary tools, preparation steps, and various mounting techniques.
Before commencing the installation, several essential factors must be considered. The type of mantel, the material of the fireplace surround, and local building codes all play a crucial role in determining the appropriate installation method. Neglecting these considerations can result in structural instability or code violations.
Understanding Mantel Types and Materials
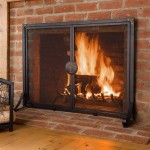
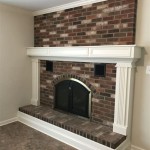
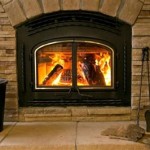
Fireplace mantels are available in a variety of materials, each with its own characteristics and installation requirements. Wood mantels are popular for their warmth and versatility, but require proper sealing to prevent warping or cracking from heat exposure. Stone mantels, such as marble or granite, offer a more formal and durable option, but their weight necessitates robust support systems. Cast iron mantels offer a classic look and are fire-resistant, but can be susceptible to rust if not properly maintained.
The choice of mantel material should complement the existing fireplace surround and the overall aesthetic of the room. Consider the weight of the mantel, as heavier materials will require more substantial anchoring. Ensure the chosen mantel meets safety standards regarding proximity to the fireplace opening.
Preparing for Installation: Safety First
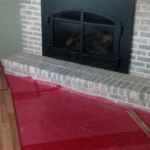
Safety is paramount throughout the installation process. Before beginning any work, ensure the fireplace is completely cool. Disconnect any gas lines or electrical connections associated with the fireplace if necessary. Gather the necessary tools, including a stud finder, level, drill, masonry bits (if working with brick or stone), wood screws, construction adhesive, safety glasses, and work gloves. Clear the area around the fireplace to provide ample workspace.
Thoroughly inspect the fireplace surround for any existing damage or instability. Repair any cracks or loose bricks before proceeding. Determine the desired height of the mantel. A general guideline is to position the mantel at least 12 inches above the top of the fireplace opening. Refer to local building codes for specific height requirements. Mark the desired mantel location on the wall using a level to ensure accuracy.
Installation Techniques: Attaching the Mantel
The method used to attach the mantel depends on the type of mantel and the material of the fireplace surround. For wood surrounds, the mantel can often be directly attached to the studs in the wall using wood screws. Use a stud finder to locate the studs and mark their positions. Drill pilot holes through the back of the mantel and into the studs. Apply construction adhesive to the back of the mantel for added stability, then drive the screws into the pilot holes.
For brick or stone surrounds, masonry anchors are required. Using a masonry drill bit, drill holes into the brick or stone at the marked locations. Insert the masonry anchors into the holes. Attach the mantel to the anchors using appropriate screws. Ensure the screws are long enough to securely grip the anchors. Consider using a ledger board, a piece of wood attached to the wall below the mantel, to provide additional support, especially for heavier mantels.
In some cases, a French cleat system can be used. A French cleat consists of two interlocking pieces of wood, one attached to the wall and the other to the back of the mantel. This system provides a strong and secure mounting solution while allowing for easy removal of the mantel if necessary. Select a high-quality French cleat system rated for the weight of the mantel.
Once the mantel is installed, carefully inspect it to ensure it is level, stable, and securely attached. Fill any gaps between the mantel and the surround with caulk or wood filler. Apply touch-up paint or stain as needed to conceal any exposed hardware.
Addressing common issues during the installation is crucial for achieving a professional and safe result. If the wall is not perfectly flat, shims can be used behind the mantel to ensure it sits flush against the surface. If the existing fireplace surround is uneven, consider adding a backer board to create a level surface for the mantel to rest upon. Always double-check measurements and use a level throughout the process to avoid alignment problems.
Maintaining the installed mantel depends on the material. Wood mantels require regular dusting and may need to be resealed periodically. Stone mantels can be cleaned with a mild detergent and water. Cast iron mantels should be inspected for rust and treated with a rust inhibitor as needed. Regularly inspect the mantel for any signs of instability or damage and make repairs promptly.

Fireplace Mantel Installation Before And After

How To Install A Floating Mantle The Easy Way In Just One Afternoon

Fireplace Mantels Installation Care Redwood Burl Inc

How To Install A Fireplace Mantel 14 Steps With S

How To Install And Decorate A Wooden Fireplace Mantel Vintage Wood Forged Iron

How To Install A Fireplace Mantel Howstuffworks

Install Fireplace Mantel Bracket Step By Guide

Fireplace Mantels Installation Care Redwood Burl Inc

How To Install A Fireplace Mantel

Guide Mantel Installation On A Stone Fireplace
Related Posts