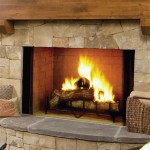
How To Tile a Metal Fireplace Surround
Tiling a metal fireplace surround offers a substantial aesthetic upgrade, transforming a utilitarian feature into a focal point of a room. This project combines decorative appeal with practical considerations, as the tiling adds a layer of insulation and protection to the metal surface. While seemingly complex, tiling a metal fireplace surround is achievable with careful planning, the right materials, and methodical execution. This article provides a comprehensive guide to successfully completing such a project.
Preparation is Paramount
Thorough preparation is the cornerstone of a successful tiling project, particularly when adhering tiles to a metal surface. Metal, being non-porous, requires specialized attention to ensure proper adhesion and longevity of the tiled surface. The following steps are critical:
Surface Cleaning and Preparation: Begin by thoroughly cleaning the metal surround. Remove any existing rust, paint flakes, or debris using a wire brush or sandpaper. The goal is to create a clean, even surface for optimal bonding. Following the initial cleaning, degrease the metal using a suitable solvent, such as mineral spirits or denatured alcohol. This ensures that any residual oils or contaminants are removed, promoting better adhesion for the primer and subsequent layers.
Priming with Metal Primer: Metal surfaces are notoriously difficult to bond to directly with thin-set mortar. Applying a high-quality metal primer is crucial. Select a primer specifically designed for non-ferrous metals or one that offers excellent adhesion to smooth surfaces. Apply the primer evenly, following the manufacturer's instructions regarding application thickness and drying time. Typically, two coats of primer are recommended, allowing each coat to dry completely before applying the next. This creates a stable base for the mortar and tile.
Planning the Layout: Before applying any mortar, dry-fit the tiles to determine the optimal layout. This step allows for adjustments to minimize cuts and ensure a visually balanced appearance. Consider the placement of full tiles and any necessary cuts, paying attention to areas around corners or openings. Use tile spacers to maintain consistent grout lines throughout the surround. Mark the layout on the primed metal surface using a pencil, providing a visual guide for tile placement.
Adhering the Tiles
Selecting the appropriate adhesive and applying it correctly are vital for ensuring the tiles remain securely affixed to the metal surface. The unique properties of metal and the heat generated by a fireplace necessitate specific materials and techniques.
Choosing the Right Mortar: Opt for a high-quality modified thin-set mortar specifically designed for non-porous surfaces. These mortars contain polymers that enhance adhesion and flexibility, allowing them to accommodate the expansion and contraction of the metal due to temperature fluctuations. Avoid using standard thin-set mortars as they may not provide sufficient bonding strength for metal applications. Consult the mortar manufacturer's specifications for optimal performance.
Applying the Mortar: Mix the thin-set mortar according to the manufacturer's instructions, ensuring a smooth, consistent consistency. Using a notched trowel of the correct size (as recommended for the chosen tile size), apply the mortar to the primed metal surface, covering a small area at a time. Hold the trowel at a 45-degree angle to create ridges in the mortar, which enhance the bond with the tiles. Press each tile firmly into the mortar, using a slight twisting motion to ensure full contact and proper adhesion. Insert tile spacers between tiles to maintain consistent grout lines.
Leveling and Alignment: Use a level to ensure that the tiles are aligned horizontally and vertically. Make any necessary adjustments while the mortar is still wet. Periodically check the overall appearance and alignment of the tiling to ensure a professional finish. Clean any excess mortar from the tile surfaces with a damp sponge before it hardens. Allow the mortar to cure completely according to the manufacturer's instructions, typically 24-48 hours, before proceeding with grouting.
Grouting and Sealing
Grouting fills the gaps between tiles, providing a finished look and preventing moisture from penetrating the underlying layers. Sealing the grout protects it from stains and enhances its durability. Proper grout selection and application are crucial for the longevity of the tiled surface.
Selecting the Grout: Choose a grout that is suitable for the size of the grout lines and the type of tile used. Epoxy grout is an excellent option for fireplace surrounds due to its water resistance, stain resistance, and durability. However, it can be more challenging to work with than cement-based grout. Cement-based grout is a more traditional and readily available option, but it requires sealing to protect it from moisture and stains.
Applying the Grout: Mix the grout according to the manufacturer's instructions, ensuring a smooth, consistent consistency. Using a grout float, apply the grout to the tile surface, pressing it firmly into the grout lines. Work diagonally across the tiles to ensure that the grout fills all the gaps completely. Remove excess grout from the tile surfaces with the grout float.
Cleaning and Sealing: After the grout has partially set, use a damp sponge to clean the tile surfaces, removing any remaining grout residue. Rinse the sponge frequently and avoid using excessive water, which can weaken the grout. Allow the grout to cure completely according to the manufacturer's instructions, typically 24-72 hours. Once the grout is fully cured, apply a grout sealer to protect it from stains and moisture. Apply the sealer according to the manufacturer's instructions, typically with a brush or applicator pad. Allow the sealer to dry completely before using the fireplace.
By meticulously following these steps, individuals can successfully tile a metal fireplace surround, enhancing both its aesthetic appeal and its functional performance. Careful attention to surface preparation, adhesive selection, and grouting techniques will contribute to a durable and visually pleasing result that will endure for years to come.

Installing Ceramic Tile Over Black Metal Fireplace Surround Advice Forums John Bridge

Right Kind Of Thinset To Attach Tile Metal Fireplace Ceramic Advice Forums John Bridge

Tiling Over Fireplace Metal Box Surround Help Ceramic Tile Advice Forums John Bridge

How To Personalise Your Cast Iron Fire With Tile Inserts Direct Fireplaces
Tiling Around A Prefab Fireplace Ceramic Tile Advice Forums John Bridge

Fireplace Makeover How To Tile Over A Surround Love Remodeled

A Mosaic Tile Fireplace Surround Art Renovation

How To Personalise Your Cast Iron Fire With Tile Inserts Direct Fireplaces
/102661017-6a23c040b71843379188b96b21ac1a08.jpg?strip=all "How To Tile A Fireplace")
How To Tile A Fireplace

Fireplace Makeover How To Tile Over A Surround Love Remodeled