How to Tile a Fireplace Surround and Hearth
Tiling a fireplace surround and hearth is a rewarding home improvement project that can dramatically enhance the aesthetic appeal of a living space. It allows for customization, enabling homeowners to select tiles that complement their existing décor and personal style. This process, while manageable for experienced DIYers, requires meticulous planning, careful execution, and adherence to safety guidelines. This article provides a comprehensive guide to tiling a fireplace surround and hearth, covering essential preparation, application techniques, and best practices for achieving a professional-looking finish.
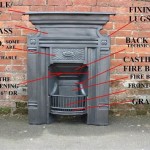
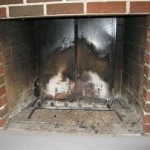
Before embarking on this project, it's crucial to understand the specific requirements related to fire safety. Local building codes often dictate the materials acceptable for use around fireplaces, especially those that burn solid fuels. Consulting with a building inspector or a qualified contractor is recommended to ensure compliance with all applicable regulations. Additionally, a thorough assessment of the existing fireplace structure is necessary to determine its suitability for tiling. Any structural deficiencies must be addressed before proceeding with the tiling process.
Preparation: Laying the Foundation for Success
The preparation phase is arguably the most important aspect of tiling a fireplace. A well-prepared surface ensures proper adhesion, prevents future tile failures, and contributes to the overall longevity of the tiled surround and hearth. This phase encompasses several critical steps, including surface cleaning, material selection, and the application of a suitable underlayment.
The first step involves thoroughly cleaning the existing fireplace surround and hearth. Remove any loose paint, debris, soot, or old adhesive. A wire brush, scraper, and vacuum cleaner are essential tools for this task. For surfaces coated with grease or residue, a degreasing cleaner may be necessary. Ensure the surface is completely dry before proceeding to the next step.
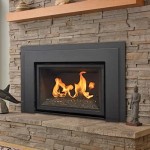
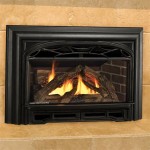
Material selection is a critical consideration. Tiles intended for fireplace surrounds and hearths should be heat-resistant and non-combustible. Porcelain, ceramic, and natural stone tiles are commonly used. The choice depends on personal preference, budget, and the overall aesthetic desired. Consider the size and shape of the tiles in relation to the dimensions of the surround and hearth. Larger tiles can reduce the number of grout lines, creating a more seamless appearance, while smaller tiles offer greater design flexibility. It’s also important to calculate the amount of tile needed, adding at least 10% extra for cuts and breakage. This prevents running out of material mid-project and ensures a consistent supply in case of future repairs.
Selecting the appropriate mortar and grout is also important. Use a modified thin-set mortar specifically designed for tiling over masonry or concrete. The type of grout should also be resistant to cracking and staining. Epoxy grout is a durable option, although it can be more difficult to work with than cementitious grout. Choose a grout color that complements the tiles and the overall design. Purchasing high-quality tools such as a notched trowel, tile cutter, level, sponge, and grout float is also recommended for a clean and professional installation.
Applying an underlayment, such as cement board, provides a stable and durable surface for the tiles. Cement board is resistant to moisture and heat, making it an ideal choice for fireplace applications. Cut the cement board to the appropriate size using a utility knife or a saw. Secure the cement board to the existing fireplace structure using screws designed for masonry. Ensure the cement board is flush and level before proceeding to the tiling process. If the hearth is uneven, a self-leveling compound may be necessary to create a smooth surface.
Application: Precise Tile Installation
The application phase involves the precise and careful installation of the tiles onto the prepared surface. This stage requires patience, attention to detail, and adherence to established tiling techniques. Proper mortar application, tile alignment, and spacing are crucial for achieving a professional and aesthetically pleasing result.
Begin by dry-laying the tiles to plan the layout and ensure proper fit. This step allows for adjustments to be made before applying the mortar. Determine the starting point, typically the center of the hearth or surround. Use a level and a measuring tape to establish a grid pattern. Mark the grid lines with a pencil or chalk line. This ensures the tiles are aligned correctly and minimizes the need for excessive cuts.
Mix the thin-set mortar according to the manufacturer's instructions. Use a notched trowel to apply a thin, even layer of mortar to the surface, covering only a small area at a time. The size of the trowel notch depends on the size and type of tile. Press each tile firmly into the mortar, using a slight twisting motion to ensure good adhesion. Use tile spacers to maintain consistent grout lines. The width of the grout lines depends on the desired aesthetic and the size of the tiles. Regularly check the level of the tiles with a level and make adjustments as needed.
When cutting tiles, use a wet saw or a tile cutter. A wet saw provides cleaner and more accurate cuts, especially for larger or more intricate tiles. Wear safety glasses and gloves when using a wet saw. For smaller cuts, a tile cutter or a nipping tool can be used. Smooth any rough edges with a tile file or a honing stone. Carefully fit the cut tiles into place, ensuring they align with the surrounding tiles.
Allow the mortar to cure according to the manufacturer's instructions, typically 24 to 48 hours. Avoid walking on or disturbing the tiles during this period. Once the mortar is cured, remove the tile spacers. Clean any excess mortar from the tile surfaces with a damp sponge.
Finishing: Grouting and Sealing
The finishing phase involves applying grout to fill the spaces between the tiles and sealing the grout to protect it from staining and moisture. This stage enhances the appearance of the tiled surface and ensures its long-term durability. Proper grout application and sealing techniques are essential for achieving a professional-looking finish.
Mix the grout according to the manufacturer's instructions. Apply the grout to the tile surface using a grout float, pressing it firmly into the grout lines. Work in small sections, ensuring all the grout lines are completely filled. Remove excess grout from the tile surfaces with a damp sponge, wiping diagonally across the grout lines. Rinse the sponge frequently to avoid leaving a haze on the tile surface.
After the grout has partially cured, typically after 30 minutes to an hour, use a grout sponge to smooth the grout lines and remove any remaining grout residue. A clean, damp sponge should be used to ensure the grout lines have an even and consistent finish. Once the grout is completely cured, typically after 24 to 72 hours, apply a grout sealer. The sealer protects the grout from staining, moisture, and mildew. Apply the sealer according to the manufacturer's instructions, using a brush or applicator. Allow the sealer to dry completely before using the fireplace.
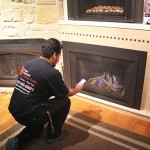
Inspect the finished tile surround and hearth for any imperfections or areas that require touch-up. Address any issues promptly to ensure a long-lasting and aesthetically pleasing result. Clean the tile surfaces with a mild detergent and water. Avoid using abrasive cleaners, which can damage the tile or grout. Regularly inspect the grout lines for cracks or damage and re-seal as necessary. Proper maintenance will help preserve the beauty and integrity of the tiled fireplace surround and hearth for years to come.
Addressing specific challenges related to the fireplace’s design is important. For example, a curved fireplace surround may require more intricate tile cuts and a greater degree of planning. The use of mosaic tiles can be an option for complex shapes, allowing for greater flexibility in design. In such cases, the application process may be more time-consuming and require specialized tools.
Finally, consider incorporating decorative elements into the tile design, such as borders, medallions, or accent tiles. These elements can add visual interest and personalize the fireplace surround and hearth. When planning the design, consider the overall aesthetic of the room and the existing décor. Choose tiles and decorative elements that complement the style of the home. This will tie the fireplace surround and hearth into the room's overall design.

How To Tile A Fireplace Surround And Hearth Build Basic

How To Install A Marble Herringbone Fireplace Surround And Hearth

How To Tile Over A Brick Hearth Shine Your Light

How To Tile A Fireplace My Uncommon Slice Of Suburbia
/102661017-6a23c040b71843379188b96b21ac1a08.jpg?strip=all "How To Tile A Fireplace")
How To Tile A Fireplace

Diy Tiling A Fireplace Surround What We Learned Along The Way

How To Tile A Fireplace Even If It S Brick The Handyman Daughter

Planning A Tile Fireplace Budgeting Design Diy Vs Pro

Diy Tiling A Fireplace Surround What We Learned Along The Way

How To Tile Over A Brick Fireplace Surround Shine Your Light
Related Posts