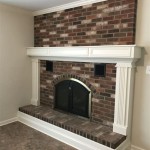
How to Tile a Fireplace Insert
A fireplace insert can enhance the aesthetic appeal of your home and provide warmth during the colder months. Installing tiles around the insert can further enhance its appearance and protect the surrounding area from heat and potential damage. This guide will provide you with the essential steps and information on how to tile a fireplace insert, transforming it into a focal point in your home.
Preparing the Surface
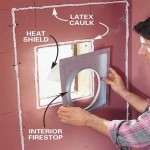
Before commencing the tiling process, it is essential to prepare the surface surrounding the fireplace insert. This involves removing any existing materials, ensuring the surface is smooth and level, and cleaning it thoroughly.
1.
Remove Existing Materials
: If the fireplace insert is surrounded by existing materials, such as drywall, plaster, or old tiles, these need to be removed carefully. Ensure that you remove any nails or screws that may interfere with the new tiling project. 2.Prepare the Substrate
: Once the existing materials are removed, you will need to prepare the substrate. This may involve applying a layer of drywall compound to fill any gaps or irregularities in the surface. Ensure that the compound is smooth and level before proceeding. 3.Clean the Surface
: Thoroughly clean the prepared surface using a damp cloth and a mild detergent. Allow the surface to dry completely before moving on to the next step.Installing the Tiles
Once the surface preparation is complete, you can start installing the tiles. This process involves applying mortar to the back of the tiles and attaching them to the prepared surface.
1.
Mixing Mortar
: Read the manufacturer's instructions for your chosen mortar and mix it according to the specified proportions. Ensure that the mortar is smooth and consistent. 2.Applying Mortar
: Use a notched trowel to spread a thin layer of mortar onto the prepared surface. The size of the notches on the trowel should correspond to the size of your tiles. 3.Positioning the Tiles
: Carefully place the tiles onto the mortar bed, ensuring they are level with each other and with the surrounding surfaces. Use a rubber mallet to gently tap the tiles into place and ensure a secure bond. 4.Spacing the Tiles
: Maintain consistent spacing between the tiles using tile spacers. This will ensure a uniform and professional look. You can adjust the spacing as per your preference.Grouting and Sealing
Once the tiles have been installed, you need to grout the gaps between them and seal the tiles to protect them and enhance their appearance.
1.
Grouting
: After the mortar has dried, apply grout to the gaps between the tiles using a grout float. Ensure the grout is evenly distributed and packed tightly into the joints. 2.Cleaning the Grout
: Wipe away any excess grout from the surface of the tiles using a damp sponge. Be sure to change the water frequently to prevent the grout from staining the tiles. 3.Sealing the Tiles
: Once the grout has dried completely, apply a sealant to the tiled surface. This will protect the tiles from stains and make them easier to clean. Choose a sealant specifically designed for tile and follow the manufacturer's instructions.Additional Tips
Here are some extra tips to ensure a successful tiling project:
1.
Plan Layout
: Before you start tiling, it's crucial to carefully plan the layout of the tiles. This includes determining the starting point, cutting the tiles to fit corners and edges, and choosing a pattern for the tiles. 2.Use Cutting Tools
: A tile cutter or wet saw will be necessary to cut the tiles to the desired dimensions for corners, edges, and around obstacles. 3.Wear Protective Gear
: Remember to wear protective gear, such as safety glasses, gloves, and a dust mask, during the entire process. This will help to protect you from dust, debris, and potential injuries. 4.Professional Assistance
: If you are unsure about any of the steps or if you have a complex tiling project, it is advisable to consult a professional tile installer.
How To Personalise Your Cast Iron Fire With Tile Inserts Direct Fireplaces

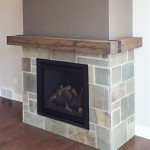
Stunning Remodel How To Tile A Fireplace Your Easy Tiling Tutorial

How To Personalise Your Cast Iron Fire With Tile Inserts Direct Fireplaces

How To Tile A Fireplace Even If It S Brick The Handyman Daughter

Diy Fireplace Makeover With High Heat Paint Jessica Welling Interiors

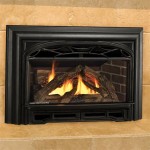
Sovereign Tiled Insert Fireplace Cast Fireplaces

Stovax Combination Tiled Fireplace Insert Bonfire

Diy Tile Fireplace Makeover The Home Depot

Voysey Tiled Fireplace Insert Twentieth Century Fireplaces

Tiling The Fireplace Surround Designatedspacedesign Com
Related Posts