How to Stone a Fireplace Over Brick
Refacing a brick fireplace with stone offers a significant aesthetic upgrade, transforming a dated or underwhelming feature into a visually stunning focal point. This project, while achievable for a reasonably skilled DIY enthusiast, requires careful planning, meticulous execution, and adherence to safety guidelines. This article provides a comprehensive guide on how to successfully stone a fireplace over existing brick.
Before embarking on the project, it's crucial to assess the condition of the existing brickwork. Look for loose, cracked, or crumbling bricks. Any structural issues must be addressed before applying the stone veneer. Repairing damaged bricks ensures a stable and sound substrate for the new stone facing. Ignoring existing damage can compromise the longevity and appearance of the completed project.
Furthermore, consider the overall design and style of the room when selecting the stone veneer. The chosen stone should complement the existing décor and architectural features. Factors to consider include color, texture, size, and the overall aesthetic you wish to achieve. Samples should be obtained and placed against the existing brick to visualize the final result. Online resources and professional design consultations can be invaluable in making an informed decision.
Proper preparation is paramount for a successful stone fireplace refacing. This involves cleaning the brick surface, applying a bonding agent, and installing a metal lath. Each step contributes to the adhesion and durability of the stone veneer.
Preparing the Brick Surface
The first step in preparing the brick is thorough cleaning. Any dirt, dust, soot, or grease must be removed. A wire brush and a solution of trisodium phosphate (TSP) are effective for this purpose. Scrub the brick vigorously to remove all contaminants. Rinse thoroughly with clean water and allow the surface to dry completely. This ensures that the bonding agent will adhere properly to the brick.
Once the brick is clean and dry, inspect it for any remaining imperfections. Small cracks can be filled with a masonry patching compound. Larger cracks or loose bricks require more significant repair, potentially involving the removal and replacement of damaged units. Ensuring a solid and even surface is critical for achieving a professional-looking finish.
After cleaning and repairing, a bonding agent should be applied to the brick. This liquid enhances the adhesion between the brick and the mortar used to install the stone veneer. Apply the bonding agent according to the manufacturer's instructions, typically using a brush or roller. Allow it to dry completely before proceeding to the next step.
Installing a metal lath provides a mechanical bond for the mortar bed. The lath is a wire mesh that is attached to the brick surface using masonry nails or screws. Overlap the edges of the lath by at least one inch to ensure complete coverage. The lath provides a textured surface for the mortar to grip, preventing it from slipping or falling off the brick.
Applying the Stone Veneer
The application of the stone veneer is a multi-step process that requires precision and attention to detail. Begin by mixing the mortar according to the manufacturer's instructions. Use a mortar mixer for larger projects or a mixing tub for smaller ones. Add water gradually until the mortar reaches a consistency similar to that of peanut butter.
Apply a layer of mortar to the back of each stone veneer unit using a trowel. The layer should be thick enough to create a strong bond with the lath, typically around ½ to ¾ of an inch. Make sure to cover the entire back of the stone with mortar to prevent voids or air pockets. These voids can weaken the bond and lead to cracking or detachment of the stone.
Press the stone veneer unit firmly against the metal lath, wiggling it slightly to ensure good contact with the mortar. Maintain consistent spacing between the stones. The spacing will depend on the type of stone veneer and the desired aesthetic. Use shims or spacers to maintain uniform gaps.
Start at the bottom of the fireplace and work your way up, row by row. Use a level to ensure that each row is straight and plumb. Overlap the joints between the stones to create a visually appealing and structurally sound pattern. Avoid creating long, continuous vertical joints, as these can be prone to cracking.
For stones that need to be cut, use a wet saw with a diamond blade. This type of saw provides clean, precise cuts and prevents dust from becoming airborne. Always wear safety glasses and ear protection when operating a wet saw.
Grouting and Finishing
Once the stone veneer is installed and the mortar has cured for the recommended time (typically 24-48 hours), the joints between the stones need to be grouted. Grouting fills the gaps between the stones, providing a finished look and preventing water from penetrating behind the veneer.
Choose a grout color that complements the stone veneer. Mix the grout according to the manufacturer's instructions, paying attention to the water-to-powder ratio. The grout should have a consistency similar to that of toothpaste.
Apply the grout to the joints using a grout bag or a pointing trowel. Fill the joints completely, ensuring that there are no air pockets. Overfill the joints slightly, as the grout will shrink as it dries.
After the grout has partially dried (typically after 30-60 minutes), use a grout sponge and a bucket of clean water to clean the excess grout from the surface of the stones. Wring out the sponge frequently to avoid smearing the grout. Be careful not to remove too much grout from the joints. The goal is to create a smooth, uniform surface while leaving the joints filled.
Once the grout has fully cured (typically after 72 hours), apply a sealant to the stone veneer. The sealant will protect the stone from stains, moisture, and other environmental factors. Choose a sealant that is specifically designed for stone veneers. Apply the sealant according to the manufacturer's instructions, typically using a brush or sprayer.
Inspect the finished fireplace for any imperfections, such as loose stones, cracked grout, or uneven surfaces. Make any necessary repairs promptly. Regular maintenance, such as cleaning and resealing, will help to keep the stone veneer looking its best for years to come.
Selecting the appropriate type of stone veneer is crucial for achieving the desired look and ensuring the longevity of the project. There are several types of stone veneers available, each with its own unique characteristics and advantages. Manufactured stone veneers are typically made from concrete and are designed to mimic the appearance of natural stone. They are lightweight, durable, and relatively inexpensive. Natural stone veneers are made from actual stone that has been cut into thin slices. They are more expensive than manufactured stone veneers but offer a more authentic and natural look. The choice between manufactured and natural stone veneers ultimately depends on budget, aesthetic preferences, and the desired level of authenticity.
Properly flashing around the fireplace is essential to prevent water damage. Flashing is a thin, waterproof material that is installed around the chimney and other areas where the fireplace intersects with the roof or exterior walls. The flashing diverts water away from the fireplace and prevents it from penetrating into the structure of the building. Improperly installed or damaged flashing can lead to leaks, rot, and other serious problems. It's important to inspect the flashing regularly and make any necessary repairs promptly. A professional roofer can provide expert advice and assistance with flashing installation and repair.

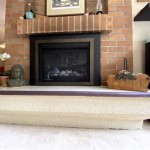
Stone Veneer Over A Brick Fireplace Updates The Look

Fireplace Remodel Stone Over Brick Google Search

Stone Veneer Over A Brick Fireplace Updates The Look

How To Cover A Brick Fireplace With Stone

How To Diy A Stacked Stone Feature Over Existing Brick

Installing Stone Veneer Over A Brick Fireplace Grand River

Stone Veneer Over A Brick Fireplace Updates The Look

Transform Your Home Stone Veneer Over Brick Fireplace Guide

Read This Before Your Stone Fireplace Makeover Understanding Undertones

Faux Stone Fireplace Surround Over Old Brick Genstone
Related Posts