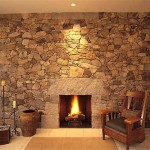
How To Stain A Fireplace Mantel
Staining a fireplace mantel is a relatively straightforward process that can dramatically enhance the aesthetic appeal of a living space. A properly stained mantel can transform a dull or unfinished wood surface into a focal point, complementing the architectural style and overall décor of the room. This article provides a comprehensive guide to staining a fireplace mantel, covering preparation, staining techniques, and protective finishing.
Preparing the Fireplace Mantel for Staining
Prior to applying any stain, thorough preparation is paramount. This stage ensures proper adhesion of the stain and an even, consistent finish. The type of preparation required will depend on the existing condition of the mantel. Whether the mantel is unfinished, previously stained, or painted, each scenario necessitates specific steps.
Unfinished Wood Mantels: New, unfinished wood mantels typically have a relatively smooth surface but may still require light sanding. This sanding removes any mill glaze or imperfections that could impede stain penetration. Begin by sanding the entire surface with 120-grit sandpaper, followed by 180-grit and then 220-grit. Sanding in the direction of the wood grain is crucial to avoid leaving visible scratches. After sanding, use a tack cloth to remove all sanding dust. This ensures a clean surface for optimal stain absorption.
Previously Stained Mantels: If the mantel has been previously stained, the existing finish must be evaluated. If the old stain is in good condition and the desired color is similar, a light scuff sanding may be sufficient. Use 220-grit sandpaper to lightly roughen the surface, creating a "key" for the new stain to adhere to. However, if the existing stain is peeling, cracking, or significantly different from the desired new color, complete removal of the old stain is necessary. Chemical strippers or a heat gun can be used for this purpose. Always follow the manufacturer's instructions when using chemical strippers, ensuring proper ventilation and safety precautions. After stripping, sand the surface to remove any residue and create a smooth, even base. Begin with a coarser grit like 120 to remove stubborn remnants, then progress to finer grits like 180 and 220 for a smooth finish.
Painted Mantels: Removing paint from a mantel is often more challenging than stripping old stain. Paint tends to form a thicker, more resilient layer that requires a more aggressive approach. Chemical strippers are often the most effective method, but a heat gun can also be used. As with stain removal, always adhere to the manufacturer's guidelines for chemical strippers, paying close attention to safety recommendations. Multiple applications of the stripper may be necessary to fully remove all traces of paint. After the paint has been removed, thoroughly sand the surface to eliminate any lingering residue and create a smooth, even surface. Start with a coarser grit sandpaper if needed, and work up to finer grits for a polished finish.
Cleaning and Dust Removal: Regardless of the mantel's previous finish, thoroughly cleaning the surface is essential after sanding or stripping. Use a vacuum cleaner with a brush attachment to remove loose dust and debris. Following the vacuuming, wipe the surface with a tack cloth. A tack cloth is a sticky cloth designed to pick up even the finest particles of dust. Ensure the cloth is clean and replaced when it becomes saturated with dust. A clean surface is critical for achieving a uniform and professional-looking stain finish.
Selecting the Right Stain and Applying It
Choosing the appropriate stain is crucial for achieving the desired aesthetic. Several factors should be considered, including the type of wood, the desired color, and the type of finish. There are two primary types of wood stain: oil-based and water-based.
Oil-Based Stains: Oil-based stains are known for their rich color and deep penetration into the wood. They tend to highlight the wood grain and provide a durable finish. They also typically offer a longer open time, meaning they remain workable for a longer period, making them easier to apply evenly. However, oil-based stains have a stronger odor and require mineral spirits for cleanup. They also take longer to dry than water-based stains.
Water-Based Stains: Water-based stains are environmentally friendly, have low odor, and dry quickly. They are easy to clean up with soap and water. While they may not penetrate as deeply as oil-based stains, they still provide excellent color and protection. Modern water-based stains have improved significantly in recent years and offer a wide range of color options.
Testing the Stain: Before applying the stain to the entire mantel, it is recommended to test it on a small, inconspicuous area or a scrap piece of wood of the same species. This allows confirmation of the color and ensures it achieves the desired look on the specific type of wood. Allow the test stain to dry completely before making a final decision. This step can prevent disappointment and the need to redo the entire staining process.
Application Techniques: The stain should be applied evenly using a natural bristle brush, a foam brush, or a staining pad. Apply the stain in the direction of the wood grain, working in manageable sections. Avoid applying too much stain at once, as this can lead to uneven color and blotchiness. After applying the stain, allow it to penetrate the wood for the recommended time, as specified by the manufacturer. This is crucial for achieving the desired color depth.
Wiping Off Excess Stain: After the stain has penetrated for the recommended time, use a clean, lint-free cloth to wipe off the excess stain. This step is essential for achieving an even finish and preventing the stain from becoming too dark or muddy. Wipe in the direction of the wood grain, using gentle pressure. If a darker color is desired, a second coat of stain can be applied after the first coat has dried completely. Ensure the first coat is fully dry before applying the second to avoid lifting the previous layer.
Drying Time: Allow the stain to dry completely, following the manufacturer's recommendations. Drying times vary depending on the type of stain, humidity, and temperature. Oil-based stains typically take longer to dry than water-based stains. Ensure adequate ventilation during the drying process. Avoid placing anything on the mantel until the stain is completely dry to prevent marks or imperfections.
Applying a Protective Finish
After the stain has dried thoroughly, applying a protective finish is essential. This finish protects the stained wood from scratches, moisture, and UV damage, prolonging its life and maintaining its appearance. There are several types of protective finishes available, each with its own advantages and disadvantages.
Polyurethane: Polyurethane is a durable and water-resistant finish that is ideal for high-traffic areas. It is available in oil-based and water-based formulations. Oil-based polyurethane provides a warm, amber hue, while water-based polyurethane is clear and non-yellowing. Polyurethane is available in various sheens, including gloss, semi-gloss, satin, and matte, allowing customization of the final appearance. Several coats of polyurethane are typically required for optimal protection. Lightly sand between coats with fine-grit sandpaper (220-grit or higher) to ensure proper adhesion.
Varnish: Varnish is another durable and protective finish that is available in oil-based and water-based formulations. It is often used for furniture and cabinetry. Varnish provides a hard, scratch-resistant surface. Like polyurethane, varnish is available in various sheens. Apply several thin coats of varnish, allowing each coat to dry completely before applying the next. Lightly sand between coats for a smooth finish.
Lacquer: Lacquer is a fast-drying finish that provides a smooth, durable surface. It is often used for furniture and musical instruments. Lacquer is typically applied with a spray gun, which allows for a smooth, even finish. It requires proper ventilation and safety precautions due to its strong fumes. Lacquer is available in various sheens, and multiple coats are typically required. Sanding between coats is recommended for optimal adhesion.
Applying the Finish: Apply the protective finish in thin, even coats, using a high-quality brush or spray gun. Work in the direction of the wood grain. Avoid applying too much finish at once, as this can lead to drips and runs. Allow each coat to dry completely before applying the next. Lightly sand between coats with fine-grit sandpaper (220-grit or higher) to remove any imperfections and ensure proper adhesion. After the final coat has dried, allow it to cure for the recommended time, as specified by the manufacturer. This ensures the finish is fully hardened and durable.
Maintaining the Finish: Regularly dust the mantel with a soft cloth to remove dirt and debris. Avoid using harsh chemicals or abrasive cleaners, as these can damage the finish. Periodically clean the mantel with a damp cloth and a mild soap solution. Dry the mantel thoroughly after cleaning. If the finish becomes scratched or damaged, it can be repaired by lightly sanding the affected area and applying a new coat of finish.

Diy Fireplace Makeover How To Strip Stain Mantel Before After The Confused Millennial

How To Re A Fireplace Mantel True Value

Diy Fireplace Makeover How To Strip Stain Mantel Before After The Confused Millennial

How To Change A Painted Mantel Stained Wood

Oak Mantel Makeover Centsational Style

Fireplace Mantle Makeover The Reaganskopp Homestead

How To Re A Fireplace Mantel True Value

First Comes Love Diy Oak Fireplace Remodel Brick Makeover

Diy Wood Mantel Simple To Make Artsy Rule

How To Stain Yellow Southern Pine Wooden Beam Mantel Four Generations One Roof Blog
Related Posts


