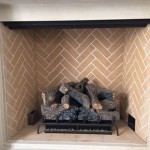
How to Resurface a Fireplace Surround
A fireplace serves as a focal point in many homes, providing warmth and aesthetic appeal. However, over time, the fireplace surround can become worn, outdated, or damaged. Resurfacing the fireplace surround offers a cost-effective alternative to a complete replacement, allowing homeowners to update the look of their fireplace and enhance the overall ambiance of their living space. This article provides a comprehensive guide on how to resurface a fireplace surround, covering the necessary materials, preparation steps, and various resurfacing techniques.
Before embarking on a resurfacing project, it is crucial to assess the existing fireplace surround and determine the appropriate course of action. Factors such as the material of the surround (brick, stone, wood, or tile), the type of damage (cracks, stains, chipped surfaces), and the desired aesthetic should be considered. The specific resurfacing method will depend on these factors.
Preparation is Key: Cleaning and Repairing the Surround
Effective preparation is essential for a successful resurfacing project. The initial step involves thoroughly cleaning the fireplace surround. This removes dirt, soot, and any loose debris that may impede adhesion of new materials. A solution of mild detergent and water, along with a scrub brush, is generally sufficient for most surfaces. For stubborn stains, a specialized cleaner designed for the specific material of the surround may be required. Ensure the surface is completely dry before proceeding.
Next, inspect the surround for any damage, such as cracks, chips, or loose tiles. These imperfections must be addressed before resurfacing. Small cracks can be filled with a crack filler designed for masonry or wood, depending on the surround's material. Larger cracks may require more extensive repairs, potentially involving patching with mortar or wood filler. Allow the filler to dry completely according to the manufacturer's instructions, and then sand the repaired areas smooth to create a seamless surface.
When working with tile surrounds, loose or missing tiles need to be replaced. Carefully remove any remaining loose or broken tiles, scrape away old grout, and apply fresh adhesive to the back of the new tiles. Position the tiles carefully and ensure they are level with the surrounding tiles. Once the adhesive has cured, apply new grout, ensuring it fills all the gaps between the tiles. Wipe away any excess grout with a damp sponge.
Resurfacing Techniques: Paint, Faux Stone, and Overlays
Several resurfacing techniques can be employed to transform the appearance of a fireplace surround. The choice of technique depends on the existing material, the desired aesthetic, and the homeowner's skill level.
Painting: Painting is a relatively simple and cost-effective way to update a brick, stone, or wood fireplace surround. Before painting, apply a primer specifically designed for the material of the surround. This will help the paint adhere properly and provide a uniform finish. Choose a paint that is heat-resistant and suitable for use near a fireplace. Apply the paint in thin, even coats, allowing each coat to dry completely before applying the next. Multiple coats may be necessary to achieve the desired color and coverage. Consider using a matte or satin finish for a more modern look. For brick surrounds, consider whitewashing or German schmear techniques to achieve a textured, rustic appearance.
Faux Stone Veneer: Faux stone veneer offers a more dramatic transformation, adding the appearance of natural stone without the weight and expense. Faux stone veneer is available in a variety of styles, colors, and textures. The installation process typically involves applying a scratch coat of mortar to the existing surround, followed by adhering the faux stone veneer panels with mortar. Careful attention must be paid to the layout and alignment of the panels to achieve a realistic stone appearance. Cutting the veneer to fit around corners and edges may require specialized tools, such as a wet saw. Grouting between the stones is typically necessary to complete the look.
Overlay Materials: An overlay involves applying a new material directly over the existing surround. This can be achieved using various materials, such as concrete, plaster, or specialized resurfacing compounds. The existing surround must be properly prepared, ensuring it is clean, structurally sound, and provides a good bonding surface. Follow the manufacturer's instructions for mixing and applying the overlay material. Concrete overlays, for example, can be troweled on to create a smooth, modern look. Plaster overlays can be textured to achieve a more rustic or decorative appearance. Some resurfacing compounds are specifically designed for fireplace surrounds, offering heat resistance and durability.
Additional Considerations: Safety and Finishing Touches
When working around a fireplace, safety should always be a top priority. Disconnect any gas lines or electrical wiring before starting the project. Wear safety glasses and gloves to protect yourself from dust, debris, and chemicals. Ensure adequate ventilation when working with paints, adhesives, or other materials that may emit fumes. If you are unsure about any aspect of the project, consult a qualified professional.
After resurfacing the fireplace surround, add finishing touches to enhance the overall aesthetic. This may include applying a sealant to protect the surface from stains and moisture, installing a new mantel or hearth, or adding decorative accessories. Consider the surrounding decor and choose finishes and accessories that complement the overall style of the room. A well-resurfaced fireplace surround can dramatically improve the look and feel of a living space, providing a warm and inviting focal point for years to come.
Regular maintenance will help to preserve the appearance of the resurfaced fireplace surround. Clean the surround regularly with a mild detergent and water. Avoid using harsh chemicals or abrasive cleaners that could damage the surface. Inspect the surround periodically for any signs of damage and address any issues promptly. By following these tips, homeowners can ensure that their resurfaced fireplace surround remains a beautiful and functional feature of their home.

A Step By Guide To Fireplace Refacing Diy Family Handyman

Diy Fireplace Makeover Wood Slat

How To Reface A Fireplace We Love Fire

Fireplace Refacing So You Want To Bob Vila

Diy Fireplace Makeover How To Resurface A

Reface A Fireplace With The Look Of Stone Or Brick Barron Designs

15 Fabulous Fireplace Refacing Ideas Average But Inspired

Diy Fireplace Makeover How To Resurface A
:max_bytes(150000):strip_icc()/MaisondePaxAfter-5bb2507646e0fb0026d9558d.jpg?strip=all)
Before And After Fireplace Makeovers

30 Fireplace Remodel Ideas For Any Budget
Related Posts

