How to Replace Tile Around a Gas Fireplace Wall
Replacing tile around a gas fireplace wall is a project that can dramatically enhance the aesthetic appeal of a living space. This undertaking requires careful planning, precise execution, and adherence to safety protocols. The following article provides a detailed guide to successfully replacing tile around a gas fireplace, encompassing preparation, removal, installation, and finishing touches.
Assessing the Project and Gathering Materials
Before commencing the tile replacement, a thorough assessment of the existing situation is crucial. This involves examining the condition of the existing tile, the substrate behind it, and the overall structural integrity of the fireplace surround. Any signs of damage, such as cracks, loose tiles, or water infiltration, should be noted and addressed during the project.
Subsequently, gathering the necessary materials and tools is an essential step. The selection of new tiles should be based on personal preference, design considerations, and compatibility with the fireplace's heat output. Common tile materials include ceramic, porcelain, natural stone (such as granite or slate), and manufactured stone veneer. Each material possesses distinct characteristics in terms of heat resistance, durability, and aesthetic appeal. Consult with a tile specialist to determine the most suitable option for the specific fireplace.
In addition to the tiles themselves, the following materials are required:
- Thin-set mortar: This is used to adhere the tiles to the substrate. A heat-resistant thin-set mortar specifically designed for fireplace applications is recommended.
- Grout: This fills the spaces between the tiles, providing a waterproof and aesthetically pleasing finish. Choose a grout color that complements the tile.
- Grout sealer: This protects the grout from stains and moisture.
- Tile spacers: These ensure uniform spacing between tiles.
- Backer board (if needed): If the existing substrate is damaged or unsuitable, a cement backer board provides a stable and moisture-resistant surface for tiling.
- Safety glasses and gloves: These protect the eyes and hands during the project.
- Respirator or dust mask: This protects against dust inhalation.
The following tools are typically necessary:
- Tile saw (wet saw): This is used to cut tiles to the required size and shape.
- Notched trowel: This is used to apply the thin-set mortar evenly. Select the correct notch size based on the tile size and manufacturer's recommendations.
- Grout float: This is used to apply and compact the grout.
- Grout sponge: This is used to clean excess grout from the tile surface.
- Hammer and chisel: These are used to remove the existing tile.
- Utility knife: This is used to score grout lines.
- Measuring tape and level: These ensure accurate measurements and level installation.
- Pencil or marker: This is used to mark cutting lines and tile placement.
- Bucket and sponges: For cleaning purposes.
- Shop vacuum: For dust and debris removal.
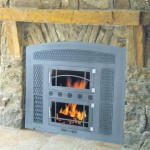
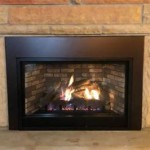
- Caulking gun and heat-resistant caulk: To seal gaps between the tile and adjacent surfaces, such as the fireplace insert or mantel.
Removing Existing Tile and Preparing the Surface
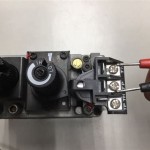
Safety is paramount during the tile removal process. Before commencing, ensure the gas supply to the fireplace is shut off completely. Disconnect the gas line according to local regulations or consult a qualified professional. Protect the surrounding area with drop cloths or plastic sheeting to prevent damage from falling debris and dust.
Using a utility knife, score the grout lines around the existing tiles. This helps to prevent chipping and damage to adjacent surfaces during removal. Starting with a corner tile, carefully use a hammer and chisel to break the bond between the tile and the substrate. Work methodically, applying gentle pressure to avoid damaging the underlying wall. A pry bar may be useful for removing larger tiles, but exercise caution to avoid damaging the substrate.
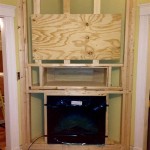
Once all the existing tiles have been removed, thoroughly clean the substrate to remove any remaining mortar, grout, or debris. A scraper, wire brush, or grinder may be necessary to achieve a smooth and clean surface. Inspect the substrate for any damage, such as cracks, holes, or water damage. Repair any imperfections with patching compound or cement backer board as needed. If the existing substrate is severely damaged, replacing it entirely with a cement backer board is recommended. Cement backer board offers excellent moisture resistance and provides a stable base for the new tile.
Prior to installing the new tile, ensure the substrate is level and plumb. Use a level to check for any irregularities and correct them with shims or additional patching compound. A level surface is essential for a professional-looking tile installation. Finally, wipe down the prepared surface with a damp sponge to remove any remaining dust or debris. This ensures proper adhesion of the thin-set mortar.
Installing New Tile
Before applying thin-set mortar, dry-fit the tiles to plan the layout and ensure proper spacing. This step allows for adjustments and avoids potential problems during the actual installation. Consider starting with a central tile and working outwards to ensure symmetry around the fireplace. Mark the layout on the substrate with a pencil or marker. This provides a visual guide during the installation process.
Mix the thin-set mortar according to the manufacturer's instructions. The consistency should be similar to peanut butter – easily spreadable but not too runny. Using the notched trowel, apply a layer of thin-set mortar to a small section of the substrate. Hold the trowel at a 45-degree angle and create ridges in the mortar. The size of the notches should correspond to the tile size and manufacturer's recommendations.
Press each tile firmly into the thin-set mortar, using a slight twisting motion to ensure good contact. Insert tile spacers between the tiles to maintain uniform spacing. Regularly check the tiles with a level to ensure they are aligned and flush with each other. Work in small sections, applying thin-set mortar and setting tiles as you go. Avoid applying too much thin-set mortar at once, as it can dry out before the tiles are set.
When cutting tiles to fit around corners, edges, or the fireplace insert, use a wet saw. A wet saw provides clean and accurate cuts, minimizing chipping and breakage. Wear safety glasses while operating the wet saw. After all the tiles have been installed, allow the thin-set mortar to cure for the recommended time, typically 24-48 hours, before proceeding with grouting.
Grouting and Sealing
Once the thin-set mortar has cured, remove the tile spacers. Prepare the grout according to the manufacturer's instructions. The consistency should be similar to that of thin-set mortar. Using a grout float, apply grout to the tile surface, pressing it firmly into the spaces between the tiles. Work in a diagonal direction to ensure all the grout lines are completely filled.
After applying grout, allow it to set for approximately 15-30 minutes, or as directed by the manufacturer. Then, using a damp grout sponge, wipe away the excess grout from the tile surface. Rinse the sponge frequently in clean water. Be careful not to remove too much grout from the grout lines. Shape the grout lines with the sponge to create a smooth and consistent finish.
Allow the grout to cure for several days, as recommended by the manufacturer. Once the grout has fully cured, apply a grout sealer to protect it from stains and moisture. Follow the manufacturer's instructions for applying the sealer. Apply the sealer evenly and allow it to dry completely before exposing the tile to moisture. A heat-resistant caulk is recommended for sealing the perimeter of the tile where it makes contact with the fireplace insert or any other combustible materials.
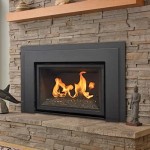
Finally, clean the tile surface with a mild detergent and water to remove any remaining grout residue. Inspect the finished tile installation for any imperfections and make any necessary touch-ups. Properly disposing of waste materials is also important. Once completed, the project yields a refreshed and aesthetically pleasing fireplace surround.

How To Prep A Fireplace For New Tile House One

How To Install A Marble Herringbone Fireplace Surround And Hearth

How To Install A Gas Fireplace With Tile Surround And Wood Mantel Sima Spaces

Fireplace Makeover Painting The Tile In My 120 Year Old Home

How To Paint Tile Easy Fireplace Makeover Setting For Four Interiors

How To Tile Over A Brick Fireplace The Handyman S Daughter

How To Tile Over A Brick Fireplace The Handyman S Daughter

Er Friendly Fireplace Makeover With L Stick Tiles The Homes I Have Made

Painting Fireplace Tile The Ultimate Guide Jessica Welling Interiors

5 Amazing Inexpensive Easy Fireplace Remodel Transformations Designed
Related Posts