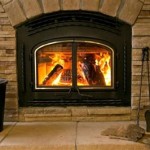
How To Replace Tile Around Gas Fireplace Inserts
Replacing the tiles around your gas fireplace insert can significantly enhance its aesthetic appeal and provide a fresh look to your living space. While it may seem like a daunting task, it is a project that many skilled homeowners can undertake with the right tools and instructions. This guide will provide a step-by-step explanation of how to replace tile around gas fireplace inserts, covering essential considerations and safety precautions.
1. Preparation and Planning
Before embarking on the tile replacement process, it is crucial to prepare the workspace and gather the necessary materials and tools. Begin by disconnecting the power to the fireplace insert, ensuring safety during the project. This can usually be done by flipping the breaker switch to the fireplace circuit.
Next, carefully remove the existing tiles. This can be done by using a utility knife or a chisel to pry them loose. Be cautious not to damage the surrounding walls or the insert itself. Once all tiles are removed, inspect the surface for any damage or irregularities. If necessary, use a patching compound to fill in any gaps or cracks. Allow the patching compound to dry fully before proceeding.
Now, it's time to choose new tiles. Consider the style and color of your fireplace insert and the overall décor of your room. Ensure that the new tiles are compatible with the fireplace's heat output and firebox dimensions. Measure the area to be tiled and calculate the number of tiles required. Purchase extra tiles to account for potential breakage or cutting errors.
Once you have selected the tiles, gather the necessary tools. These typically include:
- Tile cutter or wet saw
- Grout float
- Tile spacers
- Level
- Rubber mallet
- Tile adhesive
- Grout
- Bucket
- Sponge
- Safety Glasses
- Gloves
- Dust mask
2. Installing the New Tiles
With the workspace prepped and materials gathered, you can begin installing the new tiles. Start by applying a thin layer of tile adhesive to the back of each tile using a notched trowel. The notches ensure consistent coverage and prevent air pockets. Carefully press the tiles into place, maintaining a consistent spacing between them using tile spacers.
Use a level to ensure that the tiles are installed horizontally and vertically. Gently tap the tiles into place with a rubber mallet to create a secure bond. As you work, clean up any excess adhesive that oozes out of the joints. Clean the adhesive before it hardens, as removing dried adhesive can be challenging.
For tiles that need to be cut to fit, use a tile cutter or wet saw. These tools ensure clean, precise cuts. Take your time when cutting to avoid chips or cracks. Once all the tiles are in place, allow the adhesive to dry completely according to the manufacturer's instructions.
3. Grouting and Finishing
After the adhesive has cured, you can proceed with grouting. Grout fills the spaces between the tiles, creating a seamless finish and preventing water infiltration. Mix the grout according to the manufacturer's instructions. Using a grout float, apply the grout onto the tile joints. Ensure the grout is evenly distributed and fills the spaces completely.
Allow the grout to dry for approximately 30 minutes, then use a damp sponge to remove any excess grout from the tile surface. Be cautious not to remove the grout from the joints. Continue wiping the tiles until the grout is clean and smooth.
Once the grout has fully dried, you can apply a grout sealer. This creates a protective layer, preventing staining and making the grout easier to clean. Apply the sealer according to the manufacturer's instructions. Finally, reconnect the power to the fireplace insert and test it to ensure proper functionality.
Replacing tiles around a gas fireplace insert requires careful planning, meticulous execution, and adherence to safety measures. By following this guide, homeowners can confidently tackle this project, enhancing the aesthetic appeal of their fireplace and creating a more inviting space.

How To Reface A Fireplace For Gas Insert Major Steps

How To Install A Gas Fireplace With Tile Surround And Wood Mantel Sima Spaces

How To Tile Over A Brick Fireplace The Handyman S Daughter

How To Install A Gas Fireplace With Tile Surround And Wood Mantel

110 Diy Fireplace Makeover How To Paint Tile Jessica Welling Interiors

How To Install A Gas Fireplace With Tile Surround And Wood Mantel Sima Spaces

Diy Fireplace Makeover With High Heat Paint Jessica Welling Interiors

Diy Fireplace Makeover With Vinyl Tiles Sew Much Ado

How To Install A Marble Herringbone Fireplace Surround And Hearth

How To Paint Tile Easy Fireplace Makeover Setting For Four Interiors