How To Replace Your Fireplace Door Gasket
A fireplace door gasket is an essential component for maintaining the efficiency and safety of a wood-burning fireplace. This fibrous rope, typically made of fiberglass or ceramic fiber, seals the gap between the fireplace door frame and the firebox. Over time, the gasket can become worn, brittle, or damaged due to heat exposure and general wear and tear. A compromised gasket allows air to leak into the firebox, diminishing the fire's burn efficiency, potentially leading to increased creosote buildup in the chimney, and presenting a hazard by allowing embers or sparks to escape. Replacing a fireplace door gasket is a relatively straightforward task that can be accomplished by a homeowner with basic tools and some patience. This article provides a detailed guide on how to perform this DIY project effectively.
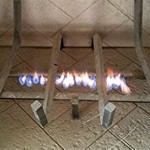
Before embarking on the replacement process, it is crucial to understand the importance of a properly functioning fireplace door gasket. The primary function of the gasket is to create an airtight seal, which regulates the air intake that fuels the fire. When the gasket is intact, the fire draws air primarily through the designated vents or dampers, allowing for more controlled burning. This controlled burn not only maximizes heat output but also minimizes the production of smoke and harmful emissions. A damaged gasket, on the other hand, allows uncontrolled airflow, which can result in a fire that burns too quickly, inefficiently, and potentially unsafely. The escaping air also contributes to a drafty house, negating the warming effect the fireplace should provide.
Moreover, an effective fireplace door gasket contributes to the safety of the home. By preventing sparks and embers from escaping the firebox, the gasket significantly reduces the risk of fire hazards. Gaskets are specifically designed to withstand high temperatures, providing a barrier against the intense heat of the fire. A worn or missing gasket compromises this safety feature, increasing the chance of stray embers igniting nearby flammable materials. By regularly inspecting and replacing the fireplace door gasket, homeowners can ensure the safe and efficient operation of their fireplace, minimizing the risk of fire and maximizing the enjoyment of their hearth.
Identifying the Need for Gasket Replacement
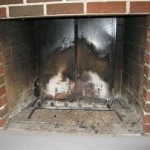
Before initiating the replacement process, it is essential to accurately assess the condition of the existing fireplace door gasket and determine whether replacement is necessary. Several key indicators suggest that the gasket needs to be replaced. The most obvious sign is visible damage to the gasket itself. This includes fraying, cracking, tearing, or compression of the material. If the gasket appears significantly thinner or flattened compared to its original state, it is likely no longer providing an adequate seal.
Another indicator is a noticeable draft coming from the fireplace door when the fire is not burning. This can be tested by holding a lit candle or a piece of tissue paper near the door frame. If the flame flickers significantly or the tissue paper moves noticeably, it indicates air leakage due to a compromised gasket. Furthermore, observing the fire's burning behavior can provide clues about the gasket's condition. If the fire burns erratically, too quickly, or produces excessive smoke, it could be a sign that uncontrolled air is entering the firebox through a damaged gasket.
In addition to visual inspection and behavioral observations, a simple tactile test can help determine the gasket's effectiveness. Gently press on the gasket along the door frame. If it feels hard, brittle, or does not spring back to its original shape, it has likely lost its elasticity and needs to be replaced. A good gasket should feel slightly pliable and provide some resistance when pressed. Finally, consider the age of the gasket. Even if it doesn't exhibit obvious signs of damage, a gasket that is several years old is likely nearing the end of its lifespan and should be replaced as a preventative measure.
Gathering the Necessary Tools and Materials
Once the need for gasket replacement has been established, the next step is to gather the necessary tools and materials. Having everything readily available will streamline the process and ensure a successful outcome. The essential tools include a scraper or putty knife, wire brush, utility knife or scissors, measuring tape, and work gloves. The scraper or putty knife will be used to remove the old gasket and adhesive, while the wire brush will help clean the door frame. The utility knife or scissors will be needed to cut the new gasket to the appropriate length. The measuring tape is crucial for determining the length of gasket required, and work gloves will protect the hands from dirt, debris, and potential irritants.
In addition to the tools, the most important material is the replacement gasket itself. It is vital to select the correct type and size of gasket for the specific fireplace door. Most fireplace door gaskets are available in various diameters, typically ranging from 1/4 inch to 1 inch. To determine the correct size, measure the diameter of the old gasket before removing it. If the old gasket is too damaged to measure accurately, consult the fireplace door manufacturer's specifications or contact a fireplace supply store for assistance. Choosing the wrong size gasket can result in an ineffective seal or difficulty closing the door.
Finally, a high-temperature silicone adhesive is required to secure the new gasket to the door frame. It is essential to use a silicone adhesive specifically designed for high-temperature applications, as regular adhesives may not withstand the intense heat of the fireplace. The adhesive should be rated for temperatures of at least 500 degrees Fahrenheit. Make sure to purchase enough adhesive to cover the entire length of the gasket. With the right tools, materials and precautions, the replacement process will be smooth and effective.
Step-by-Step Instructions for Gasket Replacement
With tools and materials at hand, the replacement of the fireplace door gasket can begin. Safety is paramount throughout the process. Ensure the fireplace is completely cool before commencing work to avoid burns. Ventilation is also crucial; open windows or doors to provide adequate airflow and prevent the build-up of dust or fumes. Wearing safety glasses and gloves is also advised to protect against debris and potential skin irritation from the adhesive.
The first step is the removal of the old gasket. Using the scraper or putty knife, carefully pry the old gasket away from the door frame. Work slowly and methodically, applying gentle pressure to avoid damaging the frame. If the gasket is particularly stubborn, a heat gun can be used to soften the old adhesive. Direct the heat gun onto the gasket for a few seconds at a time, being careful not to overheat the surrounding metal. Once the gasket is removed, use the wire brush to thoroughly clean the door frame. Remove any remaining adhesive, dirt, or debris to create a clean surface for the new gasket to adhere to.
The next step involves measuring and cutting the new gasket. Using the measuring tape, determine the total length of gasket required to encircle the door frame. Add a couple of extra inches for overlap and trimming. Using the utility knife or scissors, carefully cut the new gasket to the measured length. Once the new gasket is cut to size, apply a thin, even bead of high-temperature silicone adhesive to the door frame where the new gasket will be placed. Work in small sections to prevent the adhesive from drying out before the gasket is installed.
Carefully press the new gasket into the adhesive, ensuring that it is firmly seated along the entire length of the door frame. Start at one corner and work your way around, maintaining consistent pressure. At the point where the ends of the gasket meet, overlap them slightly and trim any excess material with the utility knife or scissors. This creates a tight, seamless seal. Once the gasket is in place, allow the adhesive to cure completely according to the manufacturer's instructions, which typically takes 24 to 48 hours. During this time, avoid opening or closing the fireplace door to prevent the gasket from shifting or becoming dislodged.
After the adhesive has fully cured, test the effectiveness of the new gasket by closing the fireplace door and checking for any air leaks. If any leaks are detected, apply additional adhesive to those areas and allow it to cure again. Finally, clean the fireplace door glass and surrounding area to remove any fingerprints or smudges. With the new fireplace door gasket in place, the fireplace is ready for safe and efficient operation.

Sbi Replacement Door Gasket W Silicone 7 8 X Oa11390

How To Replace Stove Door Rope Gasket

How To Replace A Wood Stove Door Gasket

How To Replace Your Fireplace Door Gasket Woodchimney Com

How To Change Your Glass Gasket

How To Replace Stove Door Rope Gasket

Protalwell Wood Stove Gasket 7 8 Door 72 Length Rope Kit Replacement For Woodstove And Fireplace Com

Pellet Stove Door Gasket Replacement Hearth Com Forums Home

Stove Fireplace Door Rope Gasket Seal Replacement

Wood Stove Gasket 3 4 Door Kit Rope Replacement For Or Fireplace Doors Grey Color Fiberglass High Temperature Resistant With Cement And Self Adhesive Tape Com
Related Posts