Here's an article on how to replace firebrick in a fireplace, following all your requirements:
How To Replace Firebrick In A Fireplace
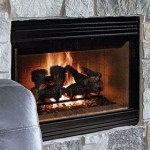
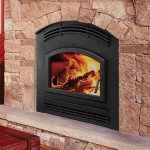
Firebrick, also known as refractory brick, is a specialized type of brick designed to withstand extremely high temperatures. It is commonly used in fireplaces, wood-burning stoves, kilns, and furnaces. Over time, and through repetitive exposure to intense heat and thermal cycling, firebrick can crack, crumble, or otherwise deteriorate. Replacing damaged firebrick is crucial for maintaining the structural integrity and efficiency of a fireplace, preventing heat leakage, and extending the lifespan of the entire unit. This article provides a comprehensive guide on how to safely and effectively replace firebrick in a fireplace.
Before embarking on the replacement process, it's essential to understand the purpose of firebrick. Firebrick acts as a thermal barrier, protecting the surrounding fireplace structure (typically made of less heat-resistant materials like common brick, concrete, or stone) from the direct impact of the fire's intense heat. Without functional firebrick, the fireplace's outer structure would be prone to overheating, cracking, and potentially even structural failure. Furthermore, damaged firebrick can reduce the efficiency of the fireplace by allowing heat to escape, requiring more fuel to maintain a desired temperature. Therefore, prompt replacement of degraded firebrick is a necessary maintenance task for any fireplace owner.
Proper preparation is paramount to a successful firebrick replacement project. This encompasses gathering the necessary tools and materials, as well as taking appropriate safety precautions. Rushing into the job without adequate preparation can lead to mistakes, injuries, or further damage to the fireplace. The following steps outline the preparatory phase.
1. Gathering Tools and Materials
A well-equipped workspace significantly streamlines the firebrick replacement process. The following is a list of essential tools and materials:
*New Firebrick:
Purchase firebrick that matches the size and shape of the original bricks. If the original bricks are unavailable, measure the existing bricks and purchase replacements with similar dimensions. It is generally acceptable to slightly undersize the replacement brick. It is better to have a small gap than to force the brick into a too-tight space. *Refractory Mortar (Fire Clay):
This specialized mortar is designed to withstand high temperatures and is essential for bonding the firebrick together. Regular mortar will not suffice, as it cannot withstand the extreme heat of a fireplace. Premixed refractory mortar is available for convenience, but dry mortar requiring mixing with water can also be used. *Trowel:
Used for applying the refractory mortar. Choose a trowel that is comfortable to handle and appropriate for the size of the bricks. A brick trowel is ideal. *Chisel and Hammer:
Necessary for removing old, stubborn firebrick and cleaning away old mortar. A cold chisel is recommended for precise chipping. *Safety Glasses:
Protect your eyes from flying debris when chiseling or hammering. *Work Gloves:
Protect your hands from sharp edges and mortar. *Dust Mask or Respirator:
Important for preventing inhalation of dust and debris, especially when working with old mortar. *Wire Brush:
Used for cleaning surfaces and removing loose debris. *Measuring Tape:
For accurately measuring the firebrick and fireplace dimensions. *Bucket and Sponge:
For mixing mortar (if using dry mix) and cleaning up spills. *Shop Vacuum:
For removing dust and debris from the fireplace after removing the old firebrick. *Level:
Ensuring the new firebrick is installed level is important for structural integrity and aesthetic appearance.2. Assessing the Damage and Ordering Materials
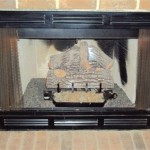
Before beginning the demolition process, carefully inspect the fireplace to determine the extent of the damage. Identify all the firebrick that needs to be replaced, paying close attention to cracks, crumbling, and areas where the mortar has deteriorated. Count the number of bricks needing replacement as well as their dimensions. When estimating the quantity of firebrick and refractory mortar to purchase, it's always advisable to buy slightly more than you think you'll need. This accounts for potential errors in measurement, breakage, or the need for additional pieces.
Ordering the correct size of firebrick to begin with is crucial. Firebrick can be cut, but it requires specialized tools like a wet saw with a diamond blade. Therefore, accurate measurement reduces unnecessary cutting and mess. Measure not only the firebrick length and width but also the thickness.
3. Safety Precautions
Safety should always be the top priority when working on any home improvement project. Before starting the firebrick replacement, take the following precautions:
*Ensure the Fireplace is Cold:
Never work on a fireplace that has been recently used. Allow ample time for it to cool completely before beginning any work. Ideally, wait at least 24 hours after the last fire. *Ventilation:
Work in a well-ventilated area to minimize exposure to dust and fumes. Open windows and doors, or use a fan to circulate air. *Personal Protective Equipment (PPE):
Always wear safety glasses, work gloves, and a dust mask or respirator to protect yourself from flying debris, sharp edges, and dust inhalation. *Clear the Work Area:
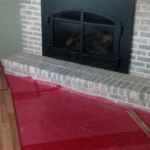
Remove any flammable materials from the vicinity of the fireplace. Cover any surrounding furniture or flooring with drop cloths to protect them from dust and debris.With the preparations complete, the next stage involves removing the damaged firebrick. This process requires patience and careful technique to avoid damaging the surrounding fireplace structure.
Begin by using the chisel and hammer to carefully chip away the old mortar surrounding the damaged firebrick. Work slowly and methodically, applying gentle pressure to gradually loosen the mortar. Avoid using excessive force, as this could damage the adjacent bricks or the fireplace structure itself. Focus on removing the mortar along the top, bottom, and sides of the firebrick.
Once the mortar has been sufficiently loosened, try to gently pry the firebrick out of its position. If the brick is still stuck, use the chisel to further loosen any remaining mortar. Avoid forcing the brick, as this could cause it to break into smaller pieces, making removal more difficult. If a brick is severely damaged and crumbling, you may need to break it apart into smaller, manageable pieces for removal. Again, safety glasses are important for this portion of the task.
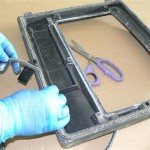
After removing the damaged firebrick, thoroughly clean the area where the new brick will be installed. Use a wire brush to remove any remaining mortar, dust, or debris. A shop vacuum can be used to remove any loose particles. Ensure that the surface is clean and dry before applying the new mortar.
4. Mortar Application
Mixing and applying the refractory mortar correctly is crucial for a strong and durable bond between the firebrick. If using premixed mortar, follow the manufacturer's instructions for preparation. If using dry mortar, mix it with water according to the manufacturer's recommendations. The consistency of the mortar should be similar to that of peanut butter – thick enough to hold its shape but still pliable.
Using the trowel, apply a generous layer of mortar to the back and sides of the new firebrick. Ensure that the mortar is evenly distributed and that there are no gaps or voids. Also apply a layer of mortar to the surrounding surfaces in the fireplace where the new firebrick will be placed. This will ensure a strong bond between the new brick and the existing structure.
5. Firebrick Placement
Carefully position the new firebrick into its place, pressing it firmly against the surrounding surfaces. Ensure that the brick is level and aligned with the adjacent bricks. Use a level to check the alignment and make any necessary adjustments. If the brick is too high or too low, add or remove mortar as needed. Wiggle the brick slightly as you push it into place, this helps compress the mortar and evenly distribute it.
Once the firebrick is in place, use the trowel to remove any excess mortar that has squeezed out. Smooth the mortar joints to create a clean and professional finish. A damp sponge can be used to wipe away any residual mortar from the surface of the firebrick and the surrounding area.
Repeat the mortar application and firebrick placement process for each remaining brick that needs to be replaced. Work systematically, ensuring that each brick is properly aligned and bonded to the surrounding structure. Small gaps between the brick are acceptable and even preferred to forcing ill-fitting brick into a confined space.
6. Curing and Drying
After all the firebrick has been replaced, allow the mortar to cure and dry completely before using the fireplace. The curing time will vary depending on the type of mortar used and the ambient temperature and humidity. Consult the manufacturer's instructions for specific curing recommendations. Generally, a curing period of at least 24 to 48 hours is recommended. Some mortars require damp curing, where the surface is lightly misted with water to prevent cracking. Consult the manufacturer's instructions to determine if your mortar requires this step.
After the mortar has cured, it's advisable to "season" the new firebrick by gradually increasing the heat over several uses. This helps to prevent thermal shock and cracking. Start with small, short fires and gradually increase the size and duration of the fires over the course of several days or weeks.
Following these steps should enable a successful firebrick replacement project. Remember to prioritize safety and take your time to ensure a high-quality result. With proper installation and maintenance, the new firebrick will provide years of reliable service, protecting the fireplace structure and ensuring efficient heat retention.

86 Replacing Fire Bricks In A Wood Stove At The Ranch

How To Repair Firebrick At A Fireplace Nonprofit Home Inspections

How To Replace Wood Stove Fire Brick 2024 Forestry Reviews

How To Repair Firebrick At A Fireplace Nonprofit Home Inspections

Replacing The Firebrick In Wood Burning Stoves

How To Install Firebrick In Your Outdoor Stone Fireplace

How To Replace Firebrick Ehow

How To Install Firebrick In Your Outdoor Stone Fireplace

How To Replace Wood Stove Fire Brick 2024 Forestry Reviews

How To Install Firebrick In Your Outdoor Stone Fireplace