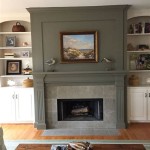
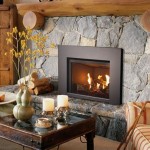
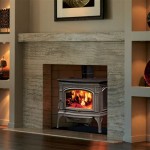
How To Reface A Fireplace With Stone
A fireplace is a focal point in many homes, and updating its appearance can dramatically change the overall aesthetic of a room. Refacing a fireplace with stone is a popular choice for homeowners seeking a timeless and elegant look. This project can be undertaken by skilled DIY enthusiasts, though it requires careful planning and execution. This article will provide step-by-step instructions for refacing a fireplace with stone, helping you achieve a stunning transformation in your home.
1. Preparation and Planning
Before embarking on the refacing project, careful planning and preparation are crucial. This includes assessing the existing fireplace, determining the desired stone type and layout, and gathering necessary materials and tools.
Here’s a detailed breakdown of the preparation phase:
a. Evaluate the Existing Fireplace
Examine the current condition of the fireplace. Determine whether it requires any repairs, such as cracks in the brick, loose mortar, or damaged trim. Assess the structural integrity of the hearth and mantel. Repair any issues before proceeding with the refacing process.
b. Choose the Stone
Select the type of stone that complements your home's style and personal preferences. Consider factors such as color, texture, and size. Popular choices for fireplace refacing include:
- Limestone: Offers a classic and elegant look with a natural, warm color palette.
- Granite: Durable and heat-resistant, available in various colors and patterns.
- Slate: Provides a rustic and contemporary appeal, with a natural, layered texture.
- Marble: Known for its luxurious appearance, offering a sophisticated and elegant touch.
Consult with a stone supplier or contractor for guidance on selecting the appropriate stone for your project.
c. Plan the Layout
Sketch out the desired stone layout for the fireplace. Consider the size and shape of the fireplace, as well as the pattern and arrangement of the stones. A professional installer can assist with this stage if needed.
d. Gather Materials and Tools
Acquire the necessary materials and tools, including:
- Stone: Ensure you have enough to cover the entire fireplace surface.
- Mortar: Choose a mortar specifically designed for stonework.
- Masonry saw: Used to cut stone to size.
- Chisel and hammer: For shaping and trimming stones.
- Level and plumb bob: To ensure precise alignment.
- Grout float: For applying grout.
- Safety gear: Including gloves, eye protection, and a dust mask.
2. Installing the Stone
With the preparation phase completed, you can begin installing the stone. The process requires patience and attention to detail.
a. Prepare the Fireplace Surface
Clean the existing fireplace surface thoroughly to remove dirt, dust, and debris. This ensures proper adhesion of the mortar. If the existing fireplace is painted, remove the paint using paint stripper or sanding. The stone will adhere better to bare brick or concrete.
b. Lay the First Row
Start by laying the first row of stones on the hearth. Use the level and plumb bob to ensure proper alignment. Apply a thin layer of mortar to the back of each stone and position them according to the planned layout. Press firmly into the mortar to ensure secure bonding.
c. Continue Laying Rows
Work your way up, laying each row of stone on top of the previous one. Make sure to maintain consistent spacing between the stones. Use the masonry saw to cut stones to size if needed. As you progress, check alignment and adjust stones as needed.
d. Apply Mortar
Once the stones are in place, apply mortar to the joints between them. Use a trowel to fill the joints completely, ensuring a smooth and even finish. Allow the mortar to dry and cure for the specified time before proceeding to the next step.
3. Finishing Touches
After the mortar has cured, the finishing touches complete the transformation. These include grouting, cleaning, and sealing.
a. Grouting
Apply grout to the joints between the stones to create a clean and finished look. Choose grout that complements the stone color and style. Use a grout float to apply the grout evenly and remove any excess. Allow the grout to dry completely before cleaning.
b. Cleaning
Clean the stone surface thoroughly to remove any excess grout or mortar residue. Use a damp cloth and a mild cleaning solution. Avoid abrasive cleaners, as they can damage the stone surface.
c. Sealing
Apply a sealant to protect the stone from stains and moisture. A sealant will enhance the stone's durability and longevity. Follow the manufacturer's instructions for application and drying time.
By carefully following these steps, you can successfully reface your fireplace with stone, bringing a touch of elegance and sophistication to your home. Remember to seek professional guidance if you are unsure about performing any part of the project. This will ensure the safety and quality of the finished product.

Reface A Fireplace With The Look Of Stone Or Brick Barron Designs

15 Fabulous Fireplace Refacing Ideas Average But Inspired

Reface A Fireplace With The Look Of Stone Or Brick Barron Designs

Refacing Fireplace And Chimney Authority

15 Fabulous Fireplace Refacing Ideas Average But Inspired

Fireplace Refacing How You Can Improve Your

Fireplace Refacing So You Want To Bob Vila

Reface Your Fireplace Fresh New Look Hearth Remodeling

Refacing Fireplace And Chimney Authority

Faux Stone Panels For Fireplaces
Related Posts