How to Reface a Fireplace: A Step-by-Step Guide
Refacing a fireplace is a cost-effective way to update the look of your home without the need for a complete remodel. Whether you're aiming for a modern, rustic, or traditional style, there are many options available to create your desired aesthetic. Here's a step-by-step guide to help you tackle this project with confidence:
Step 1: Preparing the Fireplace
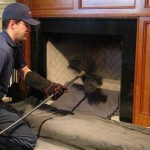
Start by clearing the area around the fireplace and removing any existing trim or molding. Cover nearby surfaces with drop cloths or plastic sheeting to protect them from dust and debris. Use a screwdriver to remove the fireplace grate and any heat-resistant panels or inserts.
Step 2: Choosing New Facing Material
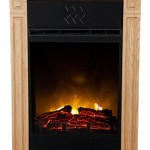
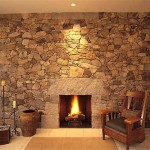
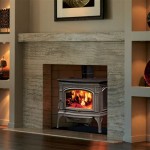
Consider various materials for the fireplace facing, such as stone veneer, tile, brick, or cultured marble. Stone veneer offers a natural look, while tile is available in a wide range of colors and finishes. Brick provides a classic aesthetic, and cultured marble gives a polished, modern appearance. The choice depends on your style preferences and budget.
Step 3: Installing the Backing Board
Install a heat-resistant backing board over the existing fireplace surround to provide a stable surface for the new facing material. Use screws or nails to secure the backing board firmly in place. Ensure that the board covers the entire area to be re-faced, including the hearth and the area around the firebox opening.
Step 4: Applying the Facing Material
Apply the facing material using a thin-set mortar or adhesive specifically designed for high-temperature areas. Spread the mortar onto the backing board with a notched trowel and press the facing material firmly into place. If using tile, use spacers to ensure even spacing between tiles. Grout the joints between tiles once the mortar has set.
Step 5: Securing the Facing
Once the facing material is installed, secure it by driving nails or screws through the material and into the backing board. Use a finishing nail gun or a hammer and nails for this step. Countersink the nails or screws slightly below the surface of the facing material to prevent them from protruding.
Step 6: Adding Trim and Finishing
Add trim around the edges of the fireplace to conceal the backing board and provide a finished look. Use a miter box to cut the trim pieces at 45-degree angles for a seamless fit. Secure the trim with nails or screws and caulk the seams for a professional-looking finish.
Tips for Success:
- Always follow the manufacturer's instructions for the materials and adhesives used.
- Use a level to ensure the facing material is installed straight.
- Allow ample time for the mortar or adhesive to set before grouting or using the fireplace.
- Protect the new fireplace surface with a heat-resistant spray or sealant.
- Consider hiring a professional if you have limited experience or want a more complex design.

15 Fabulous Fireplace Refacing Ideas Average But Inspired

Reface A Fireplace With The Look Of Stone Or Brick Barron Designs

15 Fabulous Fireplace Refacing Ideas Average But Inspired

Reface Your Fireplace Fresh New Look Hearth Remodeling

10 Fireplace Makeover Ideas Before And After Regency

Our Transformed Fireplace Before After Reface Diy Update

Fireplace Refacing How You Can Improve Your

Refacing Fireplace And Chimney Authority

A Step By Guide To Fireplace Refacing Diy Family Handyman

Reface A Fireplace With The Look Of Stone Or Brick Barron Designs
Related Posts