How To Put A Mantle On A Stone Fireplace
Adding a mantle to a stone fireplace can significantly enhance its aesthetic appeal, providing a focal point and offering a surface for displaying decorative items. The process, however, requires careful planning and execution to ensure a secure and visually pleasing result. This article outlines the steps involved in attaching a mantle to a stone fireplace, covering preparation, installation, and finishing touches.
Assessing the Stone Fireplace and Selecting the Mantle
Before beginning the installation process, a thorough assessment of the stone fireplace is crucial. The type of stone, its condition, and the overall structure must be evaluated to determine the most appropriate mounting method. Natural stone, cultured stone, and brick-faced fireplaces each present unique challenges and require different approaches.
The condition of the stone is particularly important. Look for loose stones, cracks, or crumbling mortar. Any such issues must be addressed before proceeding with the installation. Securely re-mortaring loose stones or patching cracks will ensure a stable base for the mantle.
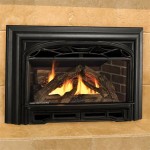
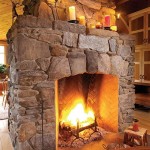
Mantle selection is another critical aspect. Consider the fireplace's dimensions, the room's style, and the desired aesthetic. Mantles are available in various materials, including wood, stone, and concrete. Wood mantles are a popular choice due to their versatility and ease of installation. However, stone or concrete mantles can provide a more rustic or contemporary look.
The size of the mantle should be proportionate to the fireplace. A mantle that is too small will appear insignificant, while one that is too large will overwhelm the space. As a general guideline, the mantle should be slightly wider than the firebox opening and deep enough to accommodate decorative items. The height of the mantle from the firebox's top should adhere to local building codes to prevent fire hazards. These codes often specify minimum distances between combustible materials and the firebox.
Preparing the Stone Surface
Proper preparation of the stone surface is essential for a secure and long-lasting installation. This involves cleaning the surface and identifying suitable attachment points. Begin by thoroughly cleaning the stone with a wire brush and a solution of water and mild detergent. This will remove any dirt, dust, or loose debris that could interfere with adhesion.
Next, identify the best locations for anchoring the mantle. Ideally, find areas where the stone is solid and free from cracks or weak points. The mortar joints can sometimes be used as attachment points, but this depends on their condition and strength. It's crucial to avoid drilling directly into fragile or unstable stones.
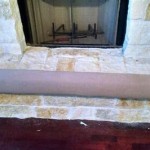
If the stone surface is uneven, consider using shims to create a level base for the mantle. Shims are thin pieces of wood or plastic that can be inserted between the mantle and the stone to compensate for irregularities. This will ensure that the mantle sits flush against the wall and looks aesthetically pleasing.
Before drilling, use a stud finder to check for any hidden wiring or pipes behind the stone. Drilling into these utilities can be dangerous and costly. If necessary, consult with a qualified electrician or plumber to determine the location of these utilities and avoid any potential hazards.
Installing the Mantle
The installation method will depend on the type of mantle and the condition of the stone fireplace. One common method involves using heavy-duty construction adhesive and mechanical fasteners. This approach provides both a strong bond and physical support for the mantle.
Begin by applying a generous bead of construction adhesive to the back of the mantle. Be sure to use an adhesive that is specifically designed for bonding to stone and masonry. Press the mantle firmly against the stone surface, ensuring that it is properly aligned and level. Use shims, as needed, to maintain the correct position.
Next, use a masonry drill bit to drill pilot holes through the mantle and into the stone. The size of the drill bit should match the diameter of the mechanical fasteners being used. Insert concrete screws or masonry anchors into the pilot holes, tightening them securely to hold the mantle in place. The number and placement of the fasteners will depend on the size and weight of the mantle. Heavier mantles will require more fasteners for adequate support.
Concealing the mechanical fasteners is important for achieving a clean and professional look. Counter-sinking the screws and using wood plugs that match the mantle's finish can effectively hide them. Alternatively, decorative bolt covers can be used to add a touch of style.
For particularly heavy mantles, consider using a corbel system for added support. Corbels are decorative brackets that are attached to the stone and provide a solid base for the mantle to rest upon. This method is especially suitable for mantles that will be used to support heavy objects.
Another method frequently utilized is using a steel bracket system, which is secured to the wall studs behind the stone. This provides a very strong and stable mount, but requires careful planning to ensure that the brackets are properly aligned and hidden behind the mantle.
Finishing Touches and Safety Considerations
Once the mantle is securely installed, the final step is to add the finishing touches. This may involve caulking any gaps between the mantle and the stone, applying a sealant to protect the mantle's surface, and adding decorative trim or molding.
Caulking any gaps will prevent drafts and moisture from entering behind the mantle, which can damage the stone or the mantle itself. Use a paintable caulk that matches the color of the mantle or the stone. Smooth the caulk with a wet finger for a clean and professional finish.
Applying a sealant, especially to wooden mantles, will protect them from moisture, stains, and scratches. Choose a sealant that is specifically designed for the type of wood used in the mantle. Follow the manufacturer's instructions for application. Regular maintenance of the sealant will help to prolong the life of the mantle.
Finally, consider adding decorative trim or molding to enhance the mantle's appearance. This can be used to create a more traditional or contemporary look, depending on the style of the trim. The trim can be attached with construction adhesive and brad nails.
Safety is paramount throughout the entire installation process. Always wear safety glasses and gloves when drilling or cutting materials. Use a dust mask to protect yourself from airborne particles. Be sure to disconnect any electrical power to the fireplace area before starting work. If you are not comfortable performing any of these steps, consult with a qualified professional. A properly installed mantle will not only enhance the aesthetic appeal of your stone fireplace but also provide a safe and functional addition to your home.

How To Build And Hang A Mantel On Stone Fireplace Shanty 2 Chic

How To Build And Hang A Mantel On Stone Fireplace Shanty 2 Chic

Fireplace Mantel Installation Before And After

Installing And Making A Floating Mantle For Our Stone Fireplace

Installing A Wood Mantel On Stone Wall Remodelaholic

Installing And Making A Floating Mantle For Our Stone Fireplace

Guide Mantel Installation On A Stone Fireplace

Eldorado Stone Fireplace Installation With Mantel Time Lapse Installing Veneer

Fireplace Mantel Installation Before And After

Installing A Wood Mantel On Stone Wall Remodelaholic