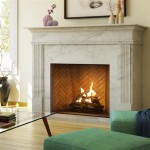
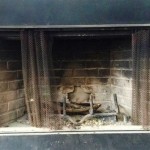
How To Paint a Brick Fireplace Gray and White
Painting a brick fireplace can dramatically transform the aesthetic of a living space. The choice of color significantly contributes to the overall ambiance, and a gray and white palette offers a versatile and modern update to a potentially outdated or overly rustic feature. This article provides a comprehensive guide on preparing and painting a brick fireplace using gray and white tones, ensuring a professional and long-lasting finish.
Before commencing any painting project, one must carefully consider the existing décor, the desired outcome, and the proper preparation techniques. A brick fireplace, due to its porous nature, requires specific priming and painting methods compared to smoother surfaces. Neglecting these details can lead to unsatisfactory results, including peeling paint, uneven coverage, and compromised structural integrity.
Key Point 1: Preparing the Brick Fireplace
Proper preparation is paramount to achieving a successful paint job on a brick fireplace. The brick must be thoroughly cleaned to remove accumulated soot, dirt, and any existing coatings. This process ensures proper adhesion of the primer and paint, preventing premature failure of the finish.
The initial cleaning step involves brushing the brick surface with a stiff-bristled brush to dislodge loose debris. A wire brush can be used for more stubborn residues, but caution should be exercised to avoid damaging the brick. Following the dry brushing, a solution of trisodium phosphate (TSP) and water should be applied to the brick. TSP is a powerful cleaning agent that effectively removes grease, grime, and soot. Always wear gloves and eye protection when working with TSP.
The TSP solution should be applied using a sponge or scrub brush, working it into the crevices and pores of the brick. Allow the solution to dwell for approximately 15-20 minutes, then thoroughly rinse the brick with clean water. Multiple rinses may be necessary to remove all traces of TSP, which can interfere with paint adhesion. A pressure washer can be used for rinsing, if available, but it must be used with caution to avoid damaging the brick or mortar.
After rinsing, allow the brick to dry completely. This may take several days, depending on the humidity and ventilation. It is crucial to ensure the brick is entirely dry before proceeding to the next step, as moisture trapped within the brick can lead to blistering and peeling of the paint.
Once the brick is dry, inspect it for any cracks or damaged mortar. These imperfections should be repaired before painting. Use a patching compound designed for masonry to fill any cracks or holes. Allow the patching compound to dry completely according to the manufacturer's instructions, and then sand it smooth to blend with the surrounding brick.
Finally, apply painter’s tape to protect any adjacent surfaces, such as the wall surrounding the fireplace, the hearth, or the mantel. This will ensure clean lines and prevent paint from getting on unwanted areas.
Key Point 2: Priming and Painting the Brick
After the brick is thoroughly cleaned, dried, and repaired, the next step is priming. Primer is essential for sealing the porous surface of the brick, providing a uniform base for the paint, and promoting adhesion. Without primer, the paint may soak into the brick unevenly, resulting in a blotchy and inconsistent finish.
Use a high-quality masonry primer specifically formulated for brick and concrete. These primers are designed to penetrate the porous surface and create a strong bond. Apply the primer using a brush, roller, or paint sprayer. When using a brush, work the primer into the crevices and pores of the brick to ensure complete coverage. When using a roller, choose a roller with a nap length suitable for rough surfaces. When using a paint sprayer, follow the manufacturer's instructions and maintain a consistent distance from the surface.
Allow the primer to dry completely according to the manufacturer's instructions. This may take several hours or even overnight. Once the primer is dry, inspect it for any missed spots or areas where the brick is still visible. Apply a second coat of primer if necessary, ensuring complete and uniform coverage.
With the brick properly primed, it is time to apply the paint. The choice of paint is crucial for achieving a durable and aesthetically pleasing finish. Use a high-quality latex paint specifically designed for masonry or an acrylic paint. These paints are breathable, allowing moisture to escape from the brick, which helps prevent peeling and blistering. An epoxy paint is another option but the fumes are strong and require proper ventilation.
Apply the paint in thin, even coats, allowing each coat to dry completely before applying the next. Multiple thin coats are preferable to one thick coat, as they provide better coverage and prevent drips and runs. Use a brush, roller, or paint sprayer, applying the paint in the same manner as the primer. The first coat is often a base coat of white or light gray, depending on the desired color scheme.
For a gray and white fireplace, one can opt for an ombre effect, painting the lower portion of the fireplace a darker shade of gray and gradually fading to white towards the top. Alternatively, one can paint the entire fireplace a neutral gray and then dry brush white paint over the surface to create a textured, aged appearance. Dry brushing involves dipping a brush lightly into the paint, wiping off the excess, and then lightly brushing the paint over the surface of the brick, leaving some of the underlying gray visible.
Another option is to create a faux limewash effect using thinned-down white paint. This technique involves diluting the paint with water and then applying it to the brick in thin, translucent layers. The goal is to create a soft, chalky finish that allows the texture of the brick to show through.
Allow each coat of paint to dry completely before applying the next. The drying time will vary depending on the humidity and temperature. Follow the manufacturer's instructions for drying times. After the final coat of paint has dried, remove the painter’s tape carefully, pulling it away at a 45-degree angle to prevent peeling the paint.
Key Point 3: Achieving the Desired Gray and White Effect
Several techniques can be employed to achieve the desired gray and white effect on a brick fireplace, depending on the desired aesthetic. These techniques range from simple color blocking to more advanced faux finishes, each offering a unique look.
One approach is to paint the entire fireplace a solid gray color and then use white paint to highlight specific areas, such as the mortar joints. This can be achieved by using a small brush or sponge to carefully apply white paint to the mortar lines, creating a subtle contrast that emphasizes the brick texture. Alternatively, a darker gray or charcoal gray can be used on the mortar for a bolder effect.
Another option is to create a distressed or aged look by sanding down certain areas of the painted brick. This technique involves using sandpaper to lightly sand away some of the paint, revealing the underlying brick or primer. The sanded areas can then be stained or glazed to enhance the aged appearance. This technique is particularly effective for creating a rustic or farmhouse-style fireplace.
The ombre effect, as mentioned previously, is a visually appealing option. To achieve this, start by painting the bottom portion of the fireplace a dark gray color. Then, gradually blend the dark gray into a lighter shade of gray as you move upwards, eventually transitioning to white at the top. This can be achieved by using a brush or sponge to blend the colors together, creating a seamless gradient. The key to a successful ombre effect is to work quickly and blend the colors while they are still wet.
For a more contemporary look, one can paint the fireplace a light gray color and then add white accents using stencils or geometric patterns. This technique is particularly effective for creating a focal point in a modern living space. The stencils can be purchased at a craft store or created using a cutting machine. The geometric patterns can be achieved by using painter’s tape to mask off the desired areas.
Limewashing is a traditional technique that involves applying a thin, diluted layer of lime paint to the brick. This creates a soft, chalky finish that allows the texture of the brick to show through. This is not traditional paint but rather a slaked lime mixture. While it can be more difficult to obtain lime-based paint, the results are more consistent in the long run.
Ultimately, the best approach for achieving the desired gray and white effect depends on personal preference and the overall aesthetic of the space. Experimentation and creativity are encouraged, but it is essential to prioritize proper preparation and painting techniques to ensure a durable and long-lasting finish.
After completing the painting process, allow the paint to cure completely before using the fireplace. This may take several days or even weeks, depending on the type of paint used. Curing allows the paint to fully harden and develop its maximum durability and resistance to heat and moisture.

Paint Your Brick Fireplace In 2 Easy Steps Birkley Lane Interiors

Transform A Basic Brick Fireplace With Gray Paint And Diy Matel Makeover Home Decor

Paint Your Brick Fireplace In 2 Easy Steps Birkley Lane Interiors

7 Beautiful Ideas For Painting Interior Brick Fireplaces

The Perfect Color Brick Fireplace Makeover Living Room With Painted Fireplaces

Paint Your Brick Fireplace In 2 Easy Steps Birkley Lane Interiors

How To Paint Your Fireplace Brick Surround

Gray Painted Brick Fireplace

Best Paint Colors For A Painted Fireplace Macfarland Painting

The Pros Const Of Painted Brick
Related Posts


