How To Mount a TV on a Faux Stone Fireplace
Mounting a television above a fireplace, especially one with a faux stone facade, presents unique challenges compared to mounting on a standard drywall surface. Faux stone, designed to mimic the appearance of natural stone, offers aesthetic appeal but often lacks the structural integrity required for secure mounting without careful planning and execution. This article provides a comprehensive guide on how to mount a TV on a faux stone fireplace, covering essential factors to consider, necessary tools and materials, and step-by-step instructions to ensure a safe and successful installation.
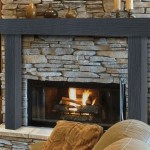
Before commencing any work, it is imperative to assess the fireplace structure and the faux stone composition. Faux stone can be made from various materials, including concrete mixtures, polymers, or adhered natural stone veneers to a substrate. The type of material and the quality of the installation significantly impact the mounting process. A thorough understanding of these factors is crucial for selecting the appropriate mounting hardware and techniques.
It's also vital to consider the heat generated by the fireplace. Although faux stone is generally heat-resistant, prolonged exposure to high temperatures can damage the television and its internal components. Therefore, assessing the heat output of the fireplace and the distance between the firebox and the planned TV location is essential. If the heat is excessive, consider alternatives such as installing a mantel to deflect heat or choosing a different location for the television.
Another crucial aspect is cable management. Hiding the power cord and HDMI cables is essential for a clean and aesthetically pleasing installation. Planning the cable routing before mounting the TV helps avoid unsightly wires and ensures a professional finish. This may involve drilling through the faux stone (with caution) or utilizing existing channels behind the fireplace.
Determining the Fireplace Structure and Stone Composition
The first step is to determine what lies beneath the faux stone. The substrate to which the faux stone is attached is the primary structural element that will bear the weight of the TV and the mounting bracket. Common substrates include brick, concrete, cement board, or wood framing. Identifying the substrate is critical for selecting the appropriate anchors and mounting techniques.
If the fireplace structure is accessible from behind or the side, inspect its construction to determine the substrate material. If visual inspection is not possible, a stud finder with metal detection capabilities can help identify the presence of wooden studs or metal components behind the faux stone. However, these tools may not be entirely accurate due to the density of the stone and the varying materials used in its construction.
Another method is to carefully drill a small pilot hole (using a masonry drill bit if necessary) in an inconspicuous area of the faux stone. The drill shavings will provide clues about the material composition. Red dust indicates brick, grey dust suggests concrete or cement board, and wood shavings confirm the presence of wood framing.
Once the substrate material is identified, assess the type of faux stone used. Some faux stone is adhered directly to the substrate with mortar or adhesive, while others are mechanically fastened with screws or clips. If the stone is loosely attached or shows signs of instability, reinforce it before proceeding with the TV mount installation. This reinforcement might involve applying additional adhesive, adding screws to certain joint areas, or securing the stone to the substrate with mortar, depending on the specific product and manufacturer recommendations.
Selecting the Appropriate Mounting Hardware and Tools
Choosing the correct mounting hardware is crucial for ensuring a secure and stable TV installation on a faux stone fireplace. The selection should be based on the weight of the television, the type of substrate, and the distance between the faux stone surface and the solid substrate behind it.
For brick or concrete substrates, masonry anchors are required. Expansion anchors or sleeve anchors are commonly used for this purpose. Expansion anchors expand when a bolt is tightened, creating a secure grip within the masonry. Sleeve anchors, on the other hand, provide a more even distribution of pressure and are suitable for heavier loads.
If the substrate is wood framing, lag bolts or structural screws are appropriate. These fasteners should be long enough to penetrate the wood studs deeply, providing sufficient holding power. Be sure to avoid using regular drywall screws, as they are not designed to support heavy loads.
When selecting the TV mount, consider the size and weight of the television, as well as the desired viewing angle. Fixed mounts offer a low-profile installation, while tilting mounts allow for slight adjustments to the vertical viewing angle. Full-motion mounts provide maximum flexibility, allowing the TV to be swiveled and extended away from the wall. Choosing a VESA-compliant mount that is compatible with the TV's mounting hole pattern is essential.
In addition to mounting hardware, the following tools are necessary for a successful installation:
- Drill with a hammer drill function (for masonry)
- Masonry drill bits (if drilling into brick or concrete)
- Standard drill bits (for wood framing)
- Stud finder with metal detection
- Level
- Tape measure
- Pencil
- Socket wrench or adjustable wrench
- Screwdriver
- Safety glasses
- Dust mask
- Cable management accessories (cable ties, wire concealers, etc.)
Ensuring you have high-quality tools and hardware will significantly improve the ease and safety of the installation process.
Step-by-Step Mounting Instructions and Cable Management
Once the substrate and stone composition are understood and the required tools and hardware are gathered, the actual mounting process can begin. These instructions provide a general guideline; always consult the TV mount manufacturer's instructions for specific details.
Prepare the Work Area:
Protect the surrounding area with drop cloths or plastic sheeting to prevent dust and debris from damaging furniture or flooring. Wear safety glasses and a dust mask to protect your eyes and lungs.Locate Studs or Solid Substrate:
Use a stud finder to locate the studs behind the faux stone if the substrate is wood framing. For brick or concrete, carefully mark the desired mounting location based on the TV mount’s measurements.Mark Mounting Holes:
Position the TV mount bracket against the faux stone and use a pencil to mark the locations of the mounting holes. Ensure the bracket is level before marking the holes.Drill Pilot Holes:
Using the appropriate drill bit for the substrate material, drill pilot holes at the marked locations. When drilling through faux stone, use a slow and steady pressure to avoid cracking or chipping the stone. For masonry, use a hammer drill function and ensure the pilot holes are deep enough to accommodate the anchors.Install Anchors:
Insert the appropriate anchors into the pilot holes. For expansion anchors, insert the anchor into the hole and tap it gently with a hammer until it is flush with the surface. For sleeve anchors, ensure the sleeve is properly aligned before tightening the bolt.Attach the Mounting Bracket:
Align the mounting bracket with the anchors and insert the bolts or screws. Tighten the fasteners securely, but avoid over-tightening, which can damage the faux stone or the substrate. Use a level to ensure the bracket is perfectly horizontal.Attach the TV to the Mount:
Attach mounting arms to the back of the TV according to the TV mount manufacturer's instructions. Ensure the arms are securely fastened and aligned properly.Hang the TV on the Bracket:
Carefully lift the TV and attach it to the mounting bracket. Most TV mounts have a locking mechanism to secure the TV in place.Cable Management:
Before fully securing the TV, route the power cord and HDMI cables through the desired cable management system. Conceal the cables behind the TV or within a wall-mounted cable concealer. Consider using cable ties or Velcro straps to bundle the cables and keep them organized.Final Adjustments:
Once the TV is mounted and the cables are managed, make any necessary adjustments to the viewing angle or position of the TV. Ensure the TV is securely locked in place and that all cables are properly connected.
Proper cable management is not only for aesthetics but also contributes to safety by preventing tripping hazards and keeping cables away from heat sources.
When drilling through faux stone, consider these additional tips:
- Use a sharp masonry drill bit designed for drilling through stone or tile.
- Apply gentle, consistent pressure while drilling. Avoid forcing the drill bit, as this can cause the stone to crack or chip.
- Use a variable-speed drill and start at a slow speed to create a pilot hole. Gradually increase the speed as you drill deeper.
- Consider using a diamond-tipped hole saw for larger holes, such as those needed for cable routing.
- If the faux stone is particularly brittle, apply painter's tape to the drilling area to help prevent chipping.
By following these steps and taking necessary precautions, mounting a TV on a faux stone fireplace can be a successful project that enhances the aesthetics of the living space.

Mounting A Tv Above Fireplace With Full Tutorial Fixthisbuildthat

Mounting A Tv Above Fireplace With Full Tutorial Fixthisbuildthat

Installing A Tv Wall Mount On Stone Fireplace Lhp

Mounting A Tv Above Fireplace With Full Tutorial Fixthisbuildthat

Faux Stone Electric Fireplace And Tv Wall Genstone

Smarthome And Theater Systems Residential Solutions Photo Album Tv Mount Over Stone Fireplace In New Canaan Ct

Installing A Tv On Stacked Stone Wall

Brett S Faux Stone Electric Fireplace And Tv Wall Genstone

Diy Faux Cast Stone Fireplace Part 3 Mounting Our Tv Top Shelf

Faux Stone Fireplace Entertainment Center Genstone
Related Posts