How to Make a Fireplace Surround
A fireplace surround is the decorative frame that encases the fireplace hearth and mantle. It's a focal point in any room, and its design can significantly impact the overall aesthetic. Making a fireplace surround is a rewarding DIY project that allows you to personalize your home and add character to a space. This article will guide you through the process of building a stunning fireplace surround, from choosing the right materials to finishing touches.
1. Planning and Design
Before embarking on your project, careful planning is essential. This stage involves deciding on the style, materials, and dimensions of the surround. Consider the following factors:
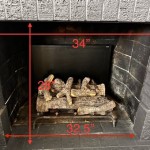
- Existing Fireplace Size: Measure the width, height, and depth of your existing fireplace opening to ensure the surround fits seamlessly.
- Style: Decide on the overall aesthetic you're aiming for. Browse online galleries and magazines, or visit local home improvement stores for inspiration. Some popular styles include traditional, modern, rustic, and contemporary.
- Materials: Select materials that complement your existing décor and suit your budget. Common materials include wood, stone, brick, tile, and even metal.
- Budget: Set a realistic budget for materials, tools, and any professional services you might require.
- Safety Considerations: Ensure that your chosen materials are fire-resistant and that the surround is installed correctly to prevent fire hazards.
Once you have a clear idea of the desired design, create a detailed sketch or blueprint. This will serve as your guide and help you visualize the final product.
2. Material Selection and Preparation
The chosen materials will determine the look and feel of your fireplace surround. Here's a breakdown of common options and their considerations:
Wood
Wood is a classic material that offers warmth and natural beauty. Choose hardwoods like oak, maple, or cherry for durability and attractive grain patterns. Consider using reclaimed wood for a rustic and sustainable look.
Stone
Stone provides a timeless elegance and adds a touch of grandeur to any fireplace. Natural stone options include granite, marble, sandstone, and limestone.
Brick
Brick is a rugged and durable material that provides a rustic or traditional aesthetic. Consider using reclaimed bricks or choosing specific brick colors and textures to match your design vision.
Tile
Tile is a versatile material that offers endless design possibilities. Options range from simple ceramic tiles to intricate mosaics and decorative tiles.
After selecting your preferred material, carefully prepare it for installation. This may involve cutting, shaping, or sanding the materials to fit your design specifications.
3. Construction and Installation
The construction phase involves building the frame of the surround and securing it to the existing fireplace. For most DIY projects, a basic framework of wood studs is often used as the foundation. Follow these general steps:
- Create the Frame: Cut and assemble the wooden studs or other framing materials according to your blueprint. Use screws or nails for stability.
- Install the Frame: Attach the frame to the existing fireplace using heavy-duty anchors or brackets. Ensure the frame is level and plumb.
- Add the Mantle: If your design includes a mantle, cut and install it on top of the frame. Be sure it is securely fastened.
- Install the Surrounding Material: Apply adhesive or mortar, depending on your chosen material, and carefully attach the selected stones, tiles, bricks, or wood panels to the frame.
- Grout and Finish: If using tile, apply grout between the tiles to fill gaps and create a seamless look. Allow the grout to dry completely before proceeding.
- Safety Check: Before using the fireplace, ensure all construction is secure and that the surround is adequately heat-resistant.
Remember to wear appropriate safety gear, such as gloves, eye protection, and a respirator, during the construction phase.

How To Make An Easy Diy Fireplace Mantel Sprucing Up Mamahood

How To Build A Fireplace Mantel Easy Diy Blossoming Life

Easy Fireplace Mantel Diy

Diy Fireplace Mantel Designatedspacedesign Com

Diy Fireplace Mantel And Surround Jenna Kate At Home

Diy Rustic Fireplace Mantel The Cure For A Boring

Building An Easy Modern Fireplace Mantel Young House Love

How To Build A Faux Fireplace Mantel And Surround The Home Depot

How To Make A Diy Fireplace Mantel The Idea Room

Diy Fireplace With Electric Insert Angela Marie Made

