How To Make a Faux Fireplace Mantel
A faux fireplace mantel offers a decorative solution to create the ambiance of a traditional fireplace without the complexities and costs associated with a functional firebox. This project can enhance the aesthetic appeal of a room, providing a focal point for décor and gathering. Constructing a faux mantel is a manageable DIY undertaking, requiring basic carpentry skills and readily available materials. The following guide outlines the steps involved in creating a custom faux fireplace mantel.
Planning and Design
Before commencing any construction, careful planning is essential. The first step is to determine the desired dimensions of the mantel. Consider the size of the room and the existing architectural features. A mantel that is disproportionately large or small will detract from the overall aesthetic. Measure the intended space and sketch out a few design options. Factors to consider include the overall height of the mantel, the width of the mantel shelf, and the desired depth of the structure. It is also imperative to decide on the style. Options range from rustic, reclaimed wood mantels to sleek, modern designs crafted from MDF or painted wood. Browse online resources and home décor magazines for inspiration.
Once the dimensions and style are determined, create a detailed plan. This plan should include precise measurements for each component of the mantel, including the legs, the mantel shelf, and any decorative elements. A detailed plan will ensure accuracy during the construction phase and minimize errors. Furthermore, the plan should include a materials list. Common materials used for faux fireplace mantels include lumber (pine, poplar, or hardwood), MDF (medium-density fiberboard), plywood, construction adhesive, screws, nails, wood filler, sandpaper, primer, and paint or stain.
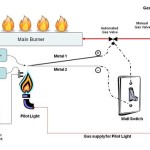
Safety considerations should also be addressed during the planning phase. Ensure that the mantel is securely attached to the wall to prevent accidents. If children or pets are present, consider rounding any sharp edges or corners to minimize the risk of injury. Finally, check local building codes and regulations to ensure that the faux fireplace mantel complies with all applicable requirements.
Construction Process
With a detailed plan in hand, the construction process can begin. The first step is to gather all the necessary materials and tools. Tools typically required include a measuring tape, pencil, saw (circular saw or miter saw), drill, screwdriver, level, sandpaper, clamps, and a nail gun (optional). Accuracy is paramount throughout the construction process.
Begin by cutting the lumber or MDF according to the dimensions specified in the plan. For the legs of the mantel, ensure that the cuts are square and precise. Use a miter saw for angled cuts, if necessary. Once the legs are cut, assemble them using construction adhesive and screws. Clamps can be used to hold the legs in place while the adhesive dries. Next, construct the mantel shelf. The mantel shelf can be a single piece of wood or a combination of pieces glued and screwed together. Ensure that the shelf is level and square.
Once the legs and mantel shelf are assembled, attach them together using construction adhesive and screws. Again, clamps can be used to hold the pieces in place while the adhesive dries. Ensure that the mantel is level and plumb. If any gaps or imperfections are present, fill them with wood filler. Allow the wood filler to dry completely and then sand it smooth. Sand all surfaces of the mantel to create a smooth, even finish. This step is crucial for achieving a professional-looking result.
Finishing and Installation
After the construction is complete, the mantel needs to be finished. The finishing process typically involves priming, painting, or staining. Before applying any finish, thoroughly clean the mantel to remove any dust or debris. Apply a coat of primer to all surfaces. Primer helps to seal the wood and provides a better surface for the paint or stain to adhere to. Allow the primer to dry completely.
Once the primer is dry, apply the desired finish. If painting, apply two or more coats of paint, allowing each coat to dry completely before applying the next. If staining, apply the stain according to the manufacturer's instructions. Consider using a wood conditioner before staining to ensure even absorption of the stain. After the stain has dried, apply a clear coat of polyurethane or varnish to protect the finish.
The final step is to install the faux fireplace mantel. Before installation, locate the wall studs using a stud finder. The mantel should be securely attached to the wall studs for maximum stability. Position the mantel against the wall and mark the locations of the studs on the mantel. Drill pilot holes through the mantel and into the studs. Attach the mantel to the wall using screws. Use a level to ensure that the mantel is perfectly level. If necessary, shim the mantel to achieve a level installation.
Once the mantel is securely attached to the wall, conceal the screw heads with wood filler or decorative plugs. Sand the filler smooth and touch up the paint or stain. Inspect the mantel for any imperfections and make any necessary repairs. Finally, decorate the mantel with candles, vases, artwork, or other decorative items. A faux fireplace mantel provides an elegant and customizable focal point for any room.

Faux Fireplace Mantel Surround

Easy Diy Faux Fireplace And Mantel Zucchini Sisters

Diy Faux Fireplace For Under 600 The Big Reveal Bless Er House

Diy Faux Fireplace Mantel With Tile And Brick

Diy Faux Fireplace Mantel From An Old Bed Love Of Family Home

Easy Diy Faux Fireplace And Mantel Zucchini Sisters

How To Turn A Bookshelf Into Faux Fireplace Mantle Miss Mustard Seed S Milk Paint

How To Build A Faux Fireplace Mantel And Surround The Home Depot

Handmade Faux Fireplace Mantel

Faux Fireplace Mantel Surround