How To Lay Brick In Front of a Fireplace
Laying brick in front of a fireplace can significantly enhance its aesthetic appeal while providing a practical, heat-resistant surface. This project, while achievable for many homeowners, requires careful planning, attention to detail, and adherence to proper techniques. Successfully laying brick ensures a durable and visually pleasing hearth extension that complements the fireplace and the surrounding room.
Before commencing the project, a thorough assessment of the existing fireplace area is crucial. This includes determining the desired size and shape of the brick extension, the type of brick to be used, and any potential compatibility issues with the existing flooring or fireplace structure. Choosing the correct materials and preparing the workspace are foundational steps to a successful installation.
This article provides a comprehensive guide to laying brick in front of a fireplace, covering the necessary preparations, material selection, installation process, and essential safety considerations. Following these guidelines will aid in creating a professionally finished hearth extension that adds both beauty and functionality to the fireplace area.
Planning and Preparation: The Foundation of a Successful Project
The initial phase involves meticulous planning and preparation. Accurate measurements and a detailed design are paramount. Start by determining the desired dimensions of the brick extension. Consider the overall aesthetics of the room and the style of the fireplace when deciding on the shape and size. A template can be created using cardboard or plywood to visualize the final result and ensure it aligns with expectations.
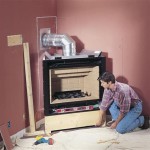
Next, assess the existing flooring in front of the fireplace. It is likely that the existing flooring will need to be removed to ensure the brick is level with, or slightly above, the surrounding floor. Determine the thickness of the brick and the mortar bed to calculate the necessary depth of removal. If the existing flooring is concrete, a concrete saw or jackhammer may be required. For wood flooring, a circular saw and pry bar will suffice.
Once the existing flooring is removed, clean the subfloor thoroughly. Remove any debris, dust, or loose particles. A clean, level surface is essential for proper adhesion of the mortar. If the subfloor is uneven, a self-leveling compound may be necessary to create a smooth, uniform base. Allow the self-leveling compound to cure completely before proceeding.
Finally, gather all the necessary tools and materials. Having everything readily available will streamline the installation process and minimize disruptions. This includes bricks, mortar, a trowel, a level, a rubber mallet, a brick hammer, a wet saw (for cutting bricks), a measuring tape, a mixing bucket, water, sponges, safety glasses, and gloves. Proper attire and safety equipment are always essential.
Material Selection: Choosing the Right Brick and Mortar
Selecting the appropriate brick and mortar is crucial for both the aesthetic appeal and the structural integrity of the hearth extension. Bricks come in various sizes, colors, and textures, each offering a unique look. Consider the style of the fireplace and the overall décor of the room when choosing the brick. Common options include standard red brick, clay brick, and reclaimed brick. Ensure the selected brick is of high quality and suitable for use around a fireplace, particularly regarding heat resistance.
The quantity of bricks required can be calculated by multiplying the length and width of the area to be covered, taking into account the dimensions of a single brick and the desired spacing between bricks (mortar joints). Adding an extra 10% to the calculated quantity is recommended to account for cuts and breaks.
Mortar is the binding agent that holds the bricks together. Type N mortar is generally recommended for hearth extensions, as it offers a good balance of strength and flexibility. Premixed mortar is available, but mixing the mortar yourself allows for greater control over the consistency. When mixing mortar, follow the manufacturer's instructions carefully. Add water gradually until the mortar reaches a thick, workable consistency similar to peanut butter. Overly wet mortar will be weak and prone to cracking.
In addition to the brick and mortar, consider the use of a sealant. After the mortar has cured, applying a brick sealant can help protect the hearth extension from stains and moisture damage. Choose a sealant that is specifically designed for use on brick and is compatible with the type of brick used.
The Installation Process: Laying the Brick with Precision
With the planning and preparation complete and the materials selected, the installation process can begin. The key to a successful brick installation is to maintain a consistent level and spacing between the bricks.
Place the first brick onto the mortar bed, pressing it firmly into place. Use a level to ensure the brick is level both horizontally and vertically. If necessary, tap the brick gently with a rubber mallet to adjust its position. Apply mortar to the sides of the brick to create the mortar joints. The standard mortar joint width is typically 3/8 inch, but this can be adjusted to suit personal preferences. Use brick spacers to maintain consistent joint widths.
Continue laying the bricks, working in rows. Apply mortar to the subfloor and the sides of each brick before placing it into position. Check the level and alignment of each brick as you go. Use the level to ensure that each row of bricks is level with the previous row. Any inconsistencies should be addressed immediately to prevent compounding errors. A string line can be used to maintain straight rows, especially for larger installations.
When reaching the edges of the hearth extension, it may be necessary to cut bricks to fit. Use a wet saw to make clean, precise cuts. Always wear safety glasses and follow the manufacturer's instructions when using a wet saw. After cutting the bricks, ensure the cut edges are smooth and even before placing them into position.
Once all the bricks are laid, allow the mortar to cure for at least 24 to 48 hours before walking on the hearth extension. Keep the area protected from moisture and temperature extremes during the curing process. After the mortar has cured, remove the brick spacers and clean the mortar joints. Use a damp sponge to wipe away any excess mortar from the brick surface. A brick jointers can be used to compact and shape the mortar joints creating a professional finish.
Finishing Touches and Important Considerations
After the mortar has cured and the joints have been cleaned, the hearth extension is nearly complete. Further steps can be taken to enhance the final product's appearance and protect its longevity. Applying a brick sealant, as mentioned previously, is an excellent way to protect against stains and spills. Choose a sealant specifically designed for brick and follow the manufacturer’s instructions for application.
Consider the integration of the hearth extension with the surrounding flooring. If there's a significant height difference between the extension and the adjacent floor, transition pieces can be installed to create a smooth and safe transition. These pieces can be made of wood, metal, or stone and should be securely fastened to both the hearth extension and the floor.
Regular maintenance of the brick hearth extension will ensure its longevity. Sweep or vacuum the surface regularly to remove dust and debris. Clean spills promptly to prevent staining. Periodically inspect the mortar joints for cracks or damage and repair them as needed. Addressing minor issues promptly will prevent them from escalating into more significant problems.
When using the fireplace, take precautions to protect the hearth extension from excessive heat. Use a fireplace screen to prevent sparks and embers from landing on the brick surface. Do not place flammable materials directly on the hearth extension. These simple steps will help ensure the safety and longevity of the brick hearth extension.
Finally, when undertaking any construction project, it's important to comply with all applicable building codes and regulations. Check with your local building department to determine if any permits are required for laying brick in front of a fireplace. Following the rules helps ensure compliance and safety.

Build A Fireplace Brick By Fine Homebuilding

How To Install A Mantel On Brick Fireplace 1905 Farmhouse

Diy Fireplace Makeover How To Add Brick A

How To Build A Fireplace Surround Beneath My Heart

Diy Fireplace Makeover Wood Slat

How To Install A Mantel On Brick Fireplace 1905 Farmhouse

How To Install Brick Slips Onto A Chimney T Q

How To Diy A Fireplace Surround Using Thin Bricks The Sommer Home

Building An Electric Fireplace With Brick Facade

Diy Fireplace Makeover Wood Slat
Related Posts