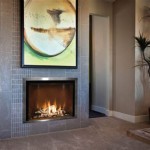
How to Install a Tile Fireplace Surround
Installing a tile fireplace surround is a significant home improvement project that can dramatically enhance the aesthetic appeal of a living space. It allows for personalization and customization, transforming a standard fireplace into a focal point. This process involves careful planning, precise execution, and adherence to safety guidelines. This article provides a comprehensive guide on how to install a tile fireplace surround, covering preparation, installation, and post-installation procedures.
Prior to commencing the project, it's crucial to assess the existing fireplace and the surrounding area. This assessment should include determining the dimensions of the fireplace opening, examining the structural integrity of the existing surround (if any), and identifying any potential hazards or complications. The type of tile selected will also impact the installation process; therefore, careful consideration should be given to factors such as material, size, and thickness.
Safety is paramount throughout the installation process. It's imperative to wear appropriate personal protective equipment (PPE), including safety glasses, gloves, and a dust mask. Disconnecting any gas or electrical connections to the fireplace is essential to prevent accidents. Furthermore, proper ventilation should be ensured, especially when working with adhesives, grout, and sealants.
Preparing the Fireplace Area
The initial step involves preparing the fireplace area for tile installation. This includes removing any existing surround, cleaning the surface, and ensuring it is level and structurally sound. A thorough cleaning is necessary to remove dust, debris, and any remnants of the previous surround. A wire brush and a scraper can be used to remove stubborn residue.
If an existing surround is present, its removal should be done carefully to avoid damaging the underlying structure. Depending on the type of surround, this may involve using a pry bar, hammer, or chisel. It's crucial to exercise caution to prevent injury or damage to the fireplace or surrounding walls.
Once the existing surround is removed, the underlying surface should be inspected for any imperfections. Cracks, holes, or uneven areas should be addressed before proceeding. Small cracks can be filled with patching compound, while larger imperfections may require more extensive repairs. The goal is to create a smooth, level surface that will provide a solid foundation for the tile.
Applying a cement backer board is generally recommended, particularly if the existing surface is not suitable for direct tile installation. Cement backer board is water-resistant and provides a stable, durable surface for tiling. It is typically attached to the fireplace surround using screws designed for cement board. Ensure the backer board is cut to the correct size and shape, and that it is securely fastened to the underlying structure.
Before applying the backer board, it's essential to measure and mark the area where the tiles will be installed. This will help ensure that the tiles are properly aligned and that the finished surround is symmetrical. Use a level and a measuring tape to create accurate markings. Consider the grout lines when marking the area to ensure a professional-looking result.
Installing the Tile
The installation of the tile is a critical phase that requires precision and attention to detail. The first step involves applying a thin-set mortar to the backer board using a notched trowel. The size of the notch should be appropriate for the size and type of tile being used. The thin-set mortar should be applied evenly, ensuring that it fully covers the backer board. Only apply thin-set to an area you can tile within 15-20 minutes to prevent it from drying out.
The tiles should be carefully placed onto the thin-set mortar, pressing them firmly into place. Use tile spacers to maintain consistent grout lines. Start at the bottom and work your way up, ensuring that each tile is level and aligned with the adjacent tiles. Periodically check the alignment with a level to ensure that the tiles are installed correctly.
Use a wet saw to cut tiles to fit around the fireplace opening and any other obstacles. A wet saw provides clean, precise cuts that are essential for a professional-looking installation. When cutting tiles, wear safety glasses to protect your eyes from debris. Measure the area where the tile needs to be cut accurately and mark the tile accordingly.
As the tiles are installed, periodically wipe away any excess thin-set mortar with a damp sponge. This will prevent the mortar from drying on the surface of the tiles and making it difficult to remove later. Use a clean sponge and fresh water to ensure that the tiles are thoroughly cleaned.
Allow the thin-set mortar to dry completely before proceeding to the next step. The drying time will vary depending on the type of mortar used and the ambient temperature. Consult the manufacturer's instructions for the recommended drying time. Typically, it takes at least 24 hours for the thin-set mortar to fully cure.
Grouting and Sealing the Tile Surround
Once the thin-set mortar has fully cured, the next step is to grout the tile surround. Select a grout color that complements the tile and the overall aesthetic of the room. Mix the grout according to the manufacturer's instructions, ensuring that it is the correct consistency. The grout should be thick enough to hold its shape but not so thick that it is difficult to apply.
Apply the grout to the tile surface using a grout float. Work the grout into the grout lines, ensuring that they are completely filled. Hold the grout float at a 45-degree angle and apply firm, even pressure. Remove any excess grout from the tile surface with the grout float.
After the grout has been applied, allow it to set for the recommended time, typically 15-30 minutes. Then, use a damp sponge to wipe away the excess grout from the tile surface. Rinse the sponge frequently with clean water to avoid smearing the grout. Work in small sections, ensuring that the tiles are thoroughly cleaned.
Once the grout has dried completely, apply a grout sealer to protect it from stains and moisture. The grout sealer should be applied according to the manufacturer's instructions. Apply a thin, even coat of sealer to the grout lines, being careful not to get it on the tile surface. Allow the sealer to dry completely before using the fireplace.
Caulk the edges of the tiled surround where it meets the wall or floor to create a watertight seal. This will prevent moisture from seeping behind the tiles and causing damage. Use a high-quality, paintable caulk that matches the color of the grout or tile. Apply the caulk in a smooth, even bead and smooth it with a wet finger or a caulking tool.
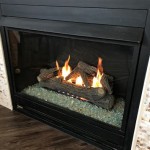
Finally, inspect the completed tile surround for any imperfections. Touch up any areas that need additional grout or sealant. Clean the tile surface with a tile cleaner to remove any remaining residue. Allow the grout and sealant to fully cure before using the fireplace.

Diy Tiling A Fireplace Surround What We Learned Along The Way

How To Tile Over An Existing Fireplace Surround My Woodlands Life

Diy Tiling A Fireplace Surround What We Learned Along The Way
/102661017-6a23c040b71843379188b96b21ac1a08.jpg?strip=all "How To Tile A Fireplace")
How To Tile A Fireplace

How To Tile A Fireplace My Uncommon Slice Of Suburbia

Tiling A Fireplace Surround Home Improvement Stack Exchange Blog

How To Tile A Fireplace South Georgia Style

How To Install A Marble Herringbone Fireplace Surround And Hearth

7 Tips I Wish Knew Before Our Diy Tile Fireplace Makeover The Homeblondy

Diy Fireplace Surround Transformation Jenna Burger Design Llc Interior Architectural Consulting
Related Posts