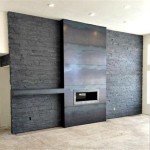
How To Install Stone Veneer Fireplace: A Comprehensive Guide
Installing stone veneer on a fireplace can dramatically enhance its aesthetic appeal and create a focal point in a living space. This process, while manageable for a dedicated do-it-yourselfer, does require careful planning, precise execution, and adherence to safety protocols. This article provides a detailed, step-by-step guide to successfully installing stone veneer on a fireplace.
Before embarking on the installation process, it's crucial to determine the scope of the project and ensure compatibility with existing structural elements. The weight of the stone veneer, the condition of the existing fireplace surface, and the local building codes are all factors that must be considered. Failing to address these preliminary factors can lead to structural issues or code violations later on.
Planning and Preparation: Laying the Foundation for Success
Successful stone veneer installation hinges on meticulous planning and preparation. This phase involves material selection, surface preparation, and the acquisition of necessary tools and equipment. A thorough approach at this stage minimizes potential errors and ensures a professional-looking finish.
Material Selection: Stone veneer is available in a wide variety of styles, colors, and textures. Choose a veneer that complements the existing décor and architectural style of the home. Consider both natural stone veneer and manufactured stone veneer. Natural stone offers authentic beauty and durability but is generally more expensive and heavier. Manufactured stone is lighter, more affordable, and offers a wider range of design options. Calculate the square footage of the fireplace surface to determine the exact amount of veneer needed. Add a contingency for cuts and waste, typically around 10% of the total square footage. Select corner pieces designed to provide a seamless transition around the edges of the fireplace. Choose appropriate setting materials, including mortar and grout, that are compatible with the chosen veneer type. Consult with a vendor to ensure the selected mortar is designed for exterior or interior stone veneer applications.
Surface Preparation: The surface onto which the stone veneer will be applied must be clean, structurally sound, and properly prepared to accept the mortar. Begin by thoroughly cleaning the existing fireplace surface. Remove any dust, debris, paint, or loose material that could interfere with adhesion. Use a wire brush and a masonry cleaner, if necessary, to remove stubborn stains or coatings. Inspect the surface for cracks or damage. Repair any imperfections with a patching compound designed for masonry surfaces. A sound substrate is fundamental for a long-lasting installation. If the existing surface is smooth concrete or painted brick, it will need to be roughened to provide a better bond for the mortar. This can be accomplished using a grinder with a concrete grinding wheel or by applying a scratch coat of mortar. A scratch coat is a thin layer of mortar applied to the surface to create a rough texture. Allow the scratch coat to cure for at least 24 hours before proceeding.
Gathering Tools and Equipment: Assemble all necessary tools and equipment before starting the installation. This will streamline the process and prevent unnecessary delays. Essential tools include: a notched trowel (size depends on veneer thickness), a margin trowel, a mixing tub, a drill with a mixing paddle, a level, a rubber mallet, a wet saw with a diamond blade (for cutting stone veneer), safety glasses, work gloves, a dust mask, a sponge, a bucket of clean water, and jointing tools for applying the grout. A leveling stick and shims can be used to ensure the stones are properly aligned. A mortar hawk is also helpful for holding mortar while working.
Safety Precautions: Prioritize safety throughout the installation process. Wear safety glasses to protect your eyes from dust and debris. Use work gloves to protect your hands from the mortar and sharp edges of the stone veneer. Wear a dust mask to avoid inhaling harmful dust particles. When operating power tools, such as a wet saw, follow the manufacturer's safety instructions carefully. Ensure adequate ventilation in the work area. If working at heights, use a stable platform or scaffolding and adhere to proper fall protection measures.
The Installation Process: Applying the Stone Veneer
With the planning and preparation complete, the next step is to apply the stone veneer to the fireplace. This process requires patience, precision, and attention to detail. The goal is to create a visually appealing and structurally sound veneer surface.
Mixing the Mortar: Follow the manufacturer's instructions for mixing the mortar. Add water to the dry mortar mix gradually, while mixing with a drill and mixing paddle. The consistency of the mortar should be similar to that of peanut butter – firm enough to hold its shape but pliable enough to spread easily. Avoid adding too much water, as this can weaken the mortar and compromise its bonding ability. Mix only the amount of mortar that can be used within a reasonable timeframe, as it will begin to harden after a certain period. Maintain consistency in mortar mix throughout the project.
Applying the Mortar: Using a notched trowel, apply a layer of mortar to the back of the stone veneer. The thickness of the mortar layer will depend on the size and weight of the stone. Typically, a layer of approximately ½ inch is sufficient. Ensure the entire back surface of the stone is covered with mortar, leaving no air pockets. Apply a similar layer of mortar to the prepared fireplace surface. This "buttering" technique ensures maximum adhesion. Press the stone firmly onto the prepared surface, wiggling it slightly to ensure good contact with the mortar. Excess mortar will squeeze out from the edges of the stone. Remove this excess mortar immediately with a margin trowel to prevent it from hardening on the surface.
Laying the Veneer: Begin laying the stone veneer from the bottom up, starting with the corner pieces. Ensure the corner pieces are level and plumb. Use a level to check the alignment of each stone as it is installed. Shims can be used to adjust the position of the stones and maintain consistent spacing. Maintain a consistent joint spacing between the stones. The width of the joints will depend on the desired aesthetic. Typically, a joint spacing of ½ inch to ¾ inch is common. Use a wet saw to cut the stone veneer to fit around openings or corners. Cut the stones with precision to ensure a seamless fit. Stagger the joints between the rows of stone veneer to create a more natural and visually appealing pattern. Avoid creating long, continuous vertical joints. Periodically step back and assess the overall appearance of the veneer installation. Make adjustments as needed to ensure a balanced and aesthetically pleasing outcome. Use a rubber mallet to gently tap the stones into place, ensuring they are firmly seated in the mortar. Remove any excess mortar that squeezes out from the joints. This is best done while the mortar is still wet.
Cutting Stone Veneer: A wet saw is the most effective tool for cutting stone veneer. Ensure the saw blade is specifically designed for cutting stone. Fill the saw's water reservoir with water to keep the blade cool and minimize dust. Mark the desired cut line on the stone veneer. Guide the stone slowly and steadily through the saw blade, allowing the water to lubricate the cut. Avoid forcing the stone, as this can cause the blade to bind or the stone to chip. Wear safety glasses and a dust mask when cutting stone veneer.
Grouting and Finishing: Completing the Fireplace Transformation
After the stone veneer has been installed and the mortar has cured, the next step is to grout the joints. Grouting fills the gaps between the stones, provides structural support, and enhances the overall aesthetic. The finishing touches, such as cleaning and sealing, will complete the fireplace transformation.
Grouting the Joints: Allow the mortar to cure for at least 24 to 48 hours before grouting the joints. This will ensure the stones are securely bonded to the fireplace surface. Mix the grout according to the manufacturer's instructions. The consistency of the grout should be similar to that of a thick paste. Apply the grout using a grout bag or a margin trowel. Force the grout into the joints, ensuring they are completely filled. Avoid getting grout on the surface of the stone veneer. If grout does get on the surface, remove it immediately with a damp sponge. Allow the grout to set for a short period, until it is firm but not completely hardened. Use jointing tools to shape and smooth the grout joints. The shape of the joints will depend on the desired aesthetic. Options include concave, flush, or raked joints. Remove any excess grout from the surface of the stone veneer. Use a damp sponge to wipe the surface clean. Rinse the sponge frequently to avoid smearing the grout. Allow the grout to cure completely according to the manufacturer's instructions. This may take several days.
Cleaning and Sealing: Once the grout has cured, clean the stone veneer surface thoroughly. Use a mild detergent and a soft brush to remove any remaining grout haze or dirt. Rinse the surface with clean water and allow it to dry completely. Apply a sealant to the stone veneer to protect it from staining and moisture damage. Choose a sealant that is specifically designed for stone veneer. Follow the manufacturer's instructions for applying the sealant. Allow the sealant to dry completely before using the fireplace.
By following these detailed steps, homeowners can complete a stone veneer fireplace installation that adds beauty and value to their homes. Remember to prioritize safety and take the time needed to ensure each step is completed correctly.

How To Install A Stone Veneer Fireplace Shoe Makes New

Thin Stone Veneers Make A Fireplace Update Easy

Thin Stone Veneers Make A Fireplace Update Easy
Installing Stone Veneer On Wall With Fireplace Hearth Com Forums Home

Thin Stone Veneers Make A Fireplace Update Easy

How To Install Stone Veneer On A Fireplace Step By Guide
.jpg?strip=all)
Tips And Tools For Professional Stacked Stone Fireplaces

How To Install A Stone Veneer Fireplace Shoe Makes New

Diy How To Install Stone On Your Fireplace Easily

Learn How To Install Stone Veneer On Walls Fireplace More Remodel Brick Makeover
Related Posts

