How To Install Stone On Brick Fireplace
Updating a brick fireplace with stone veneer can significantly alter the aesthetic appearance of a room, providing a more rustic, modern, or sophisticated ambiance. While it's a manageable project for a homeowner with some DIY experience, precise planning, preparation, and execution are paramount for achieving a professional and durable outcome. This guide outlines the necessary steps for installing stone veneer on a brick fireplace, ensuring a successful transformation.
1. Planning and Preparation: Laying the Foundation for Success
Before commencing any physical work, a well-defined plan is essential. This involves assessing the existing fireplace, selecting the appropriate stone veneer, gathering the necessary tools and materials, and preparing the work area. Neglecting this stage can lead to unforeseen complications and compromise the final result.
Assessing the Existing Fireplace: Thoroughly inspect the brick fireplace for any signs of damage, such as cracks, loose bricks, or crumbling mortar. Address these issues before proceeding with the stone veneer installation. Repair any structural deficiencies in the brickwork to ensure a stable substrate for the stone. A compromised brick surface will negatively affect the longevity and appearance of the stone veneer.
Selecting the Stone Veneer: Choose a stone veneer that complements the room's design and meets the fireplace's specific requirements. Consider factors such as the stone's color, texture, size, and most importantly, its compliance with local building codes regarding fireplace applications. Stone veneer is available in natural and manufactured options. Natural stone offers a unique, authentic appearance, while manufactured stone provides greater consistency in color and size, often at a more affordable price. Verify that the chosen stone is rated for fireplace applications and can withstand the heat exposure.
Gathering Tools and Materials: Assemble all necessary tools and materials before starting the project. This includes but is not limited to:
- Stone veneer
- Mortar (specifically formulated for stone veneer)
- Grout (if desired, depending on the stone and desired look)
- Mortar mixing tub
- Mixing drill with paddle attachment
- Trowels (various sizes, including a notched trowel)
- Grout bag (if using grout)
- Grout float (if using grout)
- Wet saw (for cutting stone)
- Angle grinder with a diamond blade (for detailed cuts)
- Level
- Measuring tape
- Chisel and hammer (for removing loose brick or mortar)
- Wire brush (for cleaning brick surface)
- Safety glasses
- Gloves
- Dust mask
- Drop cloths
- Painter's tape
- Adhesion promoting primer
Preparing the Work Area: Protect the surrounding floor and furniture with drop cloths. Use painter's tape to mask off any areas that should not be exposed to mortar or stone dust. Ensure adequate ventilation in the work area. This is particularly essential when mixing and applying mortar, as it can release harmful fumes. Ensure sufficient lighting to provide a clear view of the work surface.
2. Surface Preparation: Ensuring Proper Adhesion
Proper surface preparation is crucial for ensuring that the stone veneer adheres securely to the brick fireplace. This involves cleaning the brick surface, applying a scratch coat, and potentially installing metal lath, depending on the condition of the brick and the type of stone veneer being used.
Cleaning the Brick Surface: Thoroughly clean the brick surface to remove any dirt, dust, grease, or loose debris. Use a wire brush to scrub the surface and remove any loose mortar. A pressure washer can be used for more stubborn dirt, but ensure the brick is completely dry before proceeding. The goal is to create a clean, porous surface that will promote optimal mortar adhesion.
Applying an Adhesion Promoting Primer: Apply an adhesion promoting primer, specifically designed for masonry surfaces, to the brick. This primer enhances the bond between the brick and the mortar, leading to a more durable installation. Follow the manufacturer's instructions for application, allowing sufficient drying time before moving to the next stage.
Installing Metal Lath (Optional): In some cases, particularly when the brick surface is smooth or uneven, it may be necessary to install metal lath. Metal lath provides a mechanical key for the mortar, further enhancing adhesion. Secure the metal lath to the brick using masonry screws or nails. Overlap the edges of the lath by at least 2 inches. Cover the metal lath with a scratch coat of mortar, creating a textured surface for the stone veneer to adhere to. Allow the scratch coat to cure for at least 24-48 hours before proceeding.
3. Stone Installation: Achieving the Desired Aesthetic
The actual installation of the stone veneer requires careful attention to detail and a methodical approach. This involves mixing the mortar, applying it to the back of the stones, and carefully placing them on the fireplace, ensuring proper alignment and spacing.
Mixing the Mortar: Prepare the mortar according to the manufacturer's instructions. Use a mortar mixing tub and a mixing drill with a paddle attachment to ensure a consistent, lump-free mixture. Add water gradually until the mortar reaches a workable consistency, similar to thick peanut butter. Avoid adding too much water, as this can weaken the mortar and compromise its adhesive properties. Allow the mortar to slake (rest) for the recommended time, as this allows the chemical reactions to fully develop, improving its strength and workability.
Applying Mortar to the Stones: Use a trowel to apply a generous layer of mortar to the back of each stone veneer. Ensure that the entire surface is covered with mortar, paying particular attention to the edges. The mortar should be thick enough to create a strong bond with the brick surface but not so thick that it oozes out excessively when the stone is pressed into place.
Placing the Stones: Carefully place each stone veneer onto the prepared brick surface. Start at the bottom and work your way up, ensuring that each stone is level and plumb. Use a rubber mallet to gently tap the stones into place, ensuring good contact with the mortar. Maintain consistent spacing between the stones, using spacers if necessary. The desired spacing will depend on the type of stone and the desired aesthetic. Wipe away any excess mortar that squeezes out from between the stones with a damp sponge. Pay close attention to the overall layout and pattern of the stones, adjusting as needed to achieve the desired look. Some stones may require cutting to fit the available space. Use a wet saw for clean, precise cuts, or an angle grinder with a diamond blade for more intricate shapes.
Grouting (Optional): Once the mortar has partially cured (typically after 24-48 hours), apply grout between the stones if desired. This step is optional and depends on the type of stone and the desired aesthetic. Grout adds a finished look to the stone veneer and can help to further seal the joints against moisture. Use a grout bag to apply the grout into the joints, filling them completely. Use a grout float to smooth and compact the grout, ensuring that it is flush with the surface of the stones. Wipe away any excess grout from the surface of the stones with a damp sponge. Allow the grout to cure completely before exposing the fireplace to heat.
Curing and Sealing: Allow the mortar and grout to cure completely according to the manufacturer's instructions. This typically takes several days. Once the mortar and grout are fully cured, consider applying a sealant to the stone veneer to protect it from moisture and staining. Choose a sealant that is specifically designed for stone and masonry surfaces. Apply the sealant according to the manufacturer's instructions.
This meticulous execution, combined with careful planning and preparation, will result in a beautifully updated fireplace that will enhance the value of any home.

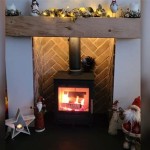
Stone Veneer Over A Brick Fireplace Updates The Look

Can Stone Veneer Be Applied Over Brick Deluca Masonry Construction

Transform Your Home Stone Veneer Over Brick Fireplace Guide

Brick Fireplace Makeover Pine And Prospect Home

Thin Stone Veneers Make A Fireplace Update Easy Swenson Granite 100 Natural Stones

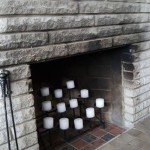
Install Stone Veneers Over Old Brick Fireplace Diy

Stone Veneer Over A Brick Fireplace Updates The Look

How To Install Thin Brick Veneers On Your Fireplace

How To Cover A Brick Fireplace With Wood Stone Nina Hendrick Home

How To Cover A Brick Fireplace With Stone