How to Install Stacked Stone Veneer Fireplace
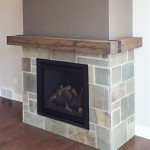
Installing stacked stone veneer on a fireplace is a significant home improvement project that can dramatically enhance the aesthetic appeal of a living space. This process, while achievable for a resourceful homeowner, requires careful planning, the right tools, and a thorough understanding of the materials involved. This article outlines the steps necessary to successfully install stacked stone veneer on a fireplace, ensuring a professional-looking and durable result.
Before commencing the installation, it's crucial to assess the existing fireplace structure. The substrate – the surface upon which the stone veneer will be applied – needs to be structurally sound and prepared appropriately to ensure adequate adhesion. Common substrate materials include brick, concrete block, and cement board. A wood-framed fireplace surround requires the installation of cement board as a suitable substrate.
Planning is essential for a successful stacked stone veneer installation. Accurate measurements of the fireplace surface are required to determine the amount of stone veneer needed. Consider accounting for waste due to cuts and installation adjustments. A detailed layout plan, including the desired pattern and stone arrangement, will streamline the installation process and minimize errors.
Preparing the Fireplace Substrate
The preparation of the fireplace substrate is paramount for a strong and lasting bond between the veneer and the existing structure. This process involves several critical steps:
Cleaning: Thoroughly clean the existing surface. Remove any loose debris, paint, dirt, or other contaminants that may impede adhesion. A wire brush can be used to scrub away loose material, followed by a wash with a mild detergent and water. Rinse the surface thoroughly and allow it to dry completely.
Scratching/Scarifying (for Smooth Surfaces): Smooth surfaces, such as painted brick or smooth concrete, require roughening to improve mortar adhesion. This can be achieved through scratching or scarifying the surface. A masonry chisel and hammer can be used to create shallow grooves across the surface. Alternatively, a grinder with a diamond blade can be employed for larger areas.
Applying a Scratch Coat (If Necessary): If the existing surface is uneven or severely damaged, applying a scratch coat of mortar may be necessary. The scratch coat provides a uniform and level surface for the stone veneer. Mix a thin layer of mortar according to the manufacturer's instructions and apply it evenly over the substrate using a notched trowel. The notches create grooves that provide a mechanical key for the subsequent stone veneer.
Curing the Scratch Coat (If Applicable): After applying the scratch coat, allow it to cure completely according to the mortar manufacturer’s instructions. This typically involves keeping the surface damp for several days, which promotes proper hydration and strength development.
Installing Metal Lath (for Wood Framing): If the fireplace surround is framed with wood, cement board must be installed as the substrate. Metal lath is then attached to the cement board using screws. The metal lath provides a strong mechanical bond for the mortar. Ensure the metal lath overlaps at seams and is securely fastened every few inches.
Cutting and Dry-Fitting the Stone Veneer
Before applying the mortar, it's crucial to cut and dry-fit the stone veneer. This step allows for adjustments and ensures a visually appealing layout. It also minimizes the risk of errors during the mortar application phase.
Cutting the Stone Veneer: Stacked stone veneer often requires cutting to fit around corners, edges, and other architectural features. A wet saw with a diamond blade is the ideal tool for cutting stone veneer. The wet saw provides precise cuts and minimizes dust. When cutting, wear appropriate safety gear, including eye protection and a dust mask. For smaller adjustments, a hammer and chisel can be used.
Dry-Fitting the Stone: Arrange the cut and uncut stone veneer pieces on the floor in the desired pattern. This allows for visual inspection and adjustments before committing to the mortar application. Pay attention to the arrangement of colors, textures, and sizes to achieve a balanced and aesthetically pleasing look. Identify any areas that require additional cutting or shaping. Mark the back of each stone piece with its intended location to avoid confusion during the installation process.
Preparing the Stone: Clean the backs of the stone veneer pieces with a brush to remove any dust or debris that may hinder adhesion. Lightly dampen the backs of the stone pieces with water just before applying the mortar. This helps to improve the bond between the stone and the mortar.
Applying Mortar and Installing the Stone Veneer
This phase involves mixing the mortar, applying it to the substrate and stone veneer, and carefully positioning each stone piece. Patience and attention to detail are essential for achieving a professional-looking result.
Mixing the Mortar: Use a high-quality mortar specifically designed for stone veneer applications. Follow the manufacturer's instructions for mixing the mortar. Typically, this involves adding water gradually to the dry mortar mix while stirring with a mixing drill and paddle. The mortar should have a consistency similar to thick peanut butter – spreadable but not too runny. Avoid mixing too much mortar at once, as it can dry out before it can be used.
Applying Mortar to the Substrate: Using a notched trowel, apply a layer of mortar to a small section of the prepared substrate. The notch size should be appropriate for the size and weight of the stone veneer. Apply enough mortar to create a good bond, but avoid applying too much, which can cause the mortar to squeeze out between the stones. For vertical surfaces, work from the bottom up to prevent the stone from sliding down.
Applying Mortar to the Stone Veneer: Apply a layer of mortar to the back of each stone veneer piece, ensuring that the entire surface is covered. Use a trowel to create ridges in the mortar, which will further enhance the bond between the stone and the substrate. The mortar should be thick enough to create a strong bond but not so thick that it oozes out excessively when the stone is pressed into place.
Installing the Stone: Press the mortar-covered stone veneer piece firmly into the mortar on the substrate. Wiggle the stone slightly to ensure good contact and adhesion. Maintain consistent spacing between the stones to achieve the desired look. Use shims if necessary to maintain even spacing. Remove any excess mortar that squeezes out from between the stones with a small trowel or putty knife. Be careful not to smear the mortar onto the face of the stone.
Working in Sections: Install the stone veneer in small sections, allowing the mortar to set up slightly before moving on to the next section. This prevents the stones from shifting or sliding down the wall. Use a level to ensure that the stones are installed straight and plumb. Periodically check the alignment of the stones and make any necessary adjustments while the mortar is still workable.
Addressing Corners: Installing stone veneer on corners requires careful attention to detail. Mitered corners, where the stones are cut at a 45-degree angle, create a seamless transition. Alternatively, overlapping corners can be created by alternating the stone pieces so that they extend beyond the corner on each side. Ensure the corner pieces are securely attached and properly aligned.
Grouting and Cleaning
While some stacked stone veneer styles are designed to be grout-free, others may benefit from grouting. The following steps detail the grouting process, as well as the final cleaning necessary to achieve a professional finish.
Grouting (Optional): If grouting is desired, apply grout to the spaces between the stones using a grout bag or a small trowel. Work the grout into the joints, ensuring that they are completely filled. Avoid getting grout on the face of the stones. If grout does get on the stones, wipe it off immediately with a damp sponge.
Tooling the Grout: Once the grout has set up slightly, use a grout-tooling tool or a damp sponge to smooth and shape the grout joints. This helps to create a consistent and professional-looking finish. Remove any excess grout from the face of the stones.
Cleaning the Stone: After the mortar and grout have fully cured, clean the stone veneer thoroughly with a brush and a mild detergent solution. This removes any remaining mortar residue, dirt, or debris. Rinse the surface with clean water and allow it to dry completely. Use a soft cloth to buff the stones and enhance their natural beauty.
Sealing (Optional but Recommended)
Applying a sealant to the installed stacked stone veneer is often recommended, especially in areas exposed to moisture or harsh weather conditions. The sealant penetration prevents water intrusion, protects against staining, and enhances the durability of the stone.
Choosing a Sealant: Select a sealant specifically designed for use on natural stone. Ensure that the sealant is compatible with the type of stone veneer installed. There are various types of sealants available, including penetrating sealants and topical sealants. Penetrating sealants soak into the stone and provide protection from within, while topical sealants form a protective layer on the surface.
Applying the Sealant: Follow the sealant manufacturer's instructions for application. Typically, this involves applying the sealant evenly over the stone surface with a brush, roller, or sprayer. Avoid applying too much sealant, which can create a glossy or artificial appearance. Allow the sealant to dry completely before exposing the stone to moisture or traffic.
Maintaining the Seal: Periodically inspect the sealant and reapply as needed to maintain its protective properties. The frequency of reapplication will depend on the type of sealant used and the environmental conditions.
By following these steps carefully and paying attention to detail, you can successfully install stacked stone veneer on a fireplace, creating a beautiful and durable focal point for your living space. Remember to prioritize safety throughout the project and consult with a professional if you have any questions or concerns.

How To Install Stacked Stone Tile On A Fireplace Thrifty Decor Diy And Organizing

Stacked Stone Fireplace How To Diy

How To Install Stacked Stone Tile On A Fireplace Thrifty Decor Diy And Organizing

How To Install Stacked Stone Tile On A Fireplace Thrifty Decor Diy And Organizing

How To Install Stacked Stone Tile On A Fireplace Thrifty Decor Diy And Organizing

How To Install Stacked Stone Tile On A Fireplace Thrifty Decor Diy And Organizing

Thin Stone Veneers Make A Fireplace Update Easy Swenson Granite 100 Natural Stones

Stacked Stone Fireplace How To Diy

How To Install Stacked Stone Veneer Wall Tiles

How To Build A Stone Veneer Fireplace With Wood Mantel
Related Posts

