How to Install Stacked Stone on a Fireplace
Stacked stone, with its rustic charm and timeless appeal, can dramatically transform a fireplace into a focal point of any room. Whether you're updating a traditional hearth or adding a modern touch, this DIY project offers a satisfying sense of accomplishment while enhancing your home's aesthetic. This article provides a comprehensive guide to installing stacked stone on a fireplace, covering essential materials, preparation steps, and installation techniques.
1. Gather Essential Materials and Tools
Before embarking on your stone installation journey, ensure you have all the necessary materials and tools readily available. This will help streamline the process and prevent delays. Here's a comprehensive checklist:
- Stacked stone veneer: Choose the style and color that best complements your desired aesthetic. Consider factors like stone size, texture, and weight.
- Mortar mix: A pre-mixed mortar specifically designed for stone installation. It should be easy to work with and offer excellent adhesion.
- Masonry trowel: This tool is essential for applying and spreading the mortar evenly.
- Level: A trusty level will guarantee that your stone installation is perfectly aligned and aesthetically pleasing.
- Grout float: This tool helps create smooth grout lines by pressing and smoothing the grout into the joints.
- Grout: Choose grout color and consistency that matches the stone and your aesthetic preferences.
- Masonry saw or grinder: For cutting stones to fit specific dimensions and corners.
- Safety gear: Eye protection, gloves, and a dust mask are crucial for protecting yourself from airborne particles and mortar dust.
- Measuring tape: For precise stone placement and ensuring the overall installation is accurate.
- Pencil: For marking cutting points on the stones.
- Bucket: For mixing mortar and cleaning up spills.
2. Prepare the Fireplace Surface
A well-prepared surface is essential for a successful stone installation. The following steps will ensure a secure and long-lasting bond:
- Clean the Fireplace: Thoroughly clean the fireplace surface, removing any dirt, dust, debris, or loose paint. Use a wire brush to dislodge stubborn residues.
- Remove Existing Mantel: If you're replacing an old mantel, carefully remove it, ensuring you have enough space for the new stone installation.
- Apply Waterproofing: Apply a waterproof sealant to the fireplace surface. This step prevents moisture damage and ensures the longevity of your stone installation.
- Install Backer Board: It's recommended to install a backer board over the fireplace surface, especially if the existing surface is damaged or uneven. This creates a smooth and stable foundation for the stone.
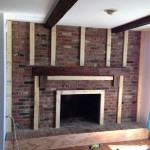
3. Start the Installation Process
With the preparation work complete, you're ready to begin installing the stacked stone. Follow these steps for a seamless and professional finish:
- Establish a Starting Point: Select a starting point for the stone installation, usually at the bottom center of the fireplace. This will ensure a balanced and symmetrical look.
- Apply Mortar: Spread a thin layer of mortar onto the backer board or existing surface using the masonry trowel. Aim for a consistent thickness throughout.
- Place the First Stone: Carefully position the first stone on the mortar bed, ensuring it's level and flush with the starting point. Use a level to verify alignment and make adjustments if necessary.
- Continue Laying Stones: Repeat steps 2 and 3, layering the remaining stones vertically. Maintain consistent spacing between stones to achieve the desired look. For corners, use a masonry saw or grinder to cut the stone to fit the angle. Use a level to check for plumb and alignment.
- Fill Gaps: As you progress, fill any gaps or voids between stones with extra mortar. Smooth out the mortar with a damp sponge or trowel.
Remember to allow the mortar to cure completely before proceeding to the next step. This usually takes 24-48 hours.
4. Grouting and Finishing Touches
Once the mortar has fully cured, you can proceed with grouting the stonework. This final step enhances the aesthetic appeal and completes the installation process.
- Clean the Stone: Before applying grout, carefully clean the stone surface to remove any dust or mortar debris.
- Mix and Apply Grout: Mix the grout according to the manufacturer's instructions and apply it to the joints between the stones. Use a grout float to press and smooth the grout, ensuring even distribution.
- Clean Excess Grout: Use a damp sponge to wipe away any excess grout from the stone surface. Pay attention to corners and edges, making sure they are cleaned thoroughly.
- Seal the Grout: Once the grout has dried, apply a grout sealant to prevent staining and make cleaning easy.
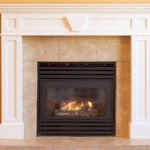
- Final Touches: After the sealant has dried, you can add any finishing touches, such as a mantel or hearth. Ensure all surfaces are clean and free of debris.
By following these steps, you'll have successfully installed stacked stone on your fireplace, enhancing its visual impact and adding character to your home. Remember to take your time, be patient, and enjoy the process of transforming your fireplace into a stunning centerpiece.

How To Install A Stacked Stone Fireplace Practical Whimsy Designs

How To Install Stack Stone Tile On Fireplace Cement Board Installation

Stacked Stone Fireplace How To Diy

Installing Stack Stone Tile On Fireplace

How To Build An Outdoor Stacked Stone Fireplace

How To Install Stacked Stone Tile On A Fireplace Thrifty Decor Diy And Organizing

Diy How To Install Stone On Your Fireplace Easily

How To Install A Stacked Stone Fireplace Practical Whimsy Designs

Tips On How To Build A Stone Fireplace Horizon

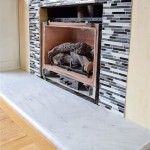
Diy Installing Marble Stacked Stone On Modern Fireplace
Related Posts