How To Install Gas Fireplace Logs
Installing gas fireplace logs is a project that can enhance the aesthetics and functionality of a home. These logs offer the ambiance of a traditional wood-burning fireplace without the associated mess and maintenance. This article provides a comprehensive guide to safely and effectively installing gas fireplace logs, covering preparation, log placement, and essential safety considerations.
Preparation and Safety Precautions
Before commencing the installation process, adequate preparation and adherence to safety protocols are paramount. The initial step involves determining the type of gas fireplace logs compatible with the existing fireplace and gas supply. Gas fireplaces typically operate on either natural gas or propane, and it's crucial to select logs designed for the specific fuel type to ensure safe and efficient operation.
Once the appropriate gas logs are acquired, ensure the fireplace and gas line are completely shut off. Locate the gas shut-off valve, often situated near the fireplace or in the adjacent room, and turn it to the "off" position. Confirm the gas supply is disconnected by attempting to light any nearby gas appliances; if no gas flows, the line is likely secure. It is advantageous to wait at least 30 minutes to allow any residual gas to dissipate before proceeding with the installation.
Personal protective equipment (PPE) is essential for safety during the installation. Wear safety glasses to shield the eyes from debris and work gloves to protect the hands from sharp edges. A dust mask can also be beneficial, particularly if the fireplace has accumulated dust or soot. Having a carbon monoxide detector nearby is encouraged as a precautionary measure.
A thorough inspection of the existing fireplace is necessary to identify any potential issues. Examine the firebox for cracks, damage, or excessive soot buildup. Any structural deficiencies must be addressed before installing the gas logs. Clean the firebox using a brush and vacuum to remove loose debris, soot, and ash. It is crucial to ensure adequate ventilation within the fireplace and chimney. Inspect the chimney flue for obstructions, such as bird nests or debris, which can impede proper airflow and create a hazardous situation.
Consult the manufacturer's instructions provided with the gas logs. These instructions offer specific guidelines and recommendations tailored to the particular log set, including optimal placement and safety precautions. Failure to adhere to the manufacturer's instructions could result in improper installation, malfunction, or potential safety hazards.
Gather all necessary tools and materials before starting the installation. These typically include a pipe wrench, adjustable wrench, Teflon tape (for gas line connections), a level, a screwdriver set, and a gas leak detector (soap and water solution or a commercially available leak detector). Having these tools readily available will streamline the installation process and prevent unnecessary delays.
Gas Line Connection and Pilot Light
Connecting the gas line to the gas logs requires careful attention to detail to ensure a secure and leak-free connection. Begin by inspecting the gas line connector and the gas valve for any signs of damage or corrosion. If damage is detected, replace the affected components before proceeding.
Wrap Teflon tape clockwise around the threads of the gas line connector to create a tight seal. Teflon tape is specifically designed for gas line connections and provides a reliable barrier against leaks. Avoid using pipe dope or other sealants not specifically intended for gas lines, as these may degrade over time and compromise the connection.
Carefully thread the gas line connector into the gas valve, tightening it securely with a pipe wrench and adjustable wrench. Avoid overtightening the connection, as this could damage the valve or connector. A snug fit is sufficient to create a tight seal. Once the connection is made, slowly turn the gas shut-off valve to the "on" position. Listen for any hissing sounds or odors indicating a gas leak.
Apply a soap and water solution (or a commercially available gas leak detector) to the connection to check for leaks. If bubbles form, it indicates a gas leak. Immediately turn the gas shut-off valve to the "off" position and tighten the connection further. Repeat the leak test until no bubbles appear. If the leak persists despite tightening, consult a qualified gas technician to address the issue.
Once the gas line connection is confirmed to be leak-free, proceed to light the pilot light. Locate the pilot light assembly, typically situated near the gas valve. Consult the manufacturer's instructions for the specific procedure for lighting the pilot light, as the process may vary depending on the gas log set.
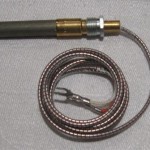
Typically, the pilot light ignites by depressing a button or turning a knob while simultaneously holding a lit match or lighter near the pilot light orifice. Once the pilot light is lit, continue holding the button or knob depressed for several seconds to allow the thermocouple to heat up. The thermocouple senses the heat from the pilot light and keeps the gas valve open. If the pilot light goes out when the button or knob is released, repeat the lighting procedure. If the pilot light consistently fails to stay lit, consult a qualified gas technician for assistance.
After the pilot light is lit and stabilized, observe the flame characteristics. A healthy pilot light flame should be blue and steady. A yellow or flickering flame may indicate a problem with the gas supply or the pilot light assembly. Adjust the pilot light flame according to the manufacturer's instructions if necessary. If the flame remains abnormal, consult a qualified gas technician.
Log Placement and Final Inspection
Correct log placement is crucial for both aesthetics and efficient operation of the gas fireplace. Consult the manufacturer's instructions for the recommended log arrangement specific to the log set. The instructions typically provide a diagram or illustrations showing the optimal placement of each log.
The primary consideration for log placement is ensuring adequate airflow around the burner and pilot light assembly. Avoid obstructing the burner ports or the pilot light flame with the logs, as this can impede combustion and create a dangerous buildup of carbon monoxide. Position the logs to allow for sufficient ventilation and flame pattern.
Pay attention to the spacing between the logs. The logs should not be tightly packed together, as this can restrict airflow and cause the flames to smolder. Maintain adequate spacing to allow for proper combustion and heat distribution. Arrange the logs in a natural and aesthetically pleasing manner, simulating a real wood-burning fire.
After the logs are placed, double-check the gas line connection and the pilot light assembly to ensure nothing has been disturbed during the log placement process. Verify that the gas line connector is still tightly secured and that the pilot light flame is still burning steadily.
Turn on the main gas valve and ignite the gas logs. Observe the flame pattern carefully. The flames should burn evenly and consistently across the burner, without any excessive flickering, sputtering, or yellow tipping. If the flames appear abnormal, adjust the log placement slightly to improve airflow and combustion. If the flame issues persist, consult a qualified gas technician.
Perform a final inspection of the entire installation. Check for any gas leaks, unusual odors, or abnormal noises. Ensure the fireplace damper is open to allow for proper ventilation of combustion gases. Verify that the carbon monoxide detector is functioning properly and is located in a suitable location within the home.
Operate the gas fireplace for a short period to ensure it is functioning correctly. Monitor the flame pattern, the heat output, and any potential issues. If any problems arise, immediately turn off the gas supply and consult a qualified gas technician to address the issue. Properly installed gas fireplace logs provide a safe and aesthetically pleasing fireplace experience. Regular maintenance and inspections are recommended to ensure continued safe and efficient operation.

How To Select And Install A Gas Fireplace Log Set Fireplaces Direct Learning Center

How To Select And Install A Gas Fireplace Log Set Fireplaces Direct Learning Center

How To Put In A Gas Log Set For Fireplace

Installing Vent Free Gas Log Set

How To Put In A Gas Log Set For Fireplace Ron Hazelton

We Install Gas Logs Amarillo Tx West Chimney

What You Need To Know About Gas Fireplace Logs Fireplaces Direct Learning Center
.png?strip=all)
How To Install A Log Lighter Fireplace Gas Starter Pipe

How To Install A Log Lighter Fireplace Gas Starter Pipe

How To Put In A Gas Log Set For Fireplace
Related Posts

