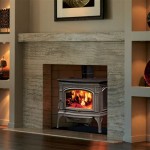
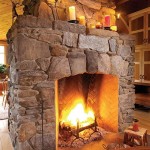
How To Install Faux Stone Over a Brick Fireplace Wall
Transforming a dated brick fireplace with faux stone veneer offers a cost-effective way to update a room’s focal point. This project can be tackled by a dedicated DIYer, adding significant value and visual appeal. Careful planning and execution are key to a successful installation. This guide outlines the necessary steps to achieve professional-looking results.
1. Preparing the Brick Surface
Proper surface preparation is paramount for ensuring the long-term adhesion of the faux stone. Begin by thoroughly cleaning the brick surface with a stiff brush and a solution of trisodium phosphate (TSP) and water. This removes dirt, soot, and efflorescence, allowing the adhesive to bond effectively. Rinse the surface thoroughly with clean water and allow it to dry completely before proceeding. Any loose or crumbling mortar should be repaired or replaced. Deeply recessed mortar joints may need to be filled with a patching compound to create a more even surface for veneer application.
Next, examine the brick for any glossy sealant. If present, the sealant must be removed through grinding, sanding, or the application of a deglossing agent. A test application of the chosen adhesive on a small inconspicuous area will confirm compatibility with the brick surface. Allow the adhesive to dry and then attempt to pull it off. If it adheres strongly, the surface is properly prepared.
Finally, consider protecting the surrounding area with drop cloths and painter's tape to prevent mortar or adhesive from staining the floor or other surfaces.
2. Gathering Materials and Tools
Gathering the necessary materials and tools in advance will streamline the installation process. Precise measurements of the fireplace surface area will determine the amount of faux stone needed. Add an extra 10-15% to account for cuts, breakage, and potential mishaps. Consult with the faux stone manufacturer's instructions to determine the recommended type and quantity of adhesive and mortar. A high-quality exterior-grade construction adhesive suitable for veneer applications is crucial.
The required tools often include a notched trowel for spreading adhesive, a grout bag or caulking gun for applying mortar, a wet saw equipped with a diamond blade for cutting stone, safety glasses and gloves, a level, a tape measure, a sponge, a bucket of clean water, and a mixing container for the mortar. A hammer and chisel may also be necessary for shaping or breaking stones.
Choosing the right type of faux stone is another important consideration. Consider the existing décor and desired aesthetic when selecting the stone's style, color, and texture. Dry-stack or mortared installations require different stone profiles. Dry-stack stones have tighter interlocking edges designed to minimize gaps.
3. Applying the Faux Stone Veneer
Starting at a bottom corner or at the hearth, begin applying the faux stone veneer. Spread a thin, even layer of adhesive onto the back of each stone using a notched trowel, ensuring full coverage. Press the stone firmly against the brick surface, holding it in place for a few seconds. Follow the manufacturer's recommendations for open time (the period during which the adhesive remains workable) and adjust the application speed accordingly. Maintain a consistent gap between stones if a mortared look is desired. Use spacers to ensure uniform joint widths.
For a mortared installation, allow the adhesive to cure according to the manufacturer's instructions before applying the mortar. Mix the mortar to the correct consistency, ensuring it's not too runny or too thick. Using a grout bag or caulking gun, fill the joints between the stones, taking care not to overfill. Tool the joints with a concave or convex jointer for a professional finish. Remove excess mortar with a damp sponge before it dries completely. For a dry-stack look, simply fit the stones tightly together without mortar.
Cutting the faux stone is often necessary to fit around corners, outlets, or other obstacles. Use a wet saw equipped with a diamond blade for precise cuts. Measure carefully and mark the cutting lines on the stone before making the cut. Wear safety glasses and gloves when operating the saw.
Throughout the installation process, periodically step back and view the work from a distance to ensure the pattern and alignment are consistent. This allows for early correction of any inconsistencies. Once the installation is complete, allow the adhesive and mortar to cure completely before using the fireplace.

Install Stone Veneers Over Old Brick Fireplace Diy

Install Stone Veneers Over Old Brick Fireplace Diy

Thin Stone Veneers Make A Fireplace Update Easy Swenson Granite 100 Natural Stones

How To Install Thin Brick Veneers On Your Fireplace

How To Diy A Stacked Stone Feature Over Existing Brick

Diy Brick Fireplace Makeover Transform Your With Beautiful Airstone Pine And Prospect Home

Installing Stone Veneer Over Brick

Walter S Diy Chimney Remodel Stone Over Brick

How To Install Thin Brick Veneers On Your Fireplace

Diy How To Install Stone On Your Fireplace Easily
Related Posts