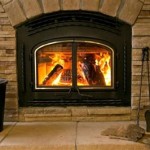
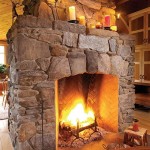
How to Install a Wood Fireplace Blower Kit
Installing a wood fireplace blower kit can significantly enhance the efficiency and heating capabilities of a wood-burning fireplace. A blower kit circulates the warm air produced by the fire, distributing it more evenly throughout the room instead of allowing it to rise directly up the chimney. This process reduces heat loss and maximizes the radiant heat generated, leading to a warmer and more comfortable environment. This article provides a comprehensive guide to installing a wood fireplace blower kit, covering the necessary preparations, step-by-step instructions, and important safety considerations.
Before commencing the installation, it is imperative to select the appropriate blower kit for the specific fireplace model. Fireplace manufacturers often provide blower kits designed for their respective units, ensuring proper fit and optimal performance. Factors such as the fireplace dimensions, BTU rating, and desired airflow should be considered when making a selection. Consulting the fireplace owner's manual or contacting the manufacturer's support team can provide valuable assistance in determining the correct blower kit for the application. Furthermore, ensuring the blower kit is Underwriters Laboratories (UL) listed or has similar safety certifications provides an added layer of assurance.
Gathering the necessary tools and materials is crucial for a smooth and efficient installation. The typical tools required include a screwdriver set (both Phillips head and flathead), a pair of pliers, a wire stripper/crimper, a voltage tester, and a work light. Additional materials may include wire connectors, electrical tape, and an extension cord if a power outlet is not readily accessible near the fireplace. Having all the tools and materials readily available before starting the installation will minimize interruptions and expedite the process.
Preparing the Fireplace for Installation
Prior to beginning any work on the fireplace, safety is paramount. The fireplace must be completely cool to the touch, ensuring no hot embers or residual heat remain. Disconnecting the fireplace from the electrical grid is also a critical safety precaution. Locate the circuit breaker that controls the fireplace and switch it to the "OFF" position. To verify that the power is indeed disconnected, use a voltage tester to check the outlet where the blower will be plugged in. Confirming the absence of voltage minimizes the risk of electrical shock during the installation process.
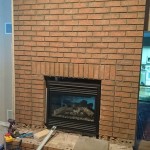
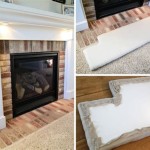
Next, cleaning the fireplace interior is recommended. Remove any accumulated ash, soot, or debris from the firebox. This not only improves the overall cleanliness of the fireplace but also provides better access for installing the blower kit. A shop vacuum can be particularly useful for removing fine particles and reaching tight corners. This step also allows for a closer inspection of the fireplace components, identifying any potential issues that may need to be addressed before installing the blower.
Carefully review the installation instructions provided with the blower kit. These instructions will detail the specific steps required for the particular model, including any variations in mounting hardware or wiring configurations. Familiarizing oneself with the instructions beforehand will prevent confusion and ensure that the installation is performed correctly. Pay close attention to any diagrams or illustrations included in the instructions, as these can provide valuable visual guidance.
Installing the Blower Unit
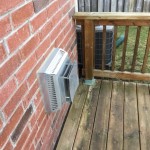
The specific installation process will vary depending on the design of the blower kit and the fireplace model. However, some general steps are common to most installations. The blower unit typically mounts underneath the firebox, utilizing existing mounting brackets or requiring the attachment of new brackets using screws. Carefully align the blower unit with the designated mounting points, ensuring that it is securely positioned and does not interfere with any other fireplace components.
Once the blower unit is securely mounted, the next step involves connecting the wiring. The blower kit will typically include a power cord and a thermal sensor. The power cord connects the blower to a standard electrical outlet, while the thermal sensor detects the temperature of the firebox and automatically turns the blower on and off. The thermal sensor is usually attached to the back or side of the firebox using a clip or adhesive pad.
The wiring connections must be made carefully and securely. Use wire connectors to join the wires from the blower motor to the wires from the power cord and thermal sensor. Ensure that the connections are tight and that no bare wires are exposed. Wrap the connections with electrical tape to provide an additional layer of insulation and protection. Incorrect wiring can lead to malfunction or even electrical hazards, so double-checking the connections is crucial.
Connecting the Thermal Sensor and Power
The thermal sensor is a critical component of the blower kit, as it regulates the blower's operation based on the temperature of the fireplace. The sensor should be positioned in a location where it can accurately detect the temperature of the firebox. Typically, this involves attaching it to the back or side of the firebox, away from direct contact with the flames. The installation instructions will provide specific guidance on the optimal placement for the thermal sensor.
The thermal sensor is usually connected to the blower motor using a pair of wires. These wires are typically terminated with spade connectors or wire nuts. Ensure that the connections are secure and that the wires are properly routed to avoid contact with hot surfaces or moving parts. The thermal sensor should be positioned so that it does not interfere with the operation of the fireplace or the movement of the fire screen or doors.
Before plugging the blower into an electrical outlet, it is essential to verify that all wiring connections are secure and that the blower unit is properly mounted. Inspect the wiring for any signs of damage or loose connections. Once satisfied that everything is in order, plug the blower into a grounded electrical outlet. If an outlet is not readily accessible near the fireplace, use a heavy-duty extension cord that is rated for the amperage of the blower motor.
Testing and Troubleshooting
After completing the installation, it is necessary to test the blower unit to ensure that it is functioning correctly. Turn on the fireplace and allow it to heat up. The thermal sensor should automatically activate the blower once the firebox reaches a certain temperature. Observe the blower to ensure that it is operating smoothly and efficiently. Listen for any unusual noises or vibrations that may indicate a problem.
If the blower does not turn on after the firebox has reached a sufficient temperature, there may be a problem with the thermal sensor or the wiring connections. Check the thermal sensor to ensure that it is properly positioned and that the wires are securely connected. Also, inspect the wiring connections to the blower motor and the power cord for any signs of loose or damaged wires.
If the blower is operating but is not producing sufficient airflow, there may be an obstruction in the blower unit or the air vents. Check the blower unit for any debris or obstructions that may be blocking the airflow. Also, inspect the air vents around the fireplace to ensure that they are clear and unobstructed. Cleaning the blower unit and the air vents can often resolve airflow issues.
In the event of persistent problems, consult with a qualified electrician or fireplace technician. Attempting to diagnose or repair complex electrical issues without proper training can be dangerous and may lead to further damage to the fireplace or the blower unit. Seeking professional assistance ensures that the problem is resolved safely and effectively.
Regular maintenance of the blower kit will prolong its lifespan and ensure optimal performance. Periodically clean the blower unit and the air vents to remove dust and debris. Inspect the wiring for any signs of damage or wear. If the blower motor becomes noisy or inefficient, it may be necessary to lubricate the motor bearings or replace the blower unit altogether. Following the manufacturer's recommendations for maintenance will help keep the blower kit in good working order.
By carefully following these instructions and adhering to safety precautions, successfully installing a wood fireplace blower kit, improving the heating efficiency and overall comfort of the living space is attainable. Remember that consulting the specific instructions provided with the blower kit and seeking professional assistance when needed are crucial for ensuring a safe and effective installation.

How Is A Fireplace Blower Kit Wired Fireplaceblowers Com

How Is A Fireplace Blower Kit Wired Fireplaceblowers Com

Fbk 250 Fireplace Blower Kit Installation

Fbk 100 Fireplace Blower Fan Kit Installation For Lennox And Superior

Fireplace Efficiency Blowers And Why You Should Have One

Blot Fireplace Blower Kit Installation

Rcfk Fireplace Blower Kit Overview

Blot Fireplace Blower Kit Installation

Why Should I Get A Fireplace Blower For My Masonry

Fireplace Blower Fans What You Need For Heat Full Service Chimney