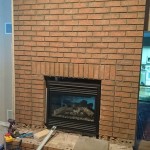
How to Install a Fireplace Surround on Brick
Installing a fireplace surround can significantly enhance the aesthetic appeal of a living space, transforming a simple brick fireplace into a focal point. While brick offers a rustic charm, a well-chosen surround can introduce a touch of elegance, modernity, or classic style, depending on the desired look. This article provides a comprehensive guide on how to install a fireplace surround directly onto a brick surface, ensuring a secure and visually pleasing result.
Before commencing the installation process, careful planning and preparation are essential. This involves assessing the existing brick fireplace, selecting a suitable surround, gathering the necessary tools and materials, and understanding the basic principles of adhesion and support. A thorough approach will minimize potential complications and contribute to a successful outcome.
Assessing the Brick Fireplace and Selecting the Surround
The first step involves a detailed evaluation of the existing brick fireplace. This includes checking for any structural damage, such as cracks, loose bricks, or crumbling mortar. Any identified issues must be addressed before proceeding with the surround installation. Repairing these problems will ensure a stable and level surface for the new surround, preventing future complications. If the brick is heavily soiled, cleaning with a suitable brick cleaner is recommended to improve adhesion.
Next, accurately measure the dimensions of the fireplace opening and the surrounding brick area. These measurements are crucial for selecting a surround that fits properly and complements the existing space. Consider the style of the room and choose a surround that harmonizes with the overall décor. Fireplace surrounds are available in a variety of materials, including wood, stone, marble, and metal, each offering a distinct aesthetic. Wood surrounds provide a warm and traditional look, while stone and marble offer a more elegant and sophisticated feel. Metal surrounds can lend a contemporary or industrial touch. The choice of material should also consider the fireplace's functionality; for example, a non-combustible material is generally preferred for surrounds close to the firebox opening.
Once a suitable surround is selected, carefully review its installation instructions. Different surrounds may have specific requirements or recommendations, and adhering to these guidelines is crucial for a successful installation. Pay particular attention to any weight restrictions or installation techniques specified by the manufacturer. In some cases, professional installation may be recommended, particularly for heavier or more complex surrounds.
Gathering Tools and Materials
The following is a comprehensive list of tools and materials typically required for installing a fireplace surround on brick:
*Fireplace Surround:
The chosen surround, ensuring it is the correct size and material. *Construction Adhesive:
Specifically formulated for bonding to brick. Look for a high-strength, flexible adhesive that is resistant to heat and moisture. *Mortar Rake or Chisel and Hammer:
For removing loose or protruding mortar. *Wire Brush:
For cleaning the brick surface. *Level:
For ensuring the surround is installed straight and plumb. *Measuring Tape:
For accurate measurements. *Caulk Gun:
For applying construction adhesive. *Caulk:
Color-matched to the surround for filling gaps. *Shims:
For leveling and supporting the surround during installation. *Drill and Masonry Drill Bits:
If mechanical fasteners are required. *Screws or Anchors:
Suitable for brick, if using mechanical fasteners. *Safety Glasses:
To protect eyes from debris. *Gloves:
To protect hands. *Dust Mask or Respirator:
To avoid inhaling dust. *Painter's Tape:
To protect adjacent surfaces. *Sanding Block or Sandpaper:
For smoothing any rough edges on the surround.Having all the necessary tools and materials readily available will streamline the installation process and minimize interruptions.
Preparing the Brick Surface and Installing the Surround
Proper preparation of the brick surface is paramount for ensuring a strong and durable bond with the construction adhesive. Begin by thoroughly cleaning the brick using a wire brush to remove any loose dirt, dust, or debris. If the brick is particularly dirty, consider using a specialized brick cleaner, following the manufacturer's instructions carefully. Rinse the brick thoroughly with clean water and allow it to dry completely before proceeding.
Inspect the mortar joints for any loose or protruding mortar. Use a mortar rake or chisel and hammer to carefully remove any loose pieces, creating a clean and even surface. Fill any significant voids or gaps in the mortar joints with fresh mortar, allowing it to cure completely before installing the surround. A level and even surface is essential for ensuring the surround sits flush against the brick and provides a professional-looking finish.
Apply painter's tape to the adjacent wall surfaces to protect them from adhesive or caulk. This will help ensure a clean and precise installation. Dry-fit the surround to the brick surface to check for fit and alignment. Use shims as needed to level the surround and ensure it is properly positioned. Mark the outline of the surround on the brick surface using a pencil. This will serve as a guide for applying the construction adhesive.
Using a caulk gun, apply a generous bead of construction adhesive to the back of the surround, following the manufacturer's recommendations. Distribute the adhesive evenly to ensure full contact with the brick surface. Carefully position the surround against the brick, aligning it with the marked outline. Press the surround firmly against the brick, ensuring full contact with the adhesive. Use shims to support the surround and maintain its level position while the adhesive cures.
If the surround is particularly heavy or if the manufacturer recommends it, consider using mechanical fasteners in addition to the construction adhesive. Drill pilot holes through the surround and into the brick using a masonry drill bit. Insert appropriate screws or anchors into the pilot holes, securing the surround to the brick. Be careful not to overtighten the fasteners, as this could damage the surround or the brick.
Allow the construction adhesive to cure completely, following the manufacturer's instructions. This may take several hours or even overnight. Once the adhesive is fully cured, remove the shims and inspect the installation. Fill any gaps between the surround and the brick with color-matched caulk, creating a seamless and professional finish. Smooth the caulk with a wet finger or a caulking tool to ensure a clean and even bead. Remove the painter's tape and clean any excess adhesive or caulk from the surrounding surfaces.
Finally, inspect the fireplace surround for any sharp edges or imperfections. Use a sanding block or sandpaper to smooth any rough areas, creating a safe and aesthetically pleasing finish. The newly installed fireplace surround should now enhance the overall appearance of the room.
Addressing Potential Challenges
Several potential challenges can arise during the installation of a fireplace surround on brick. These challenges include uneven brick surfaces, difficulty in achieving a flush fit, and the need for additional support for heavy surrounds. Addressing these challenges proactively can prevent complications and ensure a successful installation.
Uneven brick surfaces can make it difficult to achieve a flush fit between the surround and the brick. In such cases, using a thicker layer of construction adhesive may help to fill the gaps and create a more even surface. Alternatively, consider using shims to level the surround and compensate for the unevenness of the brick. In extreme cases, it may be necessary to grind down or build up certain areas of the brick surface to create a more even plane. This should be done with caution and only by experienced individuals.
Achieving a perfectly flush fit can be challenging, particularly with complex surround designs or uneven brick surfaces. Careful measurements, precise cutting, and the use of shims can help to minimize gaps and ensure a professional-looking finish. Caulking can be used to fill any remaining gaps, creating a seamless transition between the surround and the brick. Choose a caulk that is color-matched to the surround for the best results.
Heavy surrounds may require additional support beyond construction adhesive alone. Mechanical fasteners, such as screws or anchors, can provide extra security and prevent the surround from shifting or detaching over time. Choose fasteners that are specifically designed for use with brick and ensure they are properly installed according to the manufacturer's instructions. Consider consulting with a professional installer if you are unsure about the best way to support a heavy surround.
By anticipating and addressing these potential challenges, one can ensure a smooth and successful installation of a fireplace surround on brick.

How To Install A Mantel On Brick Fireplace 1905 Farmhouse

Build A Mantel Over Brick Fireplace

How To Install A Floating Mantle The Easy Way In Just One Afternoon

How To Install A Mantel On Brick Fireplace 1905 Farmhouse

Fireplace Mantel Surround How To Install Brick Veneer Sunnyside Home

How To Install A Floating Mantle The Easy Way In Just One Afternoon

Framing Over Our Brick Fireplace Pt 1

Here S How Install A New Fireplace Surround And Gas Logs

How To Install A Mantel On Brick Fireplace 1905 Farmhouse

How To Install A Floating Mantle The Easy Way In Just One Afternoon
Related Posts

