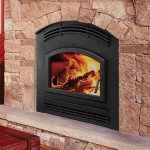
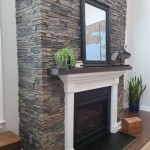
How to Install a Fireplace Damper Plate
A fireplace damper plate is a crucial component of any fireplace, playing a vital role in controlling airflow and preventing unwanted drafts. When the damper is open, it allows smoke to escape through the chimney. When closed, it seals the fireplace to prevent cold air from entering the house. Over time, these plates can become damaged, rusted, or simply worn out, requiring replacement. Installing a new damper plate is a relatively straightforward DIY project that can be completed with basic tools and a little know-how. This article will guide you through the process of installing a new fireplace damper plate.
1. Preparation and Safety
Before starting any work, safety should be paramount. It is essential to turn off the fireplace and ensure it has cooled down completely. Wear appropriate safety gear, including gloves and eye protection. Additionally, work near a well-ventilated area to prevent inhaling dust and debris. Next, gather your tools and materials. You will need:
- New fireplace damper plate
- Screwdriver or drill with appropriate bit
- Pliers
- Level
- Measuring tape
- Flashlight
- Safety glasses
- Work gloves
Once you have gathered your materials, it is important to take precise measurements of the old damper plate. This will ensure that you purchase the correct size replacement.
2. Removing the Old Damper Plate
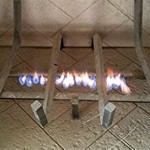
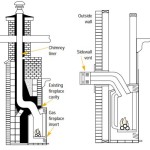
The process for removing the old damper plate will vary depending on the type and age of your fireplace. However, the general steps are similar. First, locate the damper plate assembly. This is typically found where the fireplace opening meets the chimney.
For older fireplaces, the damper plate might be held in place by a few screws or bolts. If this is the case, use a screwdriver or wrench to loosen and remove them. If the plate appears jammed or stuck, use a bit of WD-40 or lubricant to help free it.
For newer fireplaces, the damper might be attached to a frame with a latch or lever. To release the damper, open the latch or lever to disengage the plate from the frame. Once disengaged, the plate can be carefully removed.
3. Installing the New Damper Plate
After removing the old damper plate, the next step is to install the new one. This process involves reversing the steps previously used to remove the old plate. Align the new damper plate with the existing opening in the chimney. This step might require using a level to ensure proper placement.
If your replacement damper plate is secured with screws or bolts, align the holes in the new plate with the existing holes in the chimney. Carefully insert the screws or bolts and tighten them securely while ensuring the plate stays level. Use the level to ensure the plate is aligned correctly before tightening the screws.
For latched or lever-based damper plates, simply slide the plate into the frame and secure it by engaging the latch or lever. Make sure the plate sits securely in the frame and opens and closes smoothly.
4. Testing and Finishing
After installing the new damper plate, it is important to test its functionality. This step is crucial to ensure the damper operates smoothly and effectively. Close the damper and check for any leaks or drafts. If you find any, adjust the plate or tighten any loose screws.
Finally, clean up the area by removing any loose screws or scraps of materials. Ensure the fireplace is completely cooled down before using it after installing a new damper plate.

How To Use A Fireplace Damper The Right Way

How To Make A Fireplace Damper Ehow

Fireplace Dampers The Blog At Fireplacemall

How To Fix A Stuck Fireplace Damper The Blog At Fireplacemall

Fireplace Damper Repair Full Service Chimney Kansas City

Fireplace Dampers Throat Vs Top Mount Swede Chimney Sweep Dryer Vent Cleaning

Cap Dampers Damper Locks San Diego Ca Weststar Chimney

What Is A Chimney Damper Full Service

Make A Damper Sealing Block Off Plate Hearth Com Forums Home

This To Show The Full Size Version Wood Burning Stove Pipe Chimney Fireplace