How to Install a Fireplace Damper Clamp
Fireplace damper clamps are essential components for maintaining a safe and efficient fireplace. They securely hold the damper in place, preventing unwanted drafts and ensuring proper operation of the fireplace. Installing a damper clamp is a relatively straightforward task that can be done by most homeowners with basic tools and some DIY skills. This article will guide you through the steps involved in installing a fireplace damper clamp.
Understanding Fireplace Damper Clamps
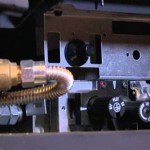
A fireplace damper clamp is a metal device that encircles the damper's shaft, tightening securely against the wall of the fireplace. Its primary purpose is to keep the damper firmly in place, preventing accidental opening or closing. This is particularly crucial for safety, as it helps to prevent unwanted drafts and the entry of smoke into the living space. The clamp can be adjusted to accommodate different damper sizes and thicknesses, making it a versatile component.
Gathering the Necessary Tools and Materials
Before you start, ensure you have the following tools and materials readily available:
- Fireplace damper clamp
- Phillips screwdriver or drill with a Phillips bit
- Wrench or adjustable wrench
- Safety glasses
- Work gloves
- Level (optional)
- Tape measure (optional)
It's important to choose a damper clamp specifically designed for your fireplace and consult the manufacturer's instructions for compatibility and installation guidelines. The clamp should be made of durable and heat-resistant metal to withstand the high temperatures associated with fireplaces.
Step-by-Step Installation Guide
Installing a fireplace damper clamp can be done in a few straightforward steps:
Step 1: Prepare the Fireplace
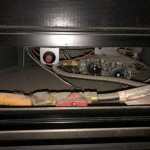
Start by clearing the area around the fireplace and ensuring there are no obstacles obstructing access to the damper. Open the damper completely to gain access to its shaft. This will allow you to easily visualize the position of the clamp and ensure a proper fit.
Step 2: Positioning the Clamp
Carefully position the damper clamp around the shaft of the damper. Ensure that the clamp is centered on the shaft and that the tightening mechanism is readily accessible for adjustment. If you have an adjustable clamp, you can use a tape measure and level to ensure proper alignment.
Step 3: Securing the Clamp
Use the provided screws or bolts to secure the clamp to the fireplace wall. Ensure that the screws or bolts are sufficiently long to provide a firm hold on the clamp. If you are using a clamp that relies on a tightening mechanism, turn the wrench or adjustable wrench to tighten the clamp against the damper shaft.
Step 4: Testing the Clamp
Once the clamp is secured, test its functionality by opening and closing the damper several times. The damper should move freely without any resistance or looseness. Ensure the clamp maintains a tight grip on the damper shaft. If any adjustments are needed, loosen the screws or bolts, reposition the clamp, and repeat the process until you achieve a secure and functional fit.
Regularly inspecting the damper clamp for any signs of wear and tear is crucial for ensuring its continued functionality. If you observe any damage or loosening, replace the clamp with a new one to maintain the safety and efficiency of your fireplace.

The Damper Clamp Im Home Inspections

Fireplace Damper Clamps Buyers Ask

The Damper Clamp Im Home Inspections

Make That 3 00 Repair Before You Your Home It Could Save Life Na Niguel Ca Patch

Damper Clamp On Older Fireplace

Fireplace Damper Clamps Buyers Ask

Cap Dampers Damper Locks San Diego Ca Weststar Chimney

How To Install A Lock Top Chimney Damper Rockford

H Burner Use And Care Instructions

Lunch With Lee I Need A Damper Clamp On My Fireplace What And How Much Is That
Related Posts