How To Finish A Fireplace Surround With Wood Base
Finishing a fireplace surround with a wood base elevates the aesthetic of a living space, adding warmth, character, and a touch of sophistication. The process involves careful planning, precise execution, and attention to detail, ensuring a seamless integration of the wood base with the existing structure. This article provides a comprehensive guide to finishing a fireplace surround with a wood base, covering essential steps from preparation to installation.
Planning and Preparation: Setting the Stage for Success
Before embarking on the physical construction, meticulous planning is crucial. This phase includes measuring the fireplace surround, selecting appropriate wood materials, and designing the overall appearance of the wood base. Accurate measurements will minimize errors during the installation process and ensure a snug, professional fit. Furthermore, the selection of wood species, style, and finish should complement the existing décor and architectural style of the room. This involves considering factors such as wood grain, color, and durability. For instance, hardwoods like oak, maple, or cherry offer robustness and visual appeal, while softwoods like pine may be more cost-effective but require extra care in finishing.
The design phase involves deciding on the specific style of the wood base. Options range from simple, clean lines for a modern aesthetic to more ornate designs with moldings and carvings for a traditional look. Consider the proportions of the fireplace surround and the surrounding room when determining the size and shape of the wood base. Sketching out the design and creating a detailed plan will serve as a valuable reference point throughout the project.
Gathering the necessary tools and materials is the next essential step. Required tools typically include a measuring tape, level, miter saw, table saw (optional, depending on the complexity of cuts), drill, screwdriver, nail gun (optional), sandpaper, wood filler, paintbrushes or spray equipment, safety glasses, and gloves. In terms of materials, the project will need lumber for the base, trim or molding (optional), wood screws or nails, wood glue, primer, paint or stain, and a clear topcoat for protection.
Preparing the fireplace surround itself is also critical. Ensure the surface is clean, dry, and free of any loose debris. If the existing surround is painted or textured, sanding may be necessary to create a smooth surface for the wood base to adhere to. Addressing any existing imperfections in the surround before installing the wood base will contribute to a more professional-looking result.
Constructing the Wood Base: Precision and Accuracy
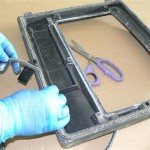
The construction phase begins with cutting the wood pieces according to the predetermined measurements and design. Use a miter saw for accurate angled cuts, particularly if the design incorporates mitered corners. A table saw can be helpful for ripping wider boards to the desired width. Prioritize safety when operating power tools by wearing safety glasses and following manufacturer's instructions. Double-check all measurements before making cuts to minimize the risk of errors and wasted materials.
Assembling the frame of the wood base is the next step. Wood glue and screws are typically used to securely join the pieces together. Ensure the frame is square and level during assembly. Clamps can be used to hold the pieces in place while the glue dries. If using a nail gun, exercise caution to avoid damaging the wood. Countersinking screws will create a flush surface that can be filled with wood filler later.
If the design includes moldings or trim, now is the time to install them. Use a miter saw to make accurate cuts for the corners. Wood glue and small nails or brads can be used to attach the moldings to the frame. Pay attention to the alignment and spacing of the moldings to create a visually appealing and symmetrical design. Consider using a combination square to ensure accurate placement of the moldings.
Once the frame is assembled and the moldings are attached, fill any nail holes or imperfections with wood filler. Allow the filler to dry completely before sanding it smooth. Sanding is crucial for creating a smooth and even surface for the finish. Use progressively finer grits of sandpaper, starting with a coarser grit to remove any imperfections and finishing with a fine grit to create a smooth surface.
Finishing and Installation: The Final Touches
The finishing stage involves priming, painting or staining, and applying a clear topcoat. Priming the wood is essential for creating a uniform surface and ensuring proper adhesion of the paint or stain. Choose a primer that is compatible with the chosen paint or stain. Apply the primer in thin, even coats, allowing it to dry completely between coats. Lightly sand the primed surface before applying the paint or stain.
When selecting a paint or stain, consider the overall aesthetic of the room and the desired look of the wood base. Paint offers a wide range of colors and finishes, while stain enhances the natural grain of the wood. Apply the paint or stain in thin, even coats, following the manufacturer's instructions. Allow each coat to dry completely before applying the next. Lightly sand the surface between coats to remove any imperfections and create a smooth finish.
Applying a clear topcoat provides protection and enhances the durability of the finish. Choose a topcoat that is compatible with the chosen paint or stain. Apply the topcoat in thin, even coats, allowing it to dry completely between coats. Lightly sand the surface between coats to remove any imperfections and create a smooth, protective finish. Consider using a polyurethane topcoat for its excellent durability and resistance to scratches and stains.
Before installing the wood base, ensure the fireplace surround is clean and dry. Apply construction adhesive to the back of the wood base, focusing on areas that will make contact with the surround. Carefully position the wood base against the fireplace surround, ensuring it is level and aligned properly. Use shims if necessary to achieve a perfectly level installation. Press the wood base firmly against the surround to ensure good adhesion.
Secure the wood base to the fireplace surround using finish nails or screws. Drive the nails or screws through the wood base and into the surrounding structure. Countersink the screws and fill the holes with wood filler. Once the wood filler is dry, sand it smooth and touch up the paint or stain. Allow the adhesive to dry completely before removing the shims.
Caulk any gaps between the wood base and the fireplace surround with paintable caulk. Smooth the caulk with a wet finger or a caulk smoothing tool. This will create a seamless transition between the wood base and the surround and prevent drafts. Touch up the caulk with paint to match the surrounding finish.
Following these steps will result in a professionally finished fireplace surround with a wood base, enhancing the beauty and value of the living space. Consistent adherence to accurate measurements, careful construction techniques, and thoughtful finishing processes will yield a durable and aesthetically pleasing addition to the home.

Building An Easy Modern Fireplace Mantel Young House Love

Diy Fireplace Finished Addicted 2 Decorating

I Built A Fireplace Easier Than Thought

Diy Fireplace Part 5 Trim Grout And Mantel Addicted 2 Decorating

How To Cover A Brick Fireplace With Wood Stone Nina Hendrick Home

Diy Wood Mantel Simple To Make Artsy Rule

Diy Fireplace Mantel And Surround Jenna Kate At Home

Diy Fireplace Mantel And Surround Jenna Kate At Home

How To Build A Modern Fireplace Surround Hana S Happy Home

Diy Fireplace Finished Addicted 2 Decorating