How To Change Fireplace Surround Tile
Changing the fireplace surround tile can significantly alter the aesthetic of a living space, transforming a dated or unappealing feature into a focal point of modern design. This project, while achievable for a confident do-it-yourselfer, requires meticulous planning, careful execution, and adherence to safety precautions. This article outlines the steps involved in changing fireplace surround tile, from preparation to installation, providing a comprehensive guide for a successful outcome. It is crucial to check local building codes and regulations before commencing any work, as specific requirements may vary by region.
Planning and Preparation
The initial phase of any tiling project is planning and preparation. This involves assessing the existing fireplace surround, selecting appropriate replacement tiles, and gathering the necessary tools and materials. A thorough preparatory stage is vital for a smooth and efficient installation process.
Assessing the Existing Fireplace Surround: The first step is to carefully examine the existing tile and substrate. Identify any loose or damaged tiles, and assess the condition of the underlying material. Note the dimensions of the current surround to determine the amount of new tile required. Consider any design limitations or structural considerations, such as the firebox opening and mantelpiece placement. Note the type of material used for the substrate. This is crucial to ensure the new tile can adhere to it adequately. Common materials are brick, cement board, or drywall.
Selecting New Tiles: Tile selection is a crucial aspect of the project, involving both aesthetic and practical considerations. Choose tiles that complement the overall design style of the room and are appropriate for use around a fireplace. Fire-rated tiles are preferable, especially those with a high heat resistance rating. Consider factors such as tile size, shape, color, and texture. Smaller tiles offer greater flexibility in design, while larger tiles can create a more modern and streamlined look. Ensure the selected tiles are of a suitable thickness and durability for the environment.
Gathering Tools and Materials: A well-equipped workspace is essential for a successful tiling project. The following tools and materials are generally required:
- Safety glasses and gloves
- Dust mask
- Chisel and hammer or a specialized tile removal tool
- Scraper
- Grout removal tool
- Thin-set mortar
- Grout
- Tile saw (wet saw recommended for precise cuts)
- Notched trowel
- Tile spacers
- Rubber mallet
- Level
- Measuring tape
- Pencil
- Buckets and sponges
- Sealer (for certain types of tile and grout)
- Drop cloths or plastic sheeting for protection
Ensure all tools are in good working order and materials are sufficient for the size of the project. It's always advisable to purchase slightly more tile (approximately 10%) than calculated to account for cuts and potential breakage.
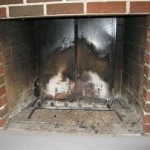
Removing the Existing Tile
Removing the existing tile is a critical step that requires careful attention to avoid damaging the underlying substrate. This process can be dusty and potentially messy, so adequate protection for the surrounding area is essential.
Protecting the Work Area: Before commencing tile removal, cover the surrounding floor and furniture with drop cloths or plastic sheeting. Secure the coverings with tape to prevent movement. Consider sealing off the room with plastic sheeting to minimize dust dispersion throughout the house. Wear safety glasses, gloves, and a dust mask to protect against debris and potential irritants.
Removing the Grout: Use a grout removal tool (manual or electric) to carefully remove the grout surrounding each tile. This will weaken the bond between the tiles and the substrate, making removal easier. Avoid gouging or damaging the adjacent surfaces during this process. In some cases, a chemical grout softener may be used to aid in grout removal. Follow the manufacturer's instructions carefully when using chemical products.
Removing the Tiles: Using a chisel and hammer or a specialized tile removal tool, carefully pry the tiles away from the substrate. Begin at a corner or edge, working progressively to loosen each tile. Apply steady pressure to avoid cracking the tiles or damaging the underlying material. If a tile is particularly stubborn, apply heat with a heat gun to soften the adhesive. Be cautious when using heat, as excessive heat can damage the substrate or create a fire hazard. As tiles are removed, dispose of them safely in a designated container. Avoid leaving sharp edges exposed, as they can pose a safety risk.
Preparing the Substrate: Once all the tiles are removed, thoroughly clean the substrate to remove any remaining adhesive, grout, or debris. Use a scraper to remove stubborn residue. If necessary, apply a chemical adhesive remover to soften the remaining mortar. Repair any damage to the substrate, such as cracks or holes, with appropriate patching compound. Ensure the substrate is clean, dry, and level before proceeding with the tiling process. For uneven surfaces, self-leveling compounds may be necessary to create a smooth and uniform base for the new tiles.
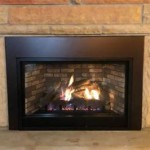
Laying the New Tile
The final phase involves laying the new tiles. This requires precise application of thin-set mortar, careful tile placement, and attention to detail to ensure a professional and aesthetically pleasing finish.
Applying Thin-Set Mortar: Prepare the thin-set mortar according to the manufacturer's instructions, ensuring a smooth and consistent consistency. Using a notched trowel, apply the mortar to the substrate in small sections. The size of the notch on the trowel will depend on the size and type of tile being used; consult the tile manufacturer's recommendations. Apply the mortar at a 45-degree angle to the substrate, creating ridges that will provide a strong bond for the tiles. Avoid applying mortar to large areas at once, as it can dry out before the tiles are set.
Setting the Tiles: Carefully place the tiles onto the mortar bed, applying even pressure to ensure good contact. Use tile spacers to maintain consistent spacing between tiles. A level can be used to ensure the tiles are aligned correctly. If necessary, gently tap the tiles with a rubber mallet to seat them firmly in the mortar. Clean any excess mortar from the tile surfaces with a damp sponge. Pay close attention to the placement of tiles around corners and edges, ensuring they are cut precisely to fit the available space. A wet saw is essential for making accurate and clean cuts.
Cutting Tiles: Accurate tile cutting is crucial for achieving a professional-looking finish. Measure the required dimensions carefully and mark the tiles with a pencil. When using a wet saw, ensure the blade is sharp and the water reservoir is filled. Feed the tile slowly and steadily through the saw, following the marked line. Wear safety glasses to protect against water spray and debris. For smaller cuts or intricate shapes, a tile nipper can be used. However, for precise cuts, a wet saw is generally the preferred option.
Curing Time: Allow the thin-set mortar to cure completely according to the manufacturer's instructions. This typically takes 24-72 hours. Avoid walking on or disturbing the tiles during the curing process. Once the mortar is fully cured, the tile surface will be rigid and stable.
Grouting and Sealing
Grouting fills the spaces between the tiles, providing a waterproof seal and enhancing the overall appearance of the installation. Sealing the grout and certain types of tile protects them from stains and moisture damage.
Applying Grout: Prepare the grout according to the manufacturer's instructions. Using a grout float, apply the grout to the tile surface, forcing it into the spaces between the tiles. Work in small sections, ensuring all the grout lines are completely filled. Remove excess grout from the tile surfaces with the edge of the float, holding it at a 45-degree angle.
Cleaning Grout Haze: After allowing the grout to set for the recommended time (typically 15-30 minutes), use a damp sponge to remove excess grout from the tile surfaces. Rinse the sponge frequently in clean water. Be careful not to remove grout from the grout lines during this process. After the initial cleaning, a grout haze may remain on the tile surfaces. This can be removed with a grout haze remover, following the manufacturer's instructions.
Sealing the Grout and Tile: Once the grout is fully cured (typically 24-72 hours), apply a grout sealer to protect it from stains and moisture damage. Follow the manufacturer's instructions for application. Certain types of tile, such as natural stone, may also require sealing. Sealing helps prevent stains, protects against moisture, and enhances the longevity of the installation. Apply the sealer evenly, and allow it to dry completely before using the fireplace.
Considerations For Safety:
Safety should always be of utmost importance when doing any home improvement project, particularly with fireplaces and removing tiles.
Wear Protective Gear. When removing tiles, wear safety glasses to protect your eyes from flying debris. Gloves will protect your hands from sharp edges. A dust mask is necessary to avoid inhaling potentially harmful particles. When operating power tools, ear protection should be worn.
Use Proper Ventilation. The removal of tiles can create a lot of dust and fumes. Working in well ventilated area is crucial. If possible, open windows and doors, and consider using a fan to circulate the air. A HEPA filter can help to remove airborne particles.
Be Mindful of Fire Hazards. Make sure that the fire is completely out before starting any work. Keep flammable materials away from the work area. Keep fire extinguisher to be ready at any emergency. After the task is over, do a careful inspection to make sure there are no lingering fire hazards.

Diy Tiling A Fireplace Surround What We Learned Along The Way

How To Remove Fireplace Tiles Chaotically Creative

Diy Tiling A Fireplace Surround What We Learned Along The Way

Diy Tile Fireplace Makeover Replacement Fireplaace

Diy Tile Fireplace Makeover The Home Depot

Er Friendly Fireplace Makeover With L Stick Tiles The Homes I Have Made

How To Paint Tile Easy Fireplace Makeover Setting For Four Interiors

How To Paint Tile Easy Fireplace Makeover Setting For Four Interiors

Diy Tile Fireplace Makeover The Home Depot

How To Tile Over An Existing Fireplace Surround My Woodlands Life
Related Posts