How to Build a Paver Fireplace
A paver fireplace provides an attractive and functional outdoor feature, adding warmth and ambiance to patios, decks, and backyards. Constructing a paver fireplace is a manageable project for the moderately skilled DIY enthusiast, offering significant cost savings compared to professional installation. The process requires careful planning, proper material selection, and adherence to building codes to ensure safety and longevity.
Before commencing any construction, it is imperative to check local building codes and regulations. Many municipalities require permits for outdoor fireplaces, and zoning restrictions may dictate acceptable locations and dimensions. Compliance with these regulations is crucial to avoid potential legal issues and ensure the structure’s safety and compliance with local fire codes.
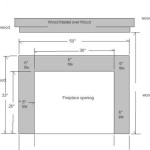
The design phase is equally important. Consider the desired style, dimensions, and location of the fireplace. Factors such as wind direction, proximity to combustible materials (e.g., trees, fences), and the overall aesthetic of the outdoor space should influence design choices. A detailed plan outlining the dimensions, materials, and assembly sequence is essential for a smooth construction process.
Choosing the Right Pavers and Materials
Selecting appropriate pavers is paramount for the structural integrity and visual appeal of the fireplace. Fire-rated pavers are highly recommended, as they are specifically designed to withstand high temperatures without cracking or deteriorating. Consider the paver’s size, shape, and color to complement the surrounding landscape. Interlocking pavers offer enhanced stability compared to standard pavers.
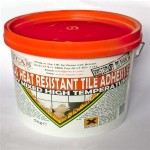
In addition to pavers, other essential materials include: fire bricks, mortar or construction adhesive, gravel or crushed stone for the base, leveling sand, a chimney liner (if applicable), and tools such as a trowel, level, measuring tape, rubber mallet, and safety glasses. The quantity of each material will depend on the size and complexity of the fireplace design. Accurate material estimation is crucial to avoid unnecessary trips to the supply store.
Consider using a concrete footing as a base. This will add structural stability and prevent settling over time. If a concrete footing is not feasible, a well-compacted base of gravel or crushed stone is a suitable alternative, providing a stable foundation for the paver structure.
Constructing the Fireplace Base and Walls
The construction process begins with preparing the foundation. Excavate the area to the required depth, typically around 6-8 inches, and compact the soil thoroughly. Add a layer of gravel or crushed stone, compacting it to create a level and stable base. Top this layer with leveling sand, ensuring a smooth and even surface for laying the first course of pavers.
With the base prepared, begin laying the first course of pavers, using a level to ensure they are perfectly horizontal. Apply mortar or construction adhesive to the bottom and sides of each paver for secure adhesion. Subsequent courses are laid in a similar manner, staggering the joints to create a strong and visually appealing structure. Continue building the walls to the desired height, ensuring the walls are plumb and square throughout the construction process.
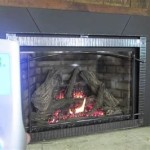
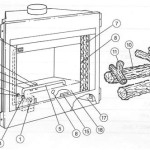
The firebox, the area where the fire will be contained, requires special attention. Line the interior of the firebox with fire bricks, using fire clay mortar to withstand the high temperatures. Ensure the fire bricks are tightly fitted to prevent heat from reaching the exterior pavers.
Adding the Chimney and Finishing Touches
If the fireplace design includes a chimney, it can be constructed from pavers or a pre-fabricated chimney liner. A chimney liner is often a more practical and efficient option, providing superior draft and safety. The liner should be securely installed and properly sealed to prevent smoke leakage and ensure proper ventilation.
When building a paver chimney, similar paver laying techniques used for the walls are adopted. Use mortar or construction adhesive and ensure a plumb installation. It is recommended to taper the chimney slightly towards the top for aesthetic appeal and to improve draft characteristics.
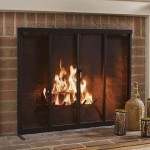
Once the main structure is complete, address any finishing touches. Clean excess mortar or adhesive from the pavers. Add decorative elements, such as caps or coping stones, to the top of the walls and chimney. Consider adding a hearth, a raised platform in front of the firebox, for added safety and aesthetics.
Prior to the first use, allow the mortar or adhesive to fully cure according to the manufacturer's instructions. This curing period is crucial for ensuring the structural integrity of the fireplace. Gradually introduce small fires to allow the materials to adjust to the heat and avoid thermal shock. Inspect the fireplace regularly for any signs of damage or deterioration, and promptly address any issues to prolong the fireplace’s lifespan.
By following these guidelines and exercising caution, one can successfully construct a beautiful and functional paver fireplace, creating an enjoyable outdoor gathering space for years to come. Remember that safety is paramount, and adhering to local building codes and regulations is critical for a successful and compliant project.

How To Build A Diy Fire Pit For Only 60 Keeping It Simple

How To Build A Diy Paver Patio With Firepit

How To Build An Outdoor Fireplace Step By Guide Buildwithroman

My 4 Day Fire Pit Patio Build Full Diy Project

Diy Paver Patio And Firepit Life On Shady Lane

How To Build An Outdoor Fireplace Step By Guide Buildwithroman

How To Build An Outdoor Fireplace Step By Guide Buildwithroman

How To Build A Fire Pit With Concrete Pavers

How To Build An Outdoor Fireplace Today S Creative Life

How To Build A Diy Stone Fire Pit Fixthisbuildthat
Related Posts