How to Build a Wood Fireplace Insert
A wood fireplace insert is a great way to add warmth and ambiance to your home while also improving the efficiency of your fireplace. Inserts are relatively easy to install, and they can be a great way to save money on your heating bills.
Here are the steps on how to build a wood fireplace insert:
1. Gather your materials.
You will need the following materials to build a wood fireplace insert:
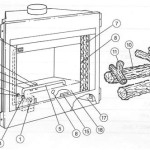
- Fireplace insert
- Insulating firebricks
- Mortar
- Fireplace grate
- Chimney liner
- Chimney cap
- Screws
- Tools
- You will also need the following tools to build a wood fireplace insert:
- Drill
- Screwdriver
- Level
- Hammer
- Chisel
- Tape measure
- Safety glasses
2. Prepare the fireplace.
The first step is to prepare the fireplace for the insert. This involves removing any existing logs or grates, and cleaning out the ashes. You should also check the chimney to make sure that it is clear of any debris.
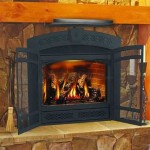
3. Install the fireplace insert.
Once the fireplace is prepared, you can install the insert. To do this, simply place the insert into the fireplace and secure it in place with the screws provided. Make sure that the insert is level before you tighten the screws.
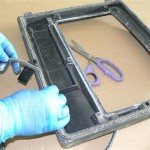
4. Install the insulating firebricks.
The next step is to install the insulating firebricks. These bricks will help to protect the fireplace from the heat of the fire, and they will also help to improve the efficiency of the insert. To install the firebricks, simply place them around the inside of the fireplace, making sure that they are snugly fit.
5. Install the mortar.
Once the firebricks are in place, you can install the mortar. The mortar will help to hold the firebricks in place and to seal any gaps between them. To install the mortar, simply apply it to the joints between the firebricks using a trowel.
6. Install the fireplace grate.
The next step is to install the fireplace grate. The grate will help to support the logs and to allow air to circulate around the fire. To install the grate, simply place it on top of the firebricks.
7. Install the chimney liner.
The next step is to install the chimney liner. The chimney liner will help to protect the chimney from the heat of the fire, and it will also help to improve the draft. To install the chimney liner, simply insert it into the chimney and secure it in place with the screws provided.
8. Install the chimney cap.
The final step is to install the chimney cap. The chimney cap will help to keep rain and snow out of the chimney, and it will also help to prevent downdrafts.
Once the chimney cap is installed, your wood fireplace insert is complete. You can now enjoy the warmth and ambiance of a wood fire without having to worry about the safety or efficiency of your fireplace.

How To Build A Fireplace Red Cottage Chronicles

How To Install A Fireplace Insert Diy Save Money

Build Or Remodel Your Own House Fireplace Problems Prefab Parts Inserts

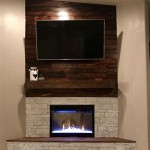
Diy Fireplace With Electric Insert Angela Marie Made

Wood Fireplace Insert Installation Overview By Rockford Chimney Supply

How To Build A Diy Built In Fireplace With An Electric Insert The Creative Mom

Fireplace Insert Installation Wood Burning Inserts

Diy Birch Wood Fireplace Cover For A Faux Insert

How Fireplace Inserts Work We Love Fire

All About Prefabricated Fireplaces Chimney Savers