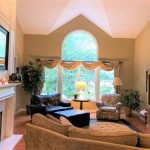
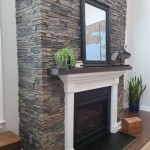
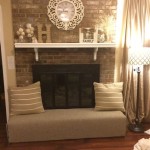
How to Build a Rustic Fireplace Mantel Shelf
A rustic fireplace mantel shelf is a great way to add warmth and character to your home. It can be used to display family photos, artwork, or other treasured items. Building your own mantel shelf allows you to create a truly custom piece that perfectly complements your fireplace and décor. This guide will walk you through the process of building a rustic fireplace mantel shelf from start to finish.
Choosing the Right Materials
The first step is to choose your materials. For a rustic look, consider using reclaimed wood, such as old barn beams or weathered planks. These materials will add a unique character to your mantel shelf. You can also use new lumber, but be sure to choose wood that has a natural, rustic look and feel.
Other materials you will need for your project include:
- Wood glue
- Wood screws
- Wood filler
- Sandpaper
- Paint or stain (optional)
- Hardware for attaching the shelf to the wall
Designing and Measuring
Once you have chosen your materials, you can begin designing your mantel shelf. Consider the overall width and depth of the shelf, as well as the height you want it to be. Make sure to measure your fireplace opening carefully so that your new mantel shelf fits properly. You will also need to decide on the style of the shelf. Do you want it to be simple and straight, or do you prefer a more elaborate design?
You can use these measurements to create a sketch or diagram of your mantel shelf. This will help you visualize the final product and ensure that you have all the necessary materials.
Constructing the Shelf
Now it's time to start building. Here are the steps involved in constructing a basic rustic mantel shelf:
- Cut the wood to size: Using a saw, cut the wood planks to the desired length and width.
- Assemble the shelf: Lay the planks for the shelf on a flat surface and secure them together with wood glue and screws.
- Create a support structure: If your shelf will be long or heavy, you’ll need to construct a support structure. This will help to distribute the weight evenly and prevent the shelf from sagging. You can use wood blocks or brackets to create the support structure.
- Smooth out the edges: Use sandpaper to smooth out the edges of the shelf and remove any rough spots.
- Fill any holes or gaps: Use wood filler to fill any holes or gaps in the wood. Let the filler dry completely, then sand it smooth.
- Paint or stain: If desired, you can paint or stain the shelf to give it a finished look.
Installing the Shelf
Once the shelf is complete, you can install it above your fireplace. Here are the steps involved in installing your new mantel shelf:
- Determine the location: Choose a location for your mantel shelf that is level and centered above the fireplace opening.
- Mark the wall: Use a pencil to mark the location for the shelf on the wall.
- Attach the shelf: You can attach the shelf to the wall using heavy-duty wall anchors, brackets, or a combination of both.
- Secure the shelf: Once the shelf is in place, use screws to secure it to the wall.
Take your time and be sure to follow the instructions carefully. Make sure that the shelf is securely attached to the wall and will be able to support the weight of your belongings.

Build A Rustic Faux Beam Mantel Or Shelf

How To Build And Hang A Mantel On Stone Fireplace Shanty 2 Chic
:max_bytes(150000):strip_icc()/ablossominglife-4151b41015a64193a437e981c3aad037.jpg?strip=all "17 Diy Fireplace Mantel Plans")
17 Diy Fireplace Mantel Plans

Diy Rustic Fireplace Mantel The Cure For A Boring

I Love How This Simple Diy Mantel Changes The Fireplace Find Out To Build A Or F Shelves

How To Build A Rustic Faux Beam Mantel Toolbox Divas

Adding Rustic Mantels And Floating Shelves To Your Home Ornamental Decorative Millwork
:max_bytes(150000):strip_icc()/sandandsisal-bdc76ad938a44d28ae9e23ef6c9fa331.jpg?strip=all "17 Diy Fireplace Mantel Plans")
17 Diy Fireplace Mantel Plans

Mantel Vignette Diy Shelf Tutorial Shades Of Blue Interiors Mantle Without Fireplace Home Decor Wooden

10 Rustic Fireplace Mantel Ideas Blog Red Door
Related Posts